How to grow your own Chestnut / White Mushrooms
Chestnut / White Mushrooms (Agaricus bisporus) not to be confused with the "chestnut mushroom" Pholiota adiposa are the most commonly cultivated and consumed mushroom in the world, it is a huge industry world wide, although in recent years more and more exotic mushrooms are being consumed also.
To grow Chestnut and White mushrooms commercially, it requires a lot of space and hygiene protocols in order to do so cost effectively. Typically these are grown commercially in large growing rooms on wooden "beds" where compost is fed into these in bulk, topsoil is placed onto the compost and eventually in a few weeks the mushrooms are manually picked by a team of pickers before the beds are cleaned out for the next crop.
How to setup your mushroom growing kit
We wanted everyone to be able to experience the thrill of growing your own mushrooms so we created our fantastic range of mushroom growing kits. With the use of grow your own kits, this process is very easy and our easy instructions will guide you through the process, any issues and we're always on hand for personalized product support and FAQ's.
Our Chestnut and White Mushroom Growing kits replicate this process but on a much smaller and manageable scale, each kit is 7x7x7" in size containing enough nutrition to allow for for 3/4 Harvests.
Step One - Setup
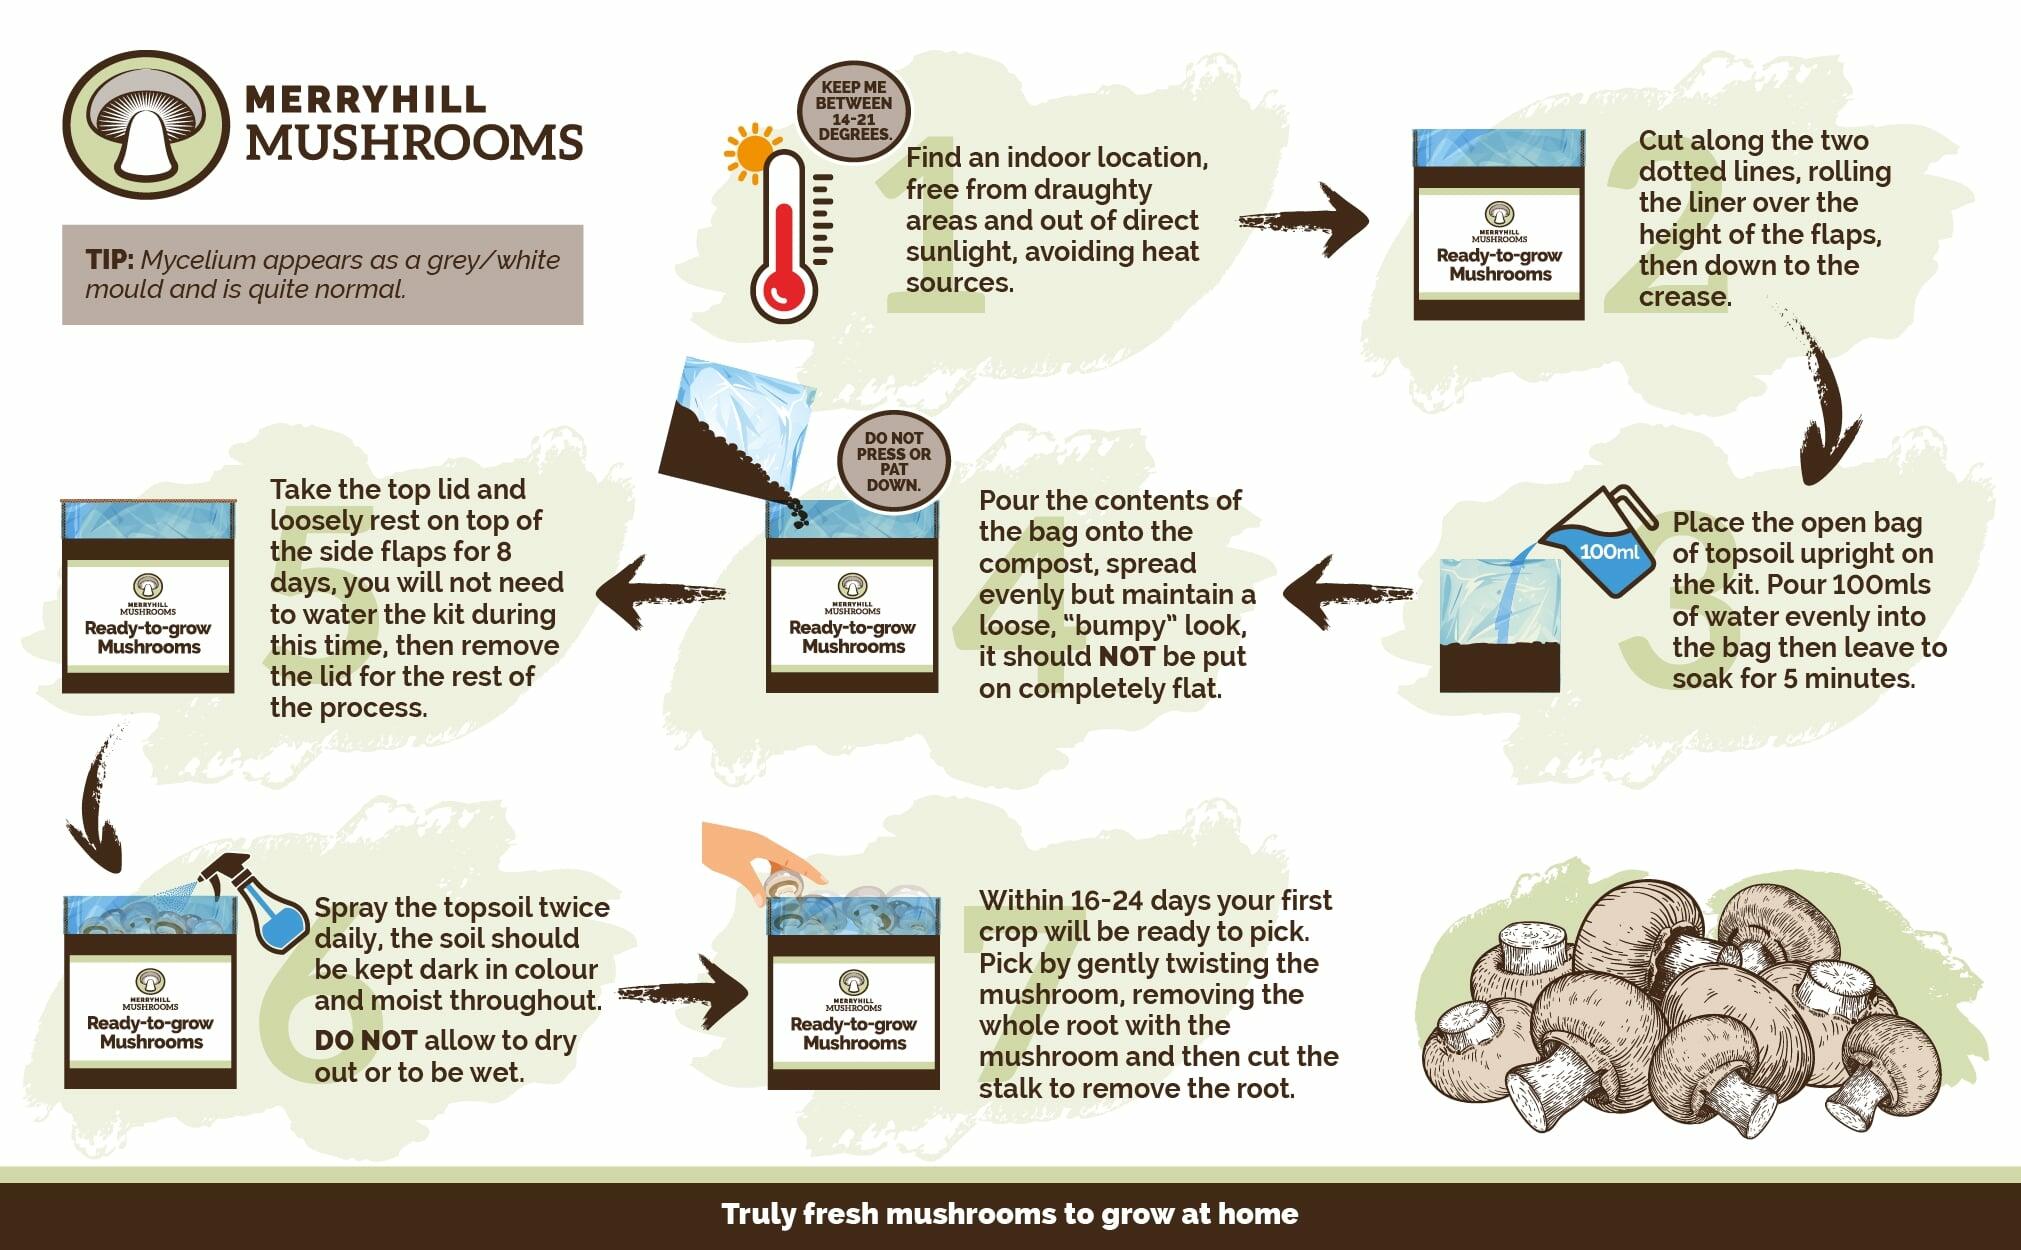
Firstly open up the box, cutting along the dotted lines and raising the side flaps with the plastic neatly hooked over, this should form a nice square for your topsoil to be placed.
Locate your kit anywhere indoors, out of direct sunlight in an area which is between 14-21°C
Ensure the topsoil bag receives 100mls of water and then evenly distribute the casing soil over the compost, Do not compact this down, it is best to go on loose and fluffy with "cracks / veins" in-between.
Place the lid loosely back on for 8 days to allow the mycelium to colonize the topsoil. Begin spraying your topsoil twice daily to provide ideal fruiting conditions. Your mushrooms will be ready to pick in another 8-16 days.
Your Chestnut / White Mushroom Growing Kits has enough nutrition for 3/4 harvests over 5/7 weeks. Please see article for our grow kit crop rates.
What to Expect: Day by Day
Chestnut and white kits take longer than oyster varieties because the topsoil casing layer needs time for the mycelium to colonise before pins can form. The milestones below show what typical growth looks like from setup to harvest.
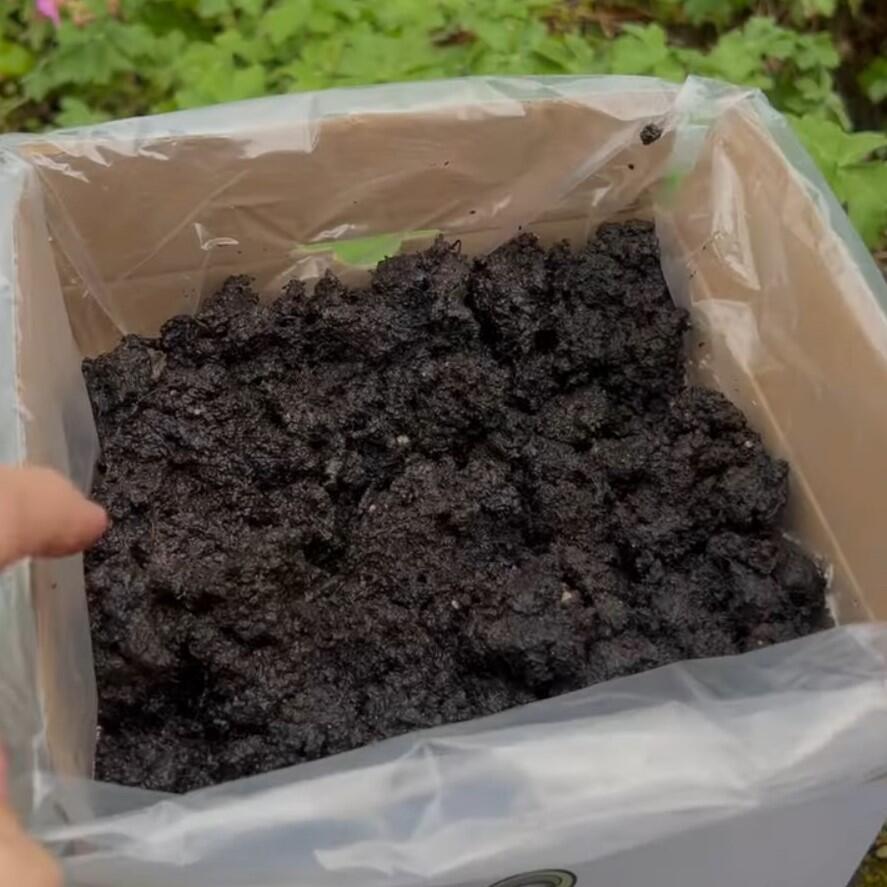
Day 1 - Setup and Casing
Add 100ml water to the topsoil bag and distribute loosely over the compost. Do not compact. Leave cracks in the soil. Place the lid on loosely for 8 days. Position between 14 and 21 degrees.
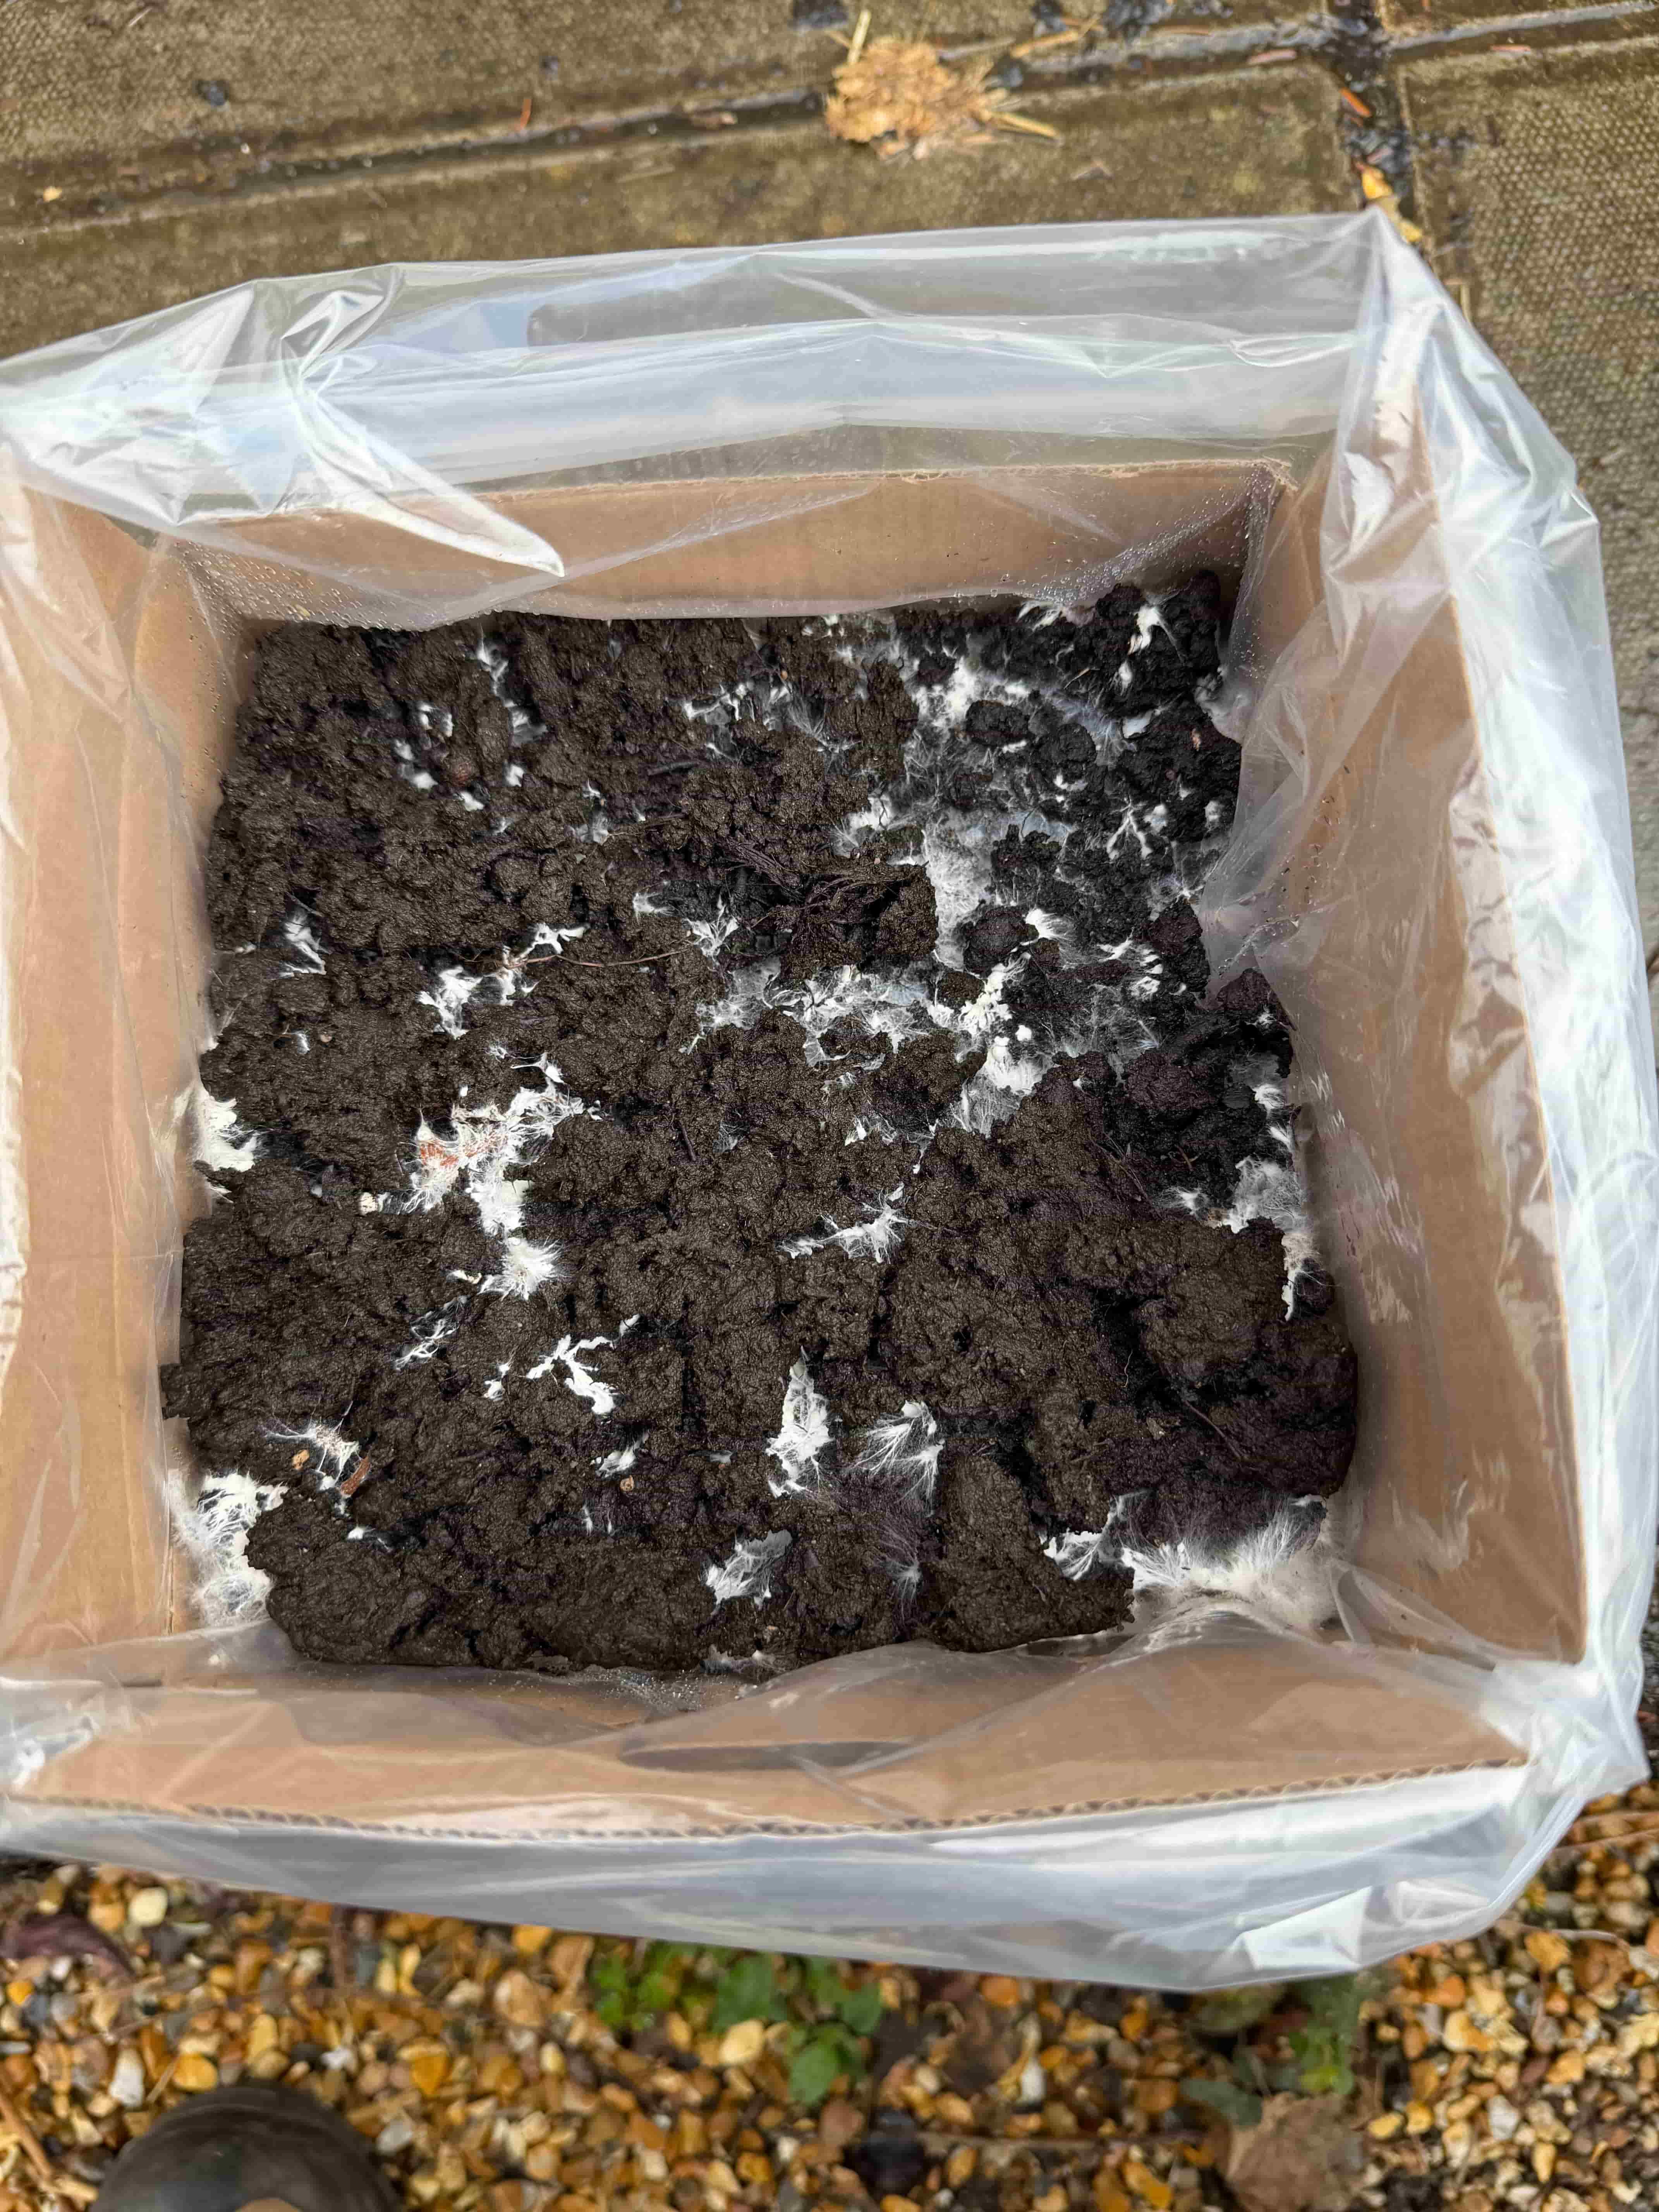
Day 7 - Mycelium in Topsoil
White threads grow through the topsoil. Remove the lid and begin spraying twice daily. Keep casing moist but not waterlogged. If it dries out, see the hydration guide.
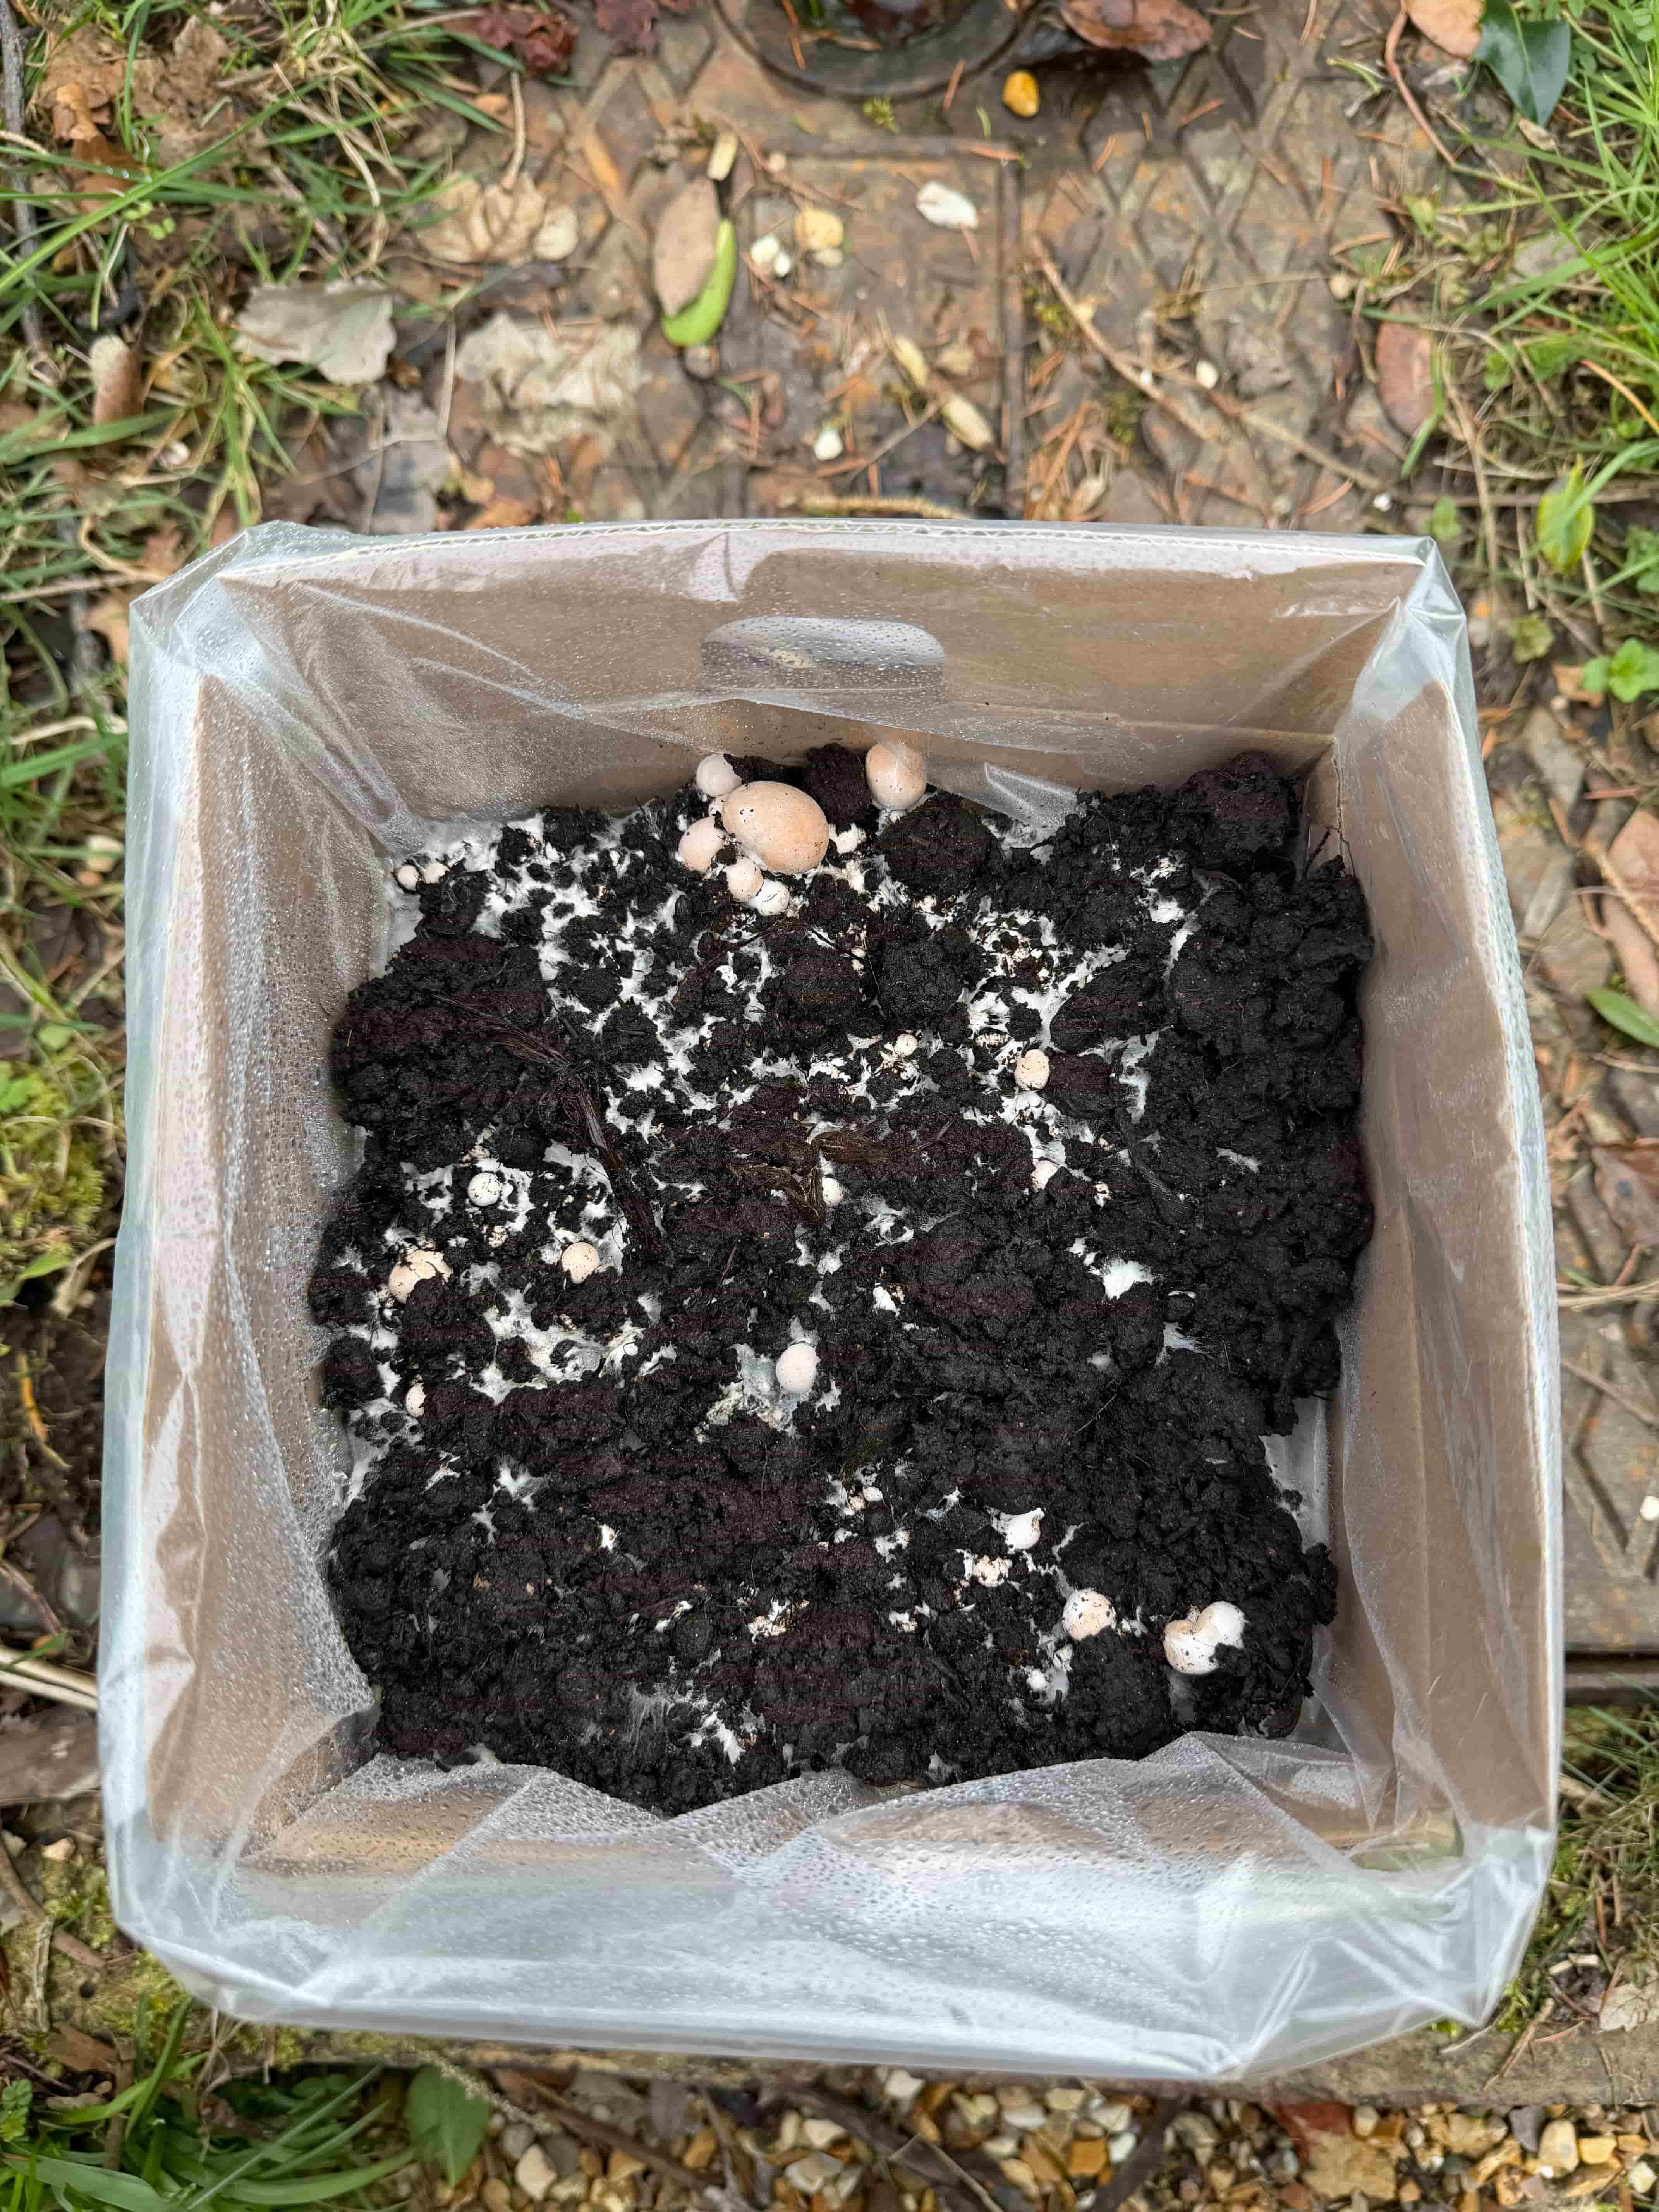
Days 8-10 - Topsoil Colonised
Mycelium has spread across the topsoil surface. The casing looks white and active. Continue spraying twice daily and ensure good airflow. Pins will begin forming soon.
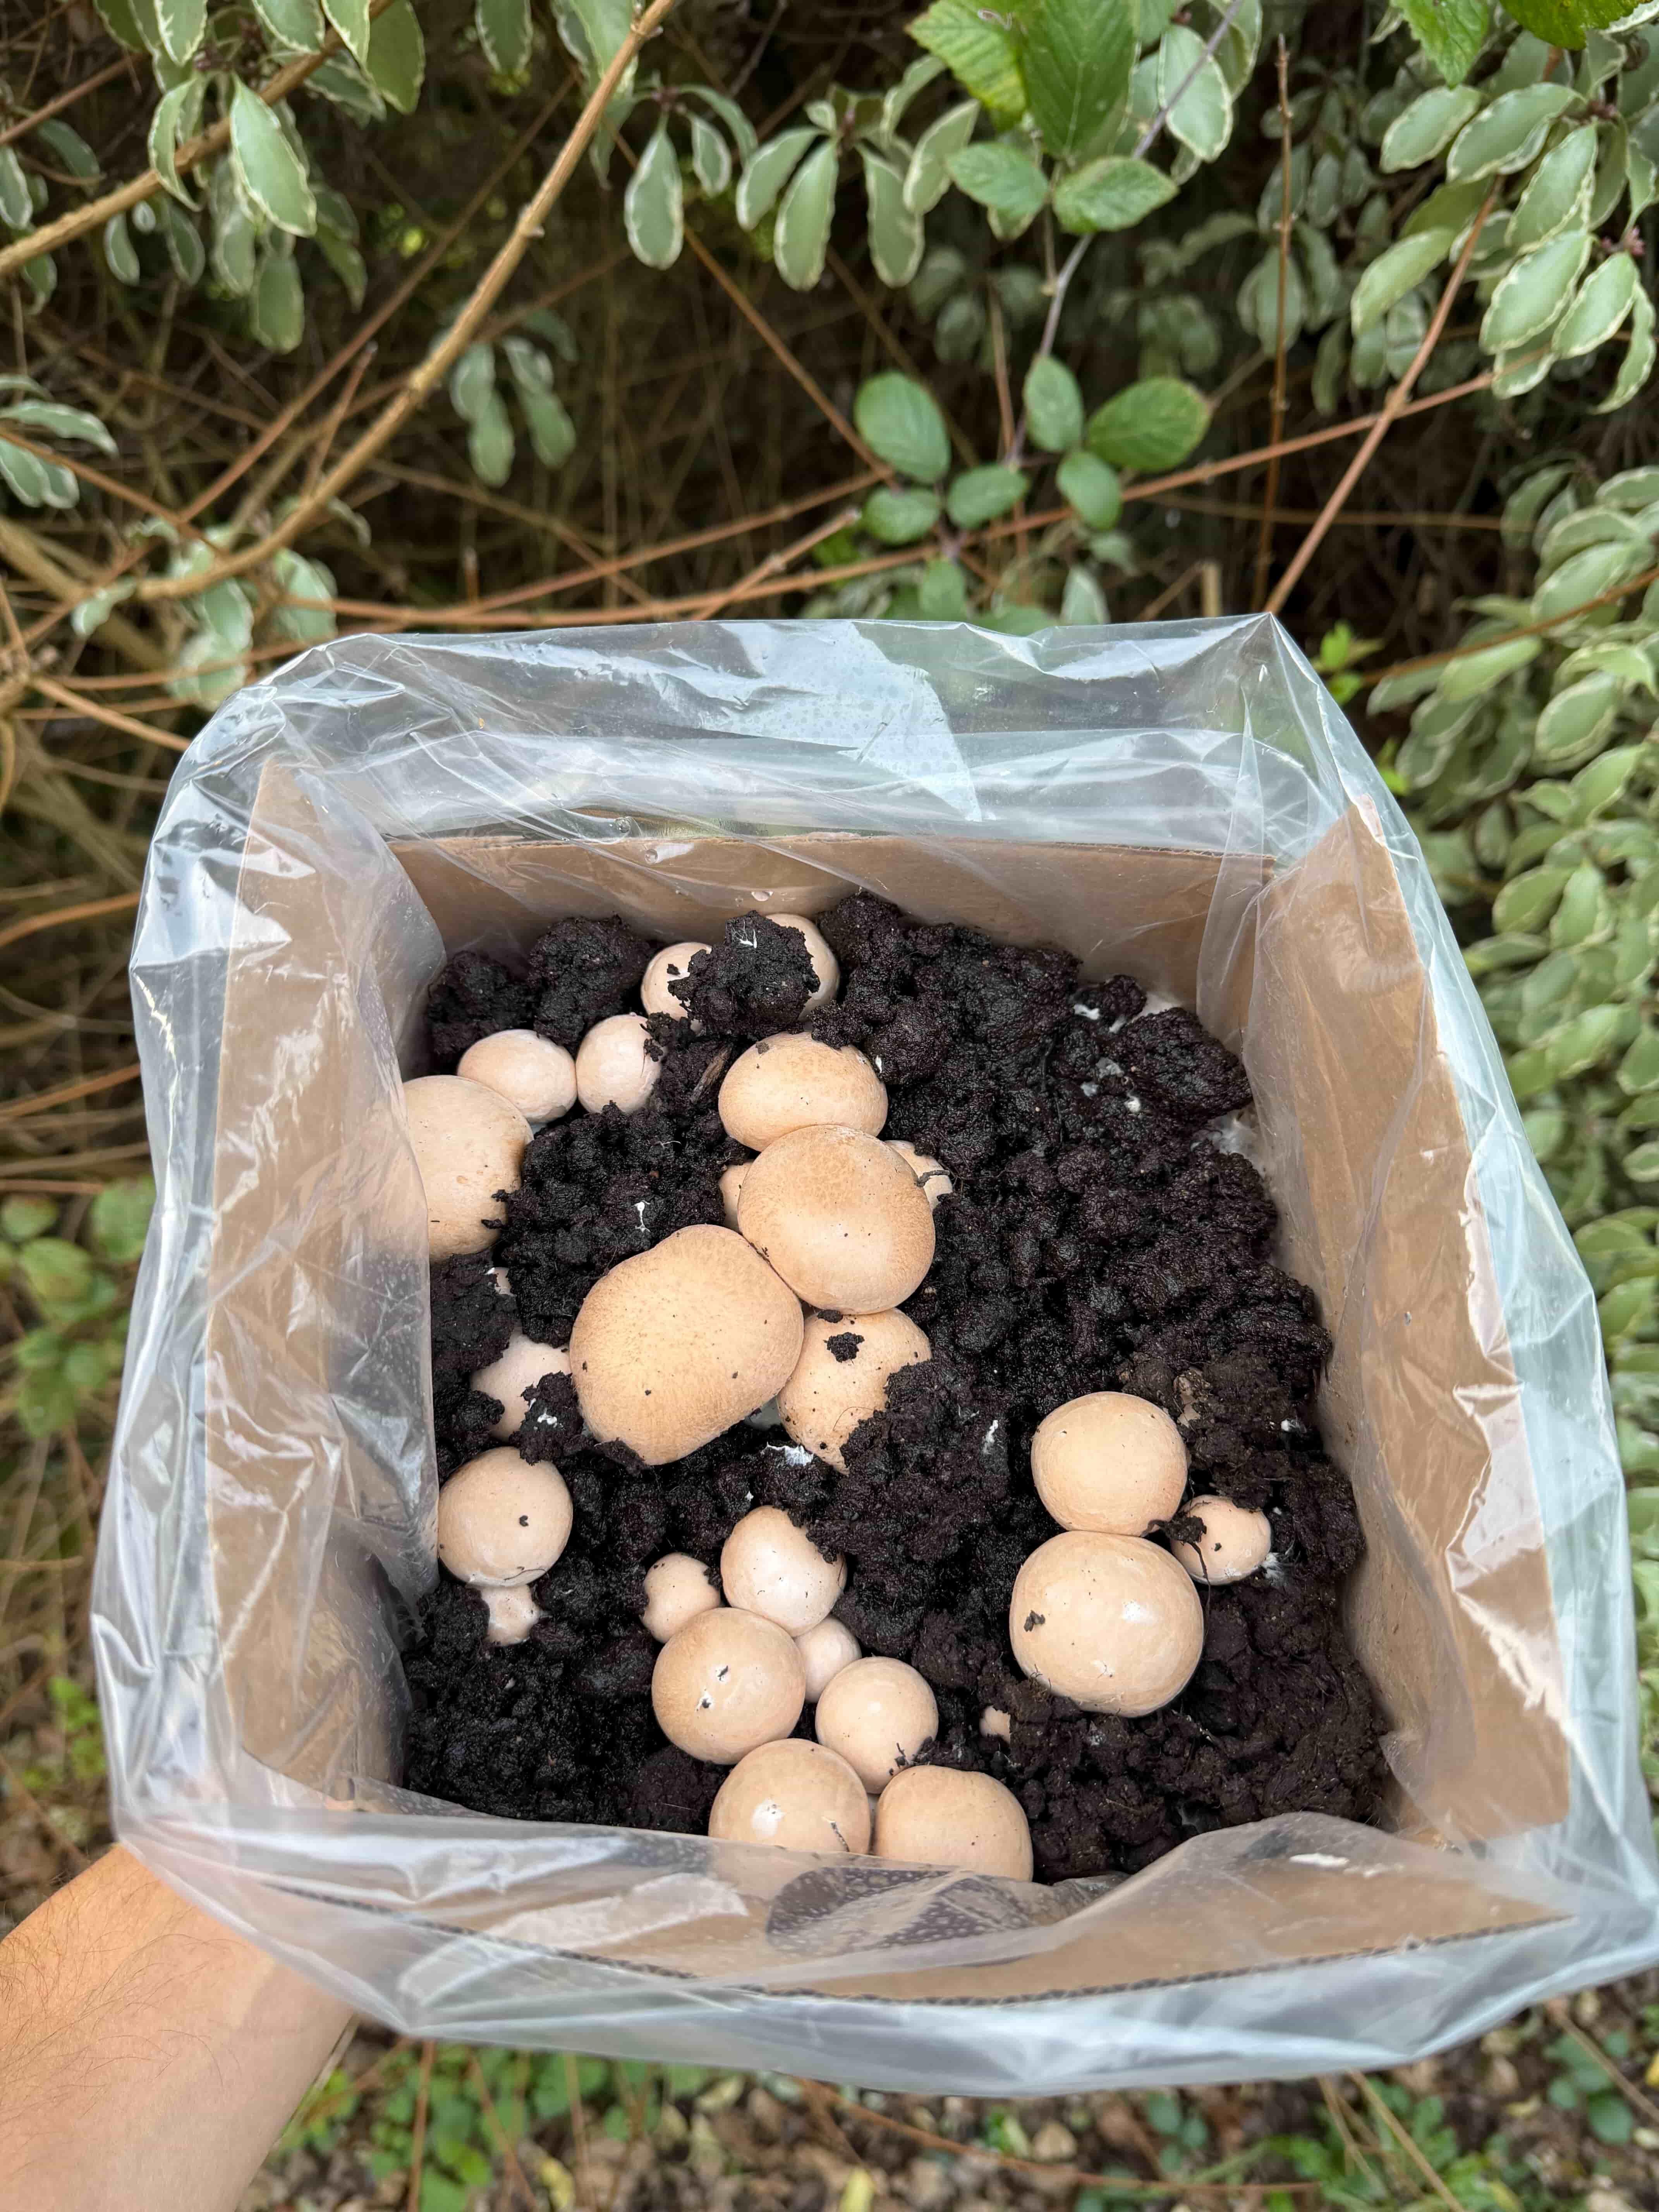
Days 12-14 - Pins Forming
Small pins appear on the topsoil surface. These double in size quickly once established. Continue spraying twice daily and keep conditions stable.
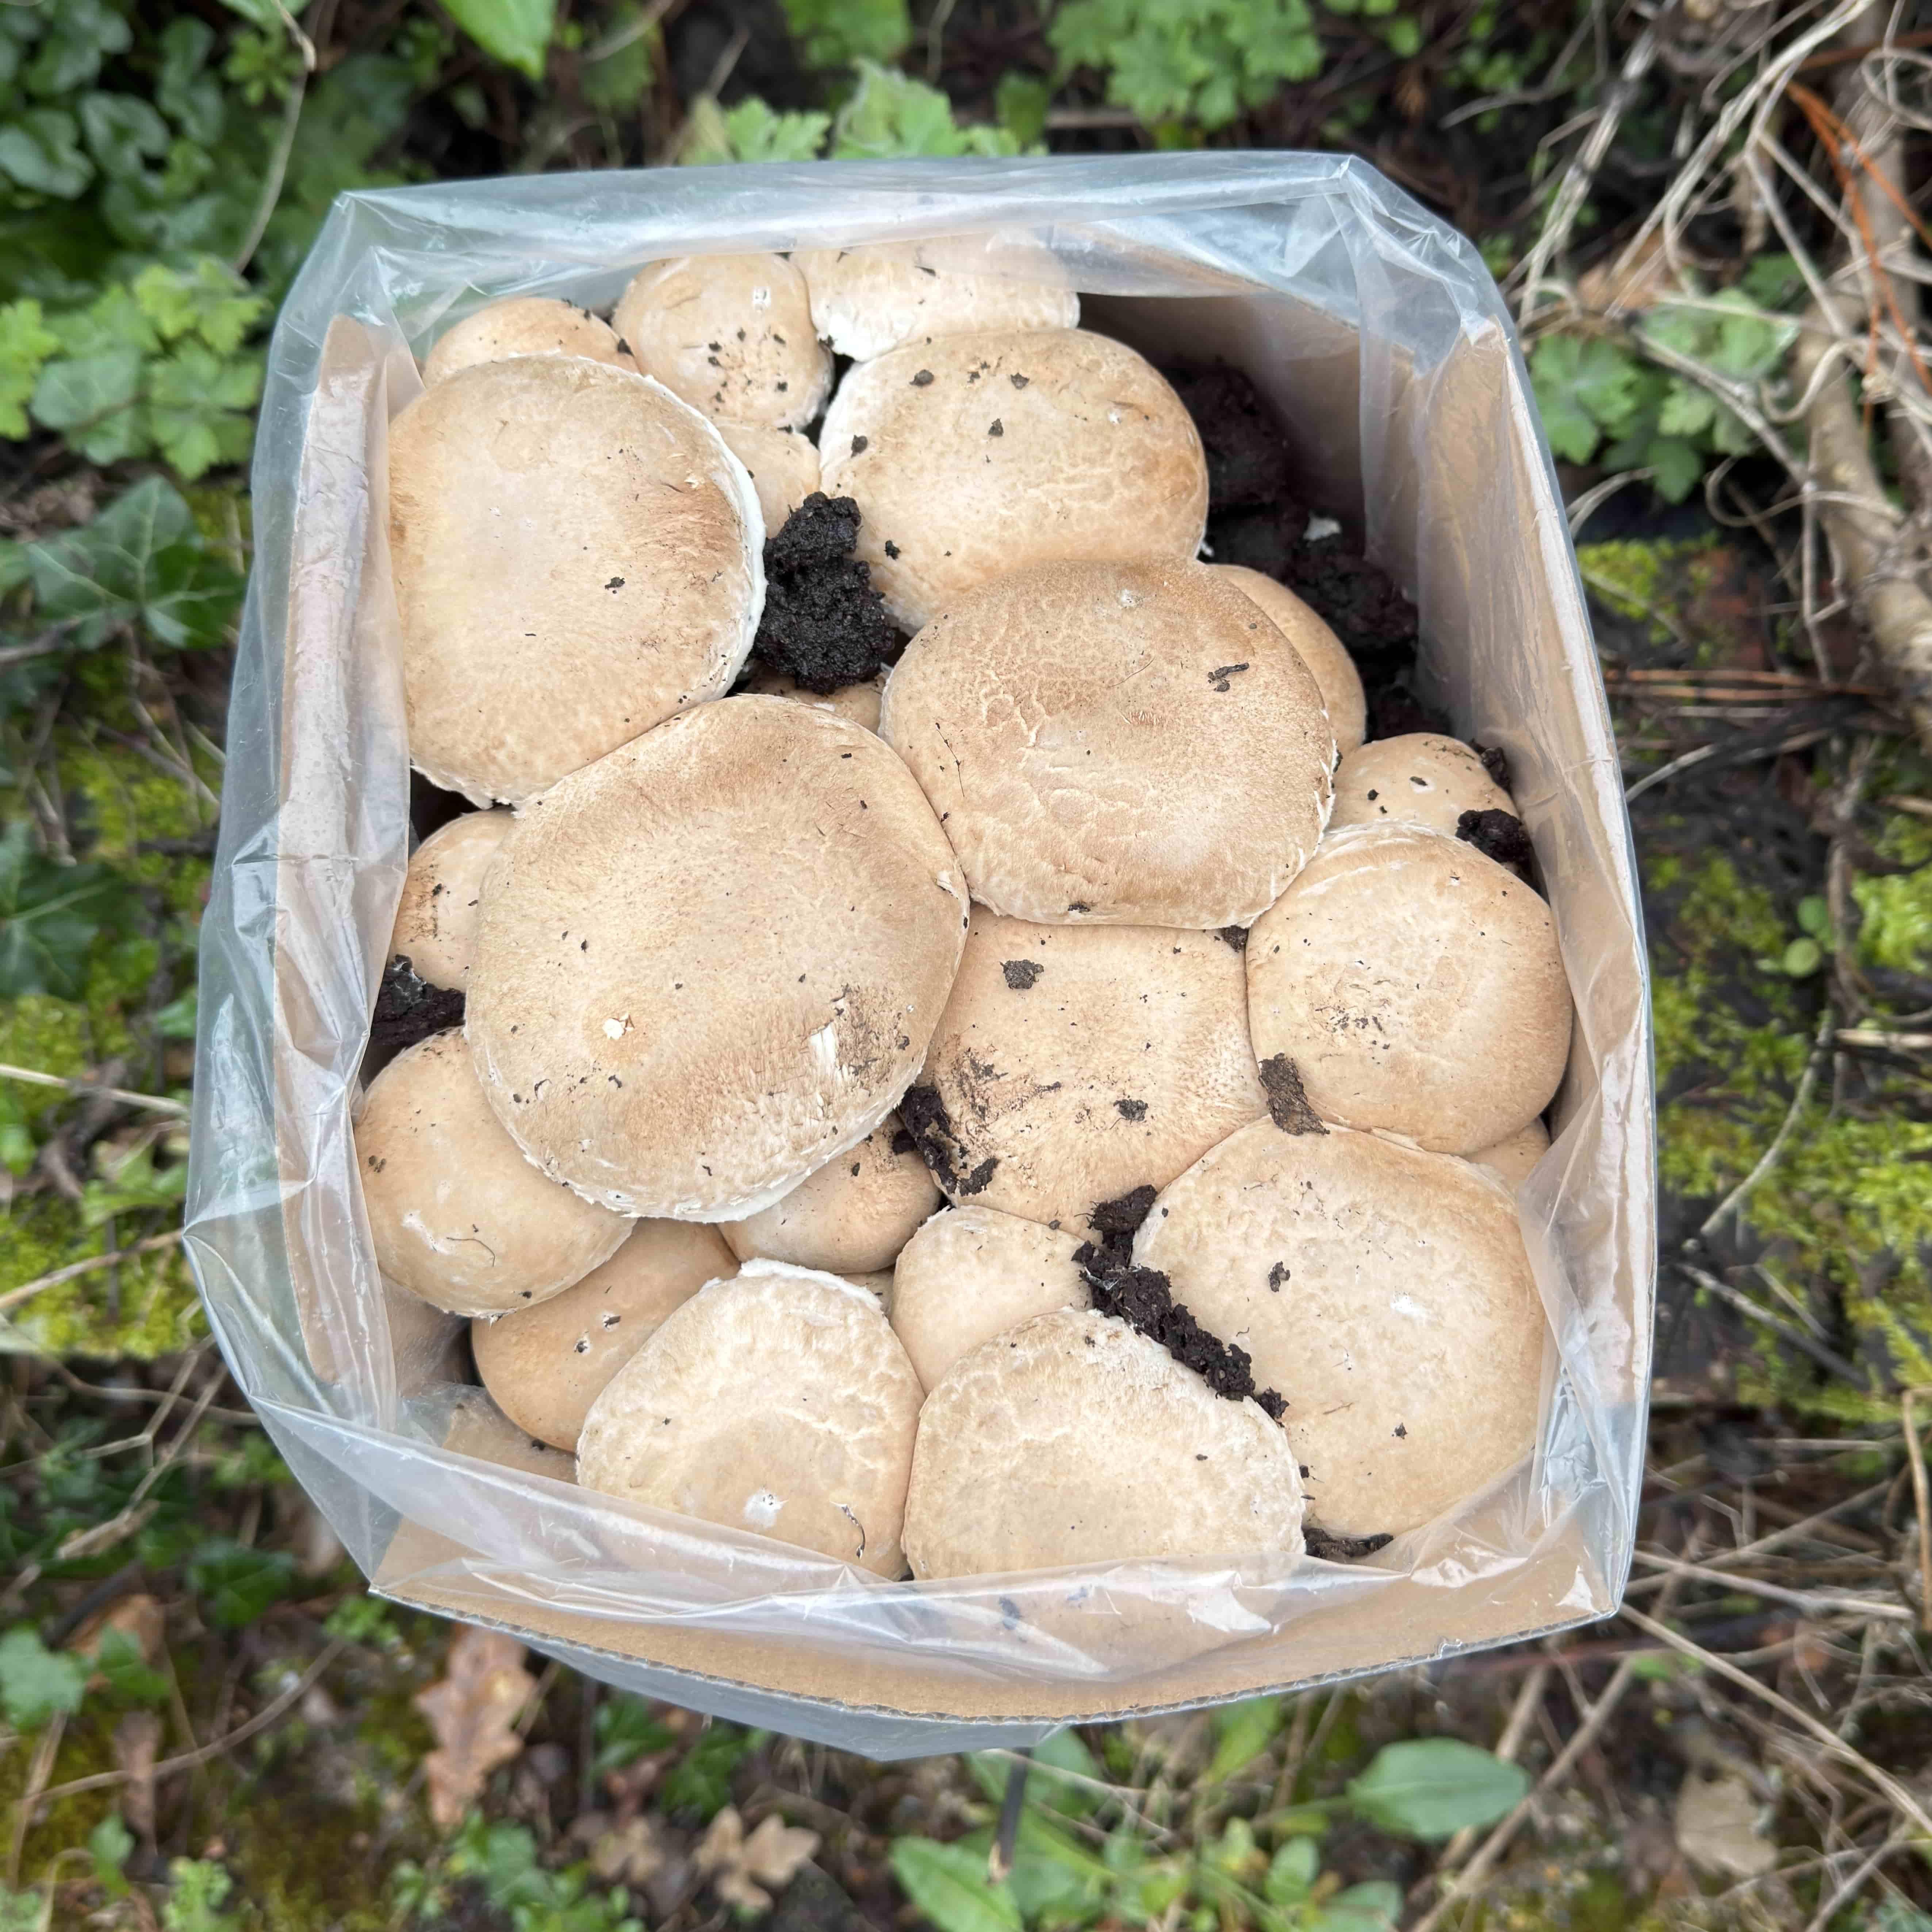
Days 16-24 - First Harvest
Pins develop into full mushrooms. Harvest before edges upturn. Twist and pull the entire mushroom out, root included, to avoid hindering further crops.
Timelines are typical results at 14-21 degrees with regular misting. View full growing timeline with all varieties
How to Grow your own Chestnut / White Mushrooms
Step Two - Pinning
Each species of mushroom growing kit we offer will provide different growing experiences, this kit in particular has a bit more to do upon arrival in order to yield its first crop as it is not part of our ready growing range, but do not worry, the entire duration to have your first crop is only 16-24 days.
10-18 days after removing the lid, primodia (pins) will begin to form on the topsoil, these will double in size over night as they grow to maturation.
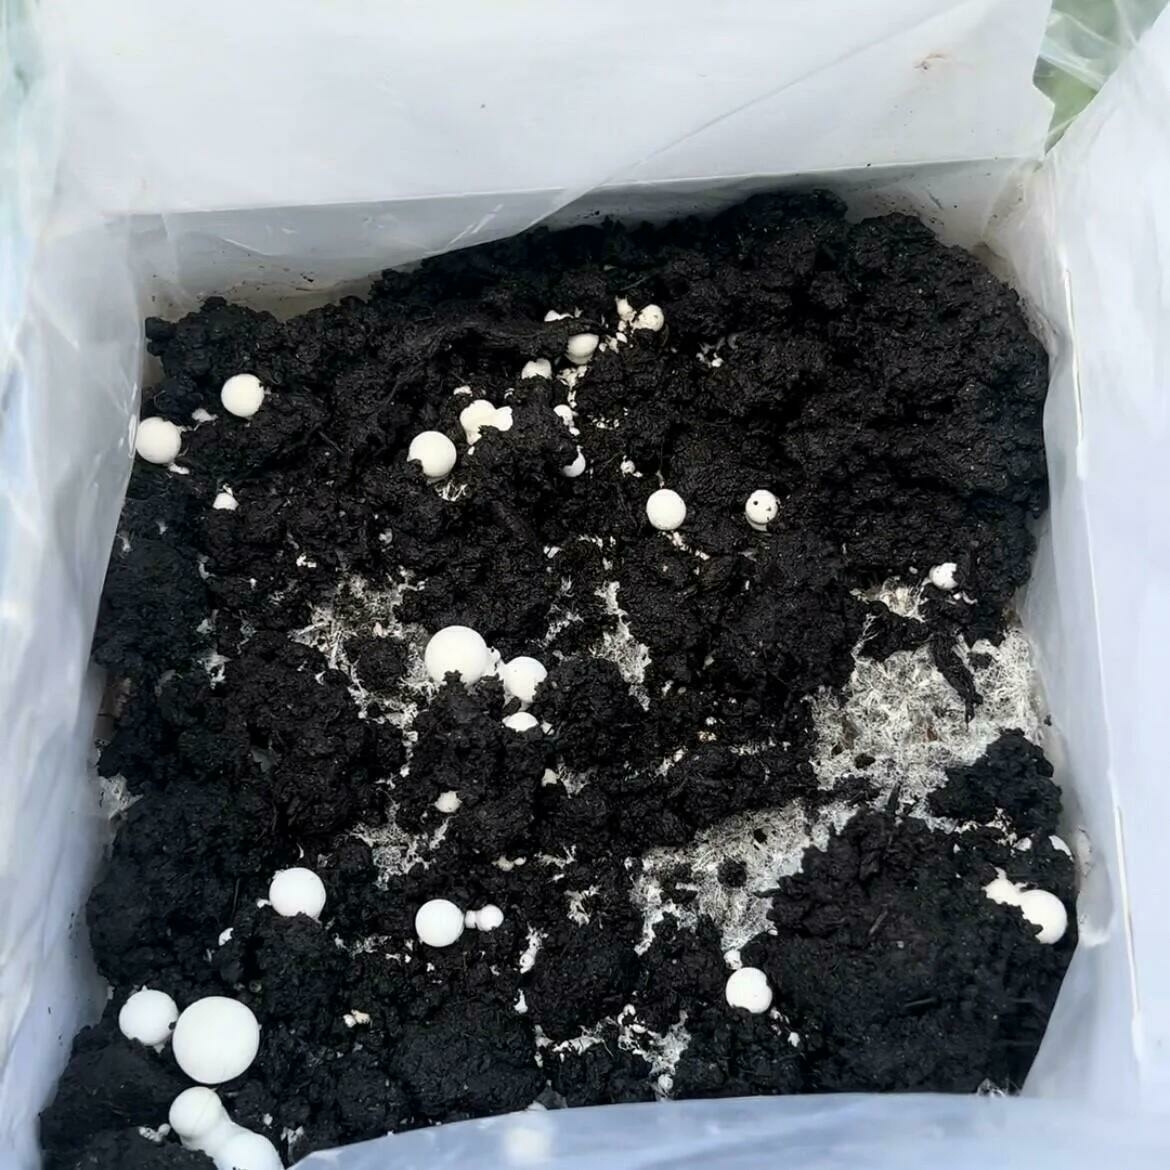
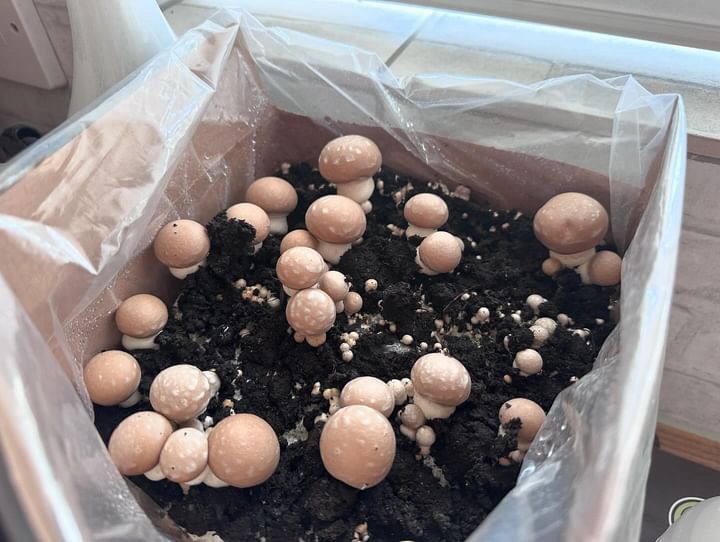
Handy growing guide
Fruiting your own Chestnut / White Mushrooms
Remember to maintain consistent moisture levels by spraying twice daily, and ensure proper ventilation to prevent the mushrooms from becoming elongated or developing abnormally.
Step Three - Fruiting and Harvesting
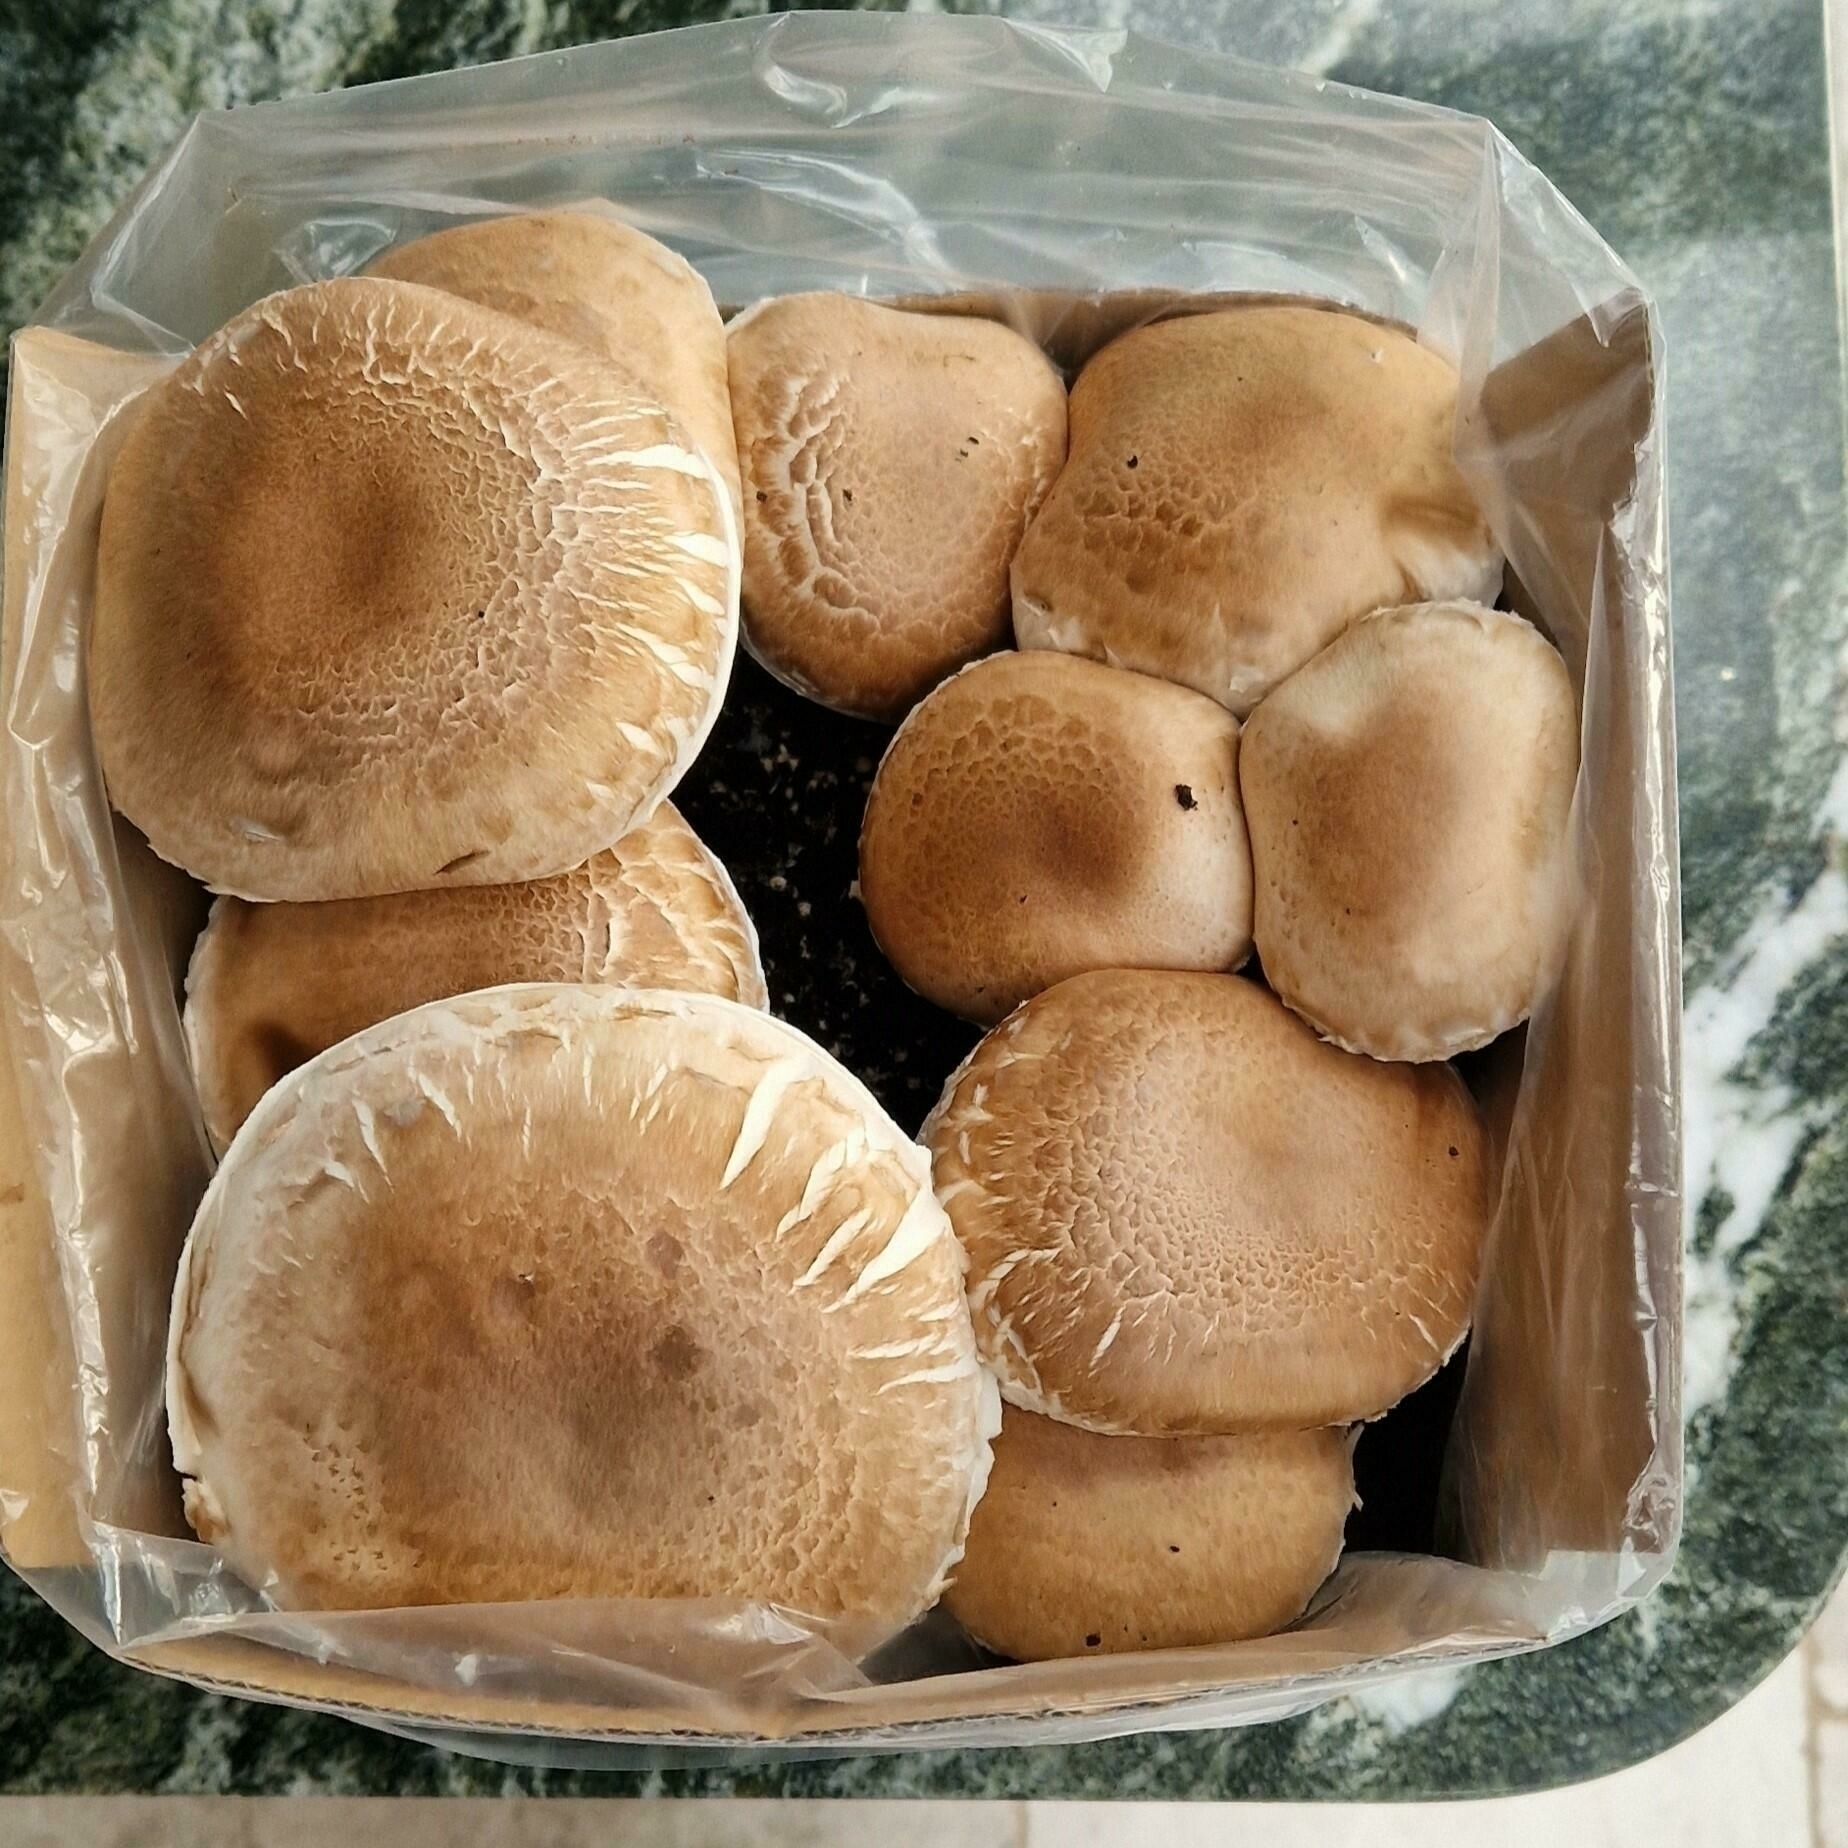
16-24 days have passed and your kit will now be in crop.
Please see the picture for reference, this is a typical crop from one of our kits, it is quite normal for some mushrooms to be bigger than the others, it is best to pick the entire crop at the same time by gently twisting and pulling out the entire mushroom, root included. The entire fruit body is edible, aside from the very base, closest to the root. We have a range of recipes on our blog.
Mushrooms are best picked before they drop spores and just before the edges begin to upturn, to leave them on past this will not make the mushrooms grow any larger, but will stop them keeping as well in the fridge and make them softer than they should be.
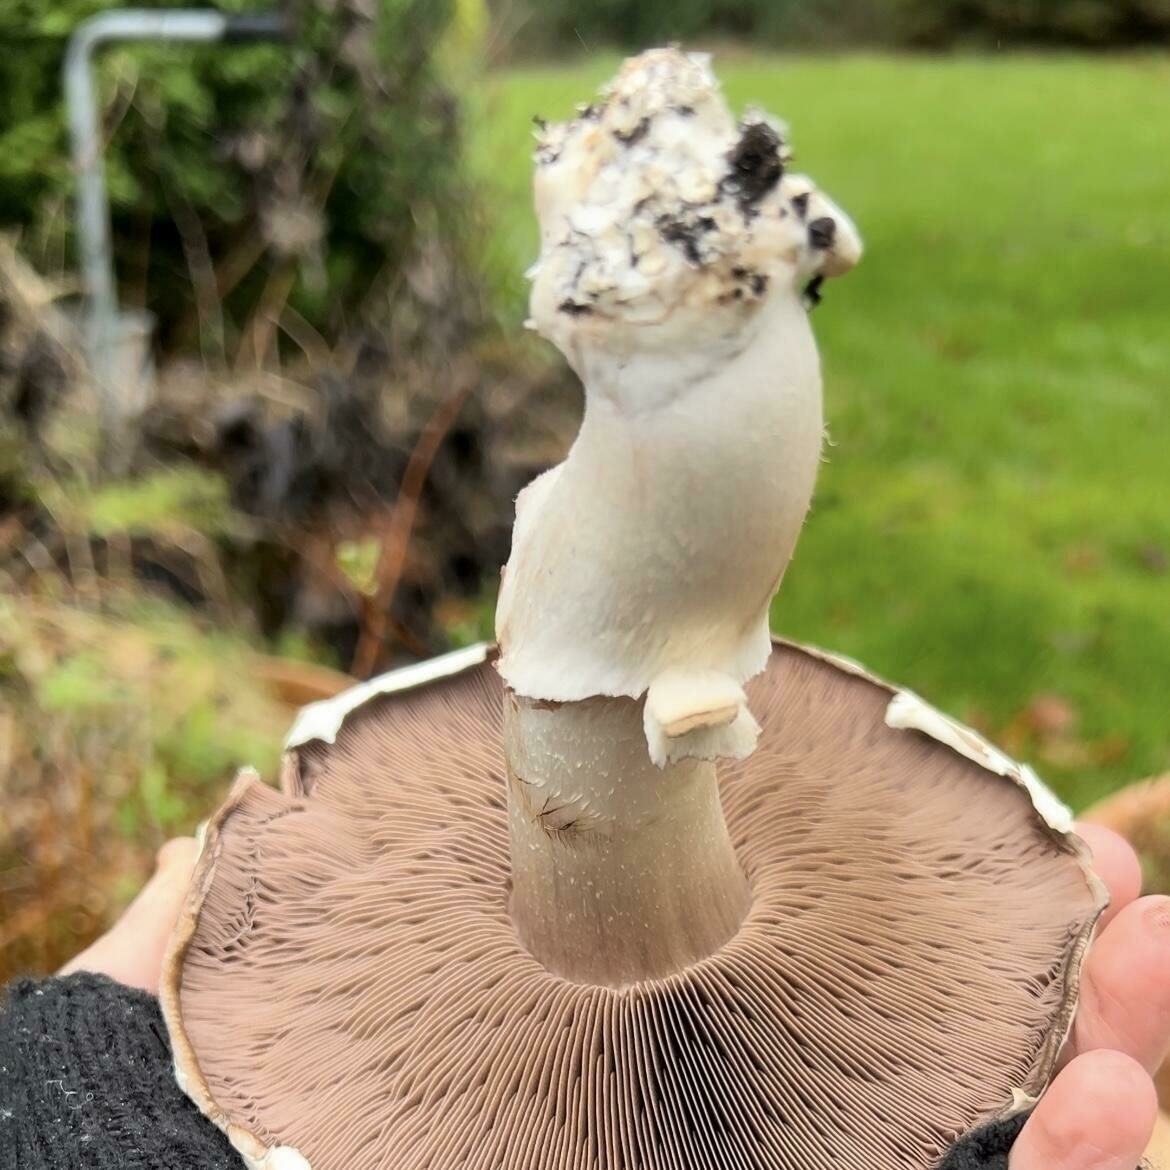
How to harvest Chestnut/White mushrooms
To harvest your mushrooms it is important you do not leave any root on the topsoil as this will hinder further crops. To pick your mushrooms correctly and avoid leaving in any root, you should gently twist and pull the entire mushroom out taking the root with you as pictured. Then simply slice and discard the root and enjoy the mushroom you have just grown.
Chestnut / White mushroom benefits
Read more about the potential benefits of Chestnut / White mushrooms here
Chestnut / White mushroom culinary uses
Chestnut / white mushrooms are versatile in culinary uses, suitable for dishes like stir-fries, soups, pasta dishes and as a meat substitute in vegetarian and vegan recipes. Overall, chestnut / white mushrooms are a nutritious and flavorful ingredient that can enhance a variety of dishes.
They can be consumed cooked or raw but our favourite way to have them is pan fried with garlic, olive oil and butter. Adding herbs such as thyme also works very well with them.
Check out our recipes for Chestnut mushrooms here.
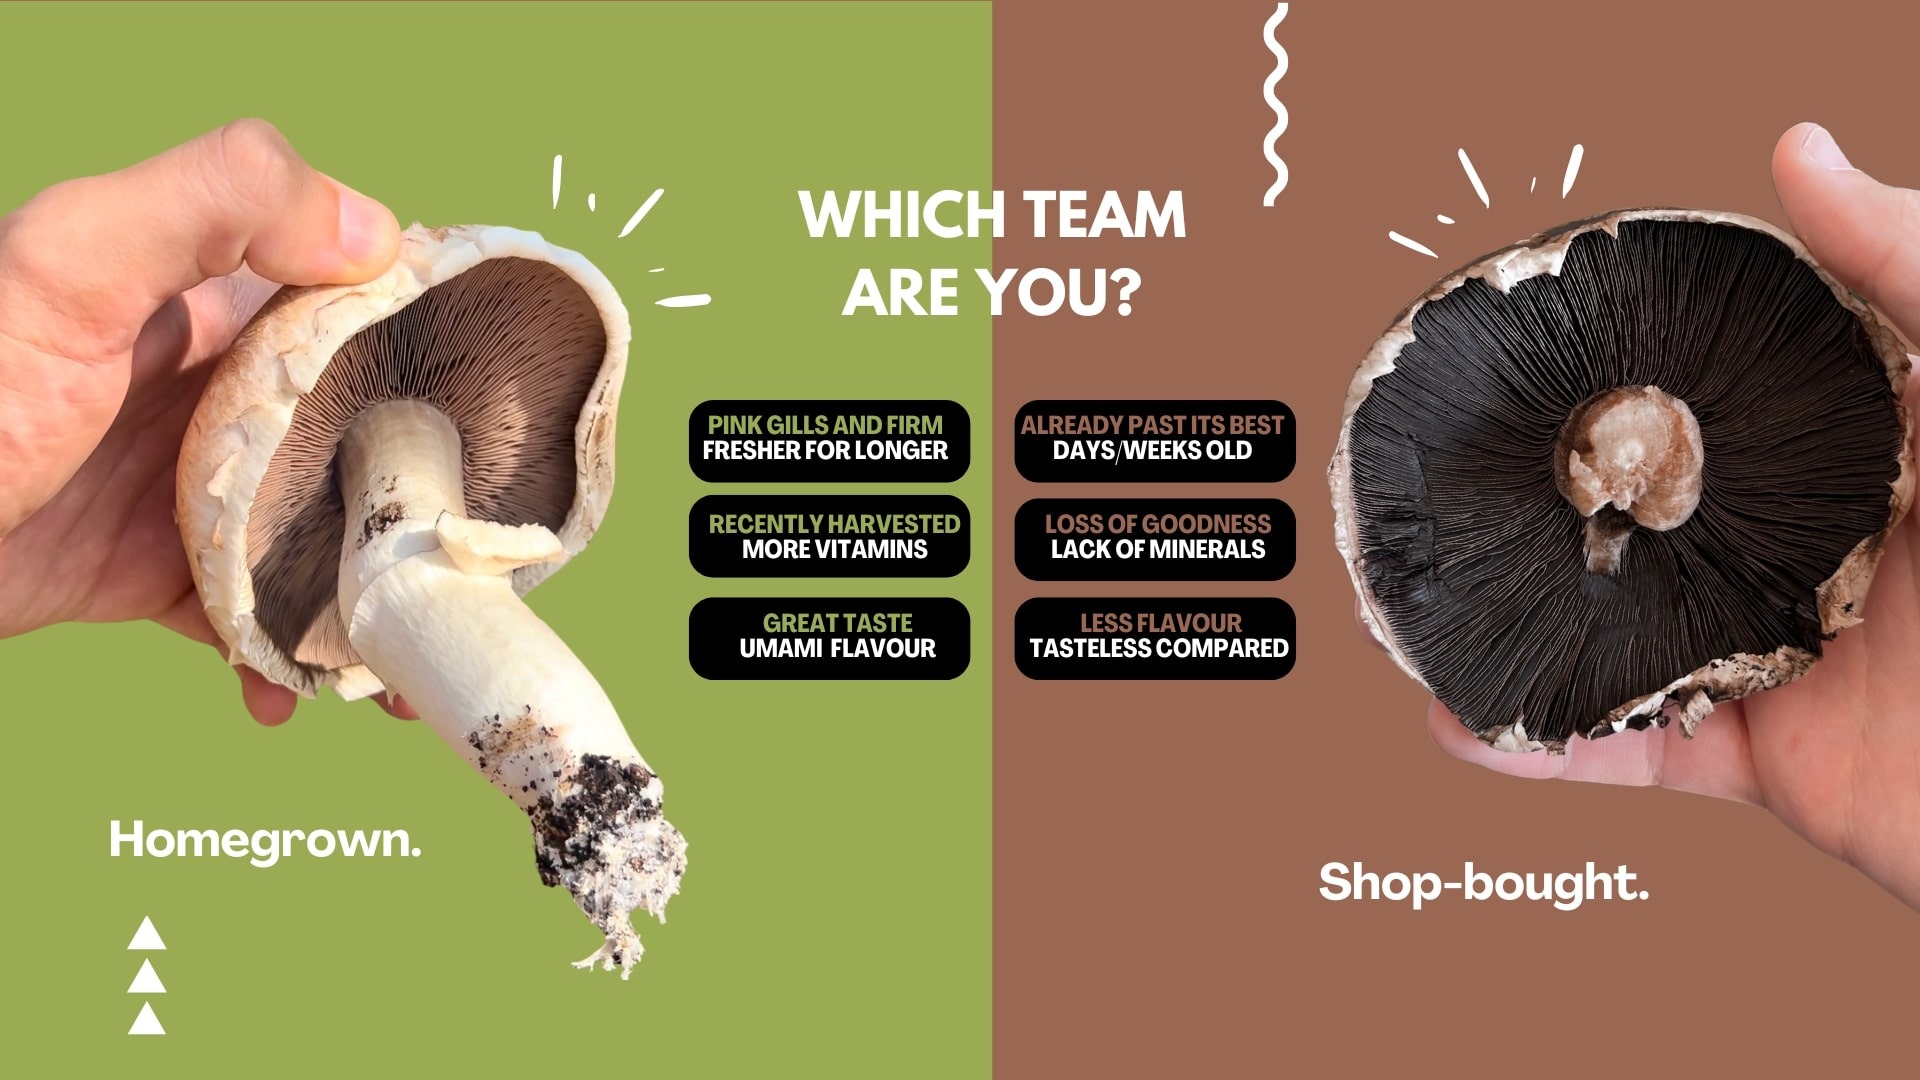
Homegrown vs Shop-bought mushrooms
FAQ for Chestnut and White Mushroom Growing Kit
After opening your kit, position it in a cool area (14-21°C) away from direct sunlight. Distribute the casing soil loosely over the compost without compacting it. Initially, add 100ml of water, then cover loosely with the lid for 8 days to let the mycelium colonise the topsoil. Begin spraying your topsoil twice daily to provide ideal fruiting conditions.
Chestnut and White Mushrooms thrive best at a steady temperature of 15-17°C with high humidity and consistent fresh air exchange. Ensure the kit is not sealed tightly to allow for airflow and prevent suffocation.
Harvest your mushrooms when they are mature but before they begin to drop spores, typically when the mushroom caps are fully opened but the edges have not yet started to curl. Gently twist and pull the entire fruit body from the substrate to avoid leaving any roots behind.
You can expect 3-4 harvests from your kit over approximately 5-7 weeks. These kits are designed for indoor use to easily control environmental conditions; therefore, growing them outside is not recommended without proper adjustments for outdoor conditions.
Featured Videos
Discover our latest content