
How to Grow Summer Oyster Mushrooms at Home
Summer Oyster (Pleurotus pulmonarius) is a British native. In woodlands from Sussex to the Scottish Borders, it fruits naturally on beech and poplar from late spring into early autumn. The pale cream to soft beige caps, and the slightly mottled surface, are both exactly what a healthy specimen looks like at full development.
Growing one at home is considerably faster than it sounds. Merryhill Mushrooms Summer Oyster Mushroom Growing Kit arrives fully colonised, which means the hard part is already done at the farm. Spray twice daily, find a warm spot indoors, and your first harvest typically arrives in 7 to 10 days. A single kit produces between 800g and 1.2kg across 2 to 3 flushes.
It is also the only oyster variety that genuinely thrives in British summer temperatures. Pink Oyster and Yellow Oyster both struggle once rooms climb above 21°C. Summer Oyster doesn't.
What Makes Summer Oyster Different from Other Oyster Varieties
Most oyster mushrooms grown in UK homes are Pleurotus ostreatus, the common grey oyster, which fruits best between 10 and 18°C. Summer Oyster is a different species. Pleurotus pulmonarius peaks at 19 to 21°C, which covers the natural room temperature of most British kitchens, living rooms, and conservatories from April through October with no special equipment.
That difference matters in practice. Try to grow White Oyster in a warm room in July and growth stalls. Grow Summer Oyster in that same room and you'll have mushrooms in under a week.
The caps look different too. Cream to beige rather than white-grey, with a slight wrinkle or mottled texture across the surface. Some first-time growers mistake this for damage. It isn't. That texture is simply how Pleurotus pulmonarius develops as the caps mature, and it's a reliable sign the kit is healthy.
On an outdoor hardwood log, this species takes months to fruit. On Merryhill Mushrooms sawdust-based compost, with spawn already colonised at the farm in Sussex before dispatch, the same result comes in days. First-flush cluster size is generous, often comparable to or slightly larger than White Oyster on a per-harvest basis, which makes Summer Oyster one of the better-value kits in the range for total yield against growing time.
How to Set Up Your Summer Oyster Mushroom Growing Kit
Setting up takes five minutes. Confirm all three holes are cut in an "X". Position the box in a room between 14-22°C, ideally 19-21°C, away from direct sunlight. Start misting into the holes twice a day. That's it.
You're not watering the compost like a plant. A light mist to keep the exposed surface damp is enough. If water pools at the base of a hole between sessions, dab it away with paper towel before the next spray.
The compost inside will look either brown (fresh sawdust) or white (mature mycelium). Both are correct. Merryhill Mushrooms kits are part of the ready-growing range, which means spawn run and colonisation are completed at the farm before dispatch. The mushrooms are ready to fruit on arrival. Browse the full kit range to compare Summer Oyster with other varieties before ordering. Printed growing instructions are included with every kit, and the Merryhill Mushrooms support team is available if specific questions come up at any stage.
On an outdoor log, Summer Oyster takes months to fruit. On pre-colonised sawdust compost, that condenses to 7 to 10 days. Each 7x7x7 inch kit contains enough nutrition for 2 to 3 harvests.
Step One - Setup
Take the box and confirm all three holes are cut in an "X". Place it somewhere between 14-22°C, ideally 19-21°C, with no direct sunlight. A kitchen shelf, a living room sideboard, or a windowsill out of direct sun all work.
The compost will look brown or white depending on the kit's age. Both are healthy. Start misting the three holes twice daily, keeping the surface damp rather than soaking it. Any pooling water should be dabbed away between sessions.
Don't place the kit in a cupboard, near a radiator, or in a room that gets cold overnight. Consistent warmth and a bit of natural airflow make a real difference to how quickly pins form.
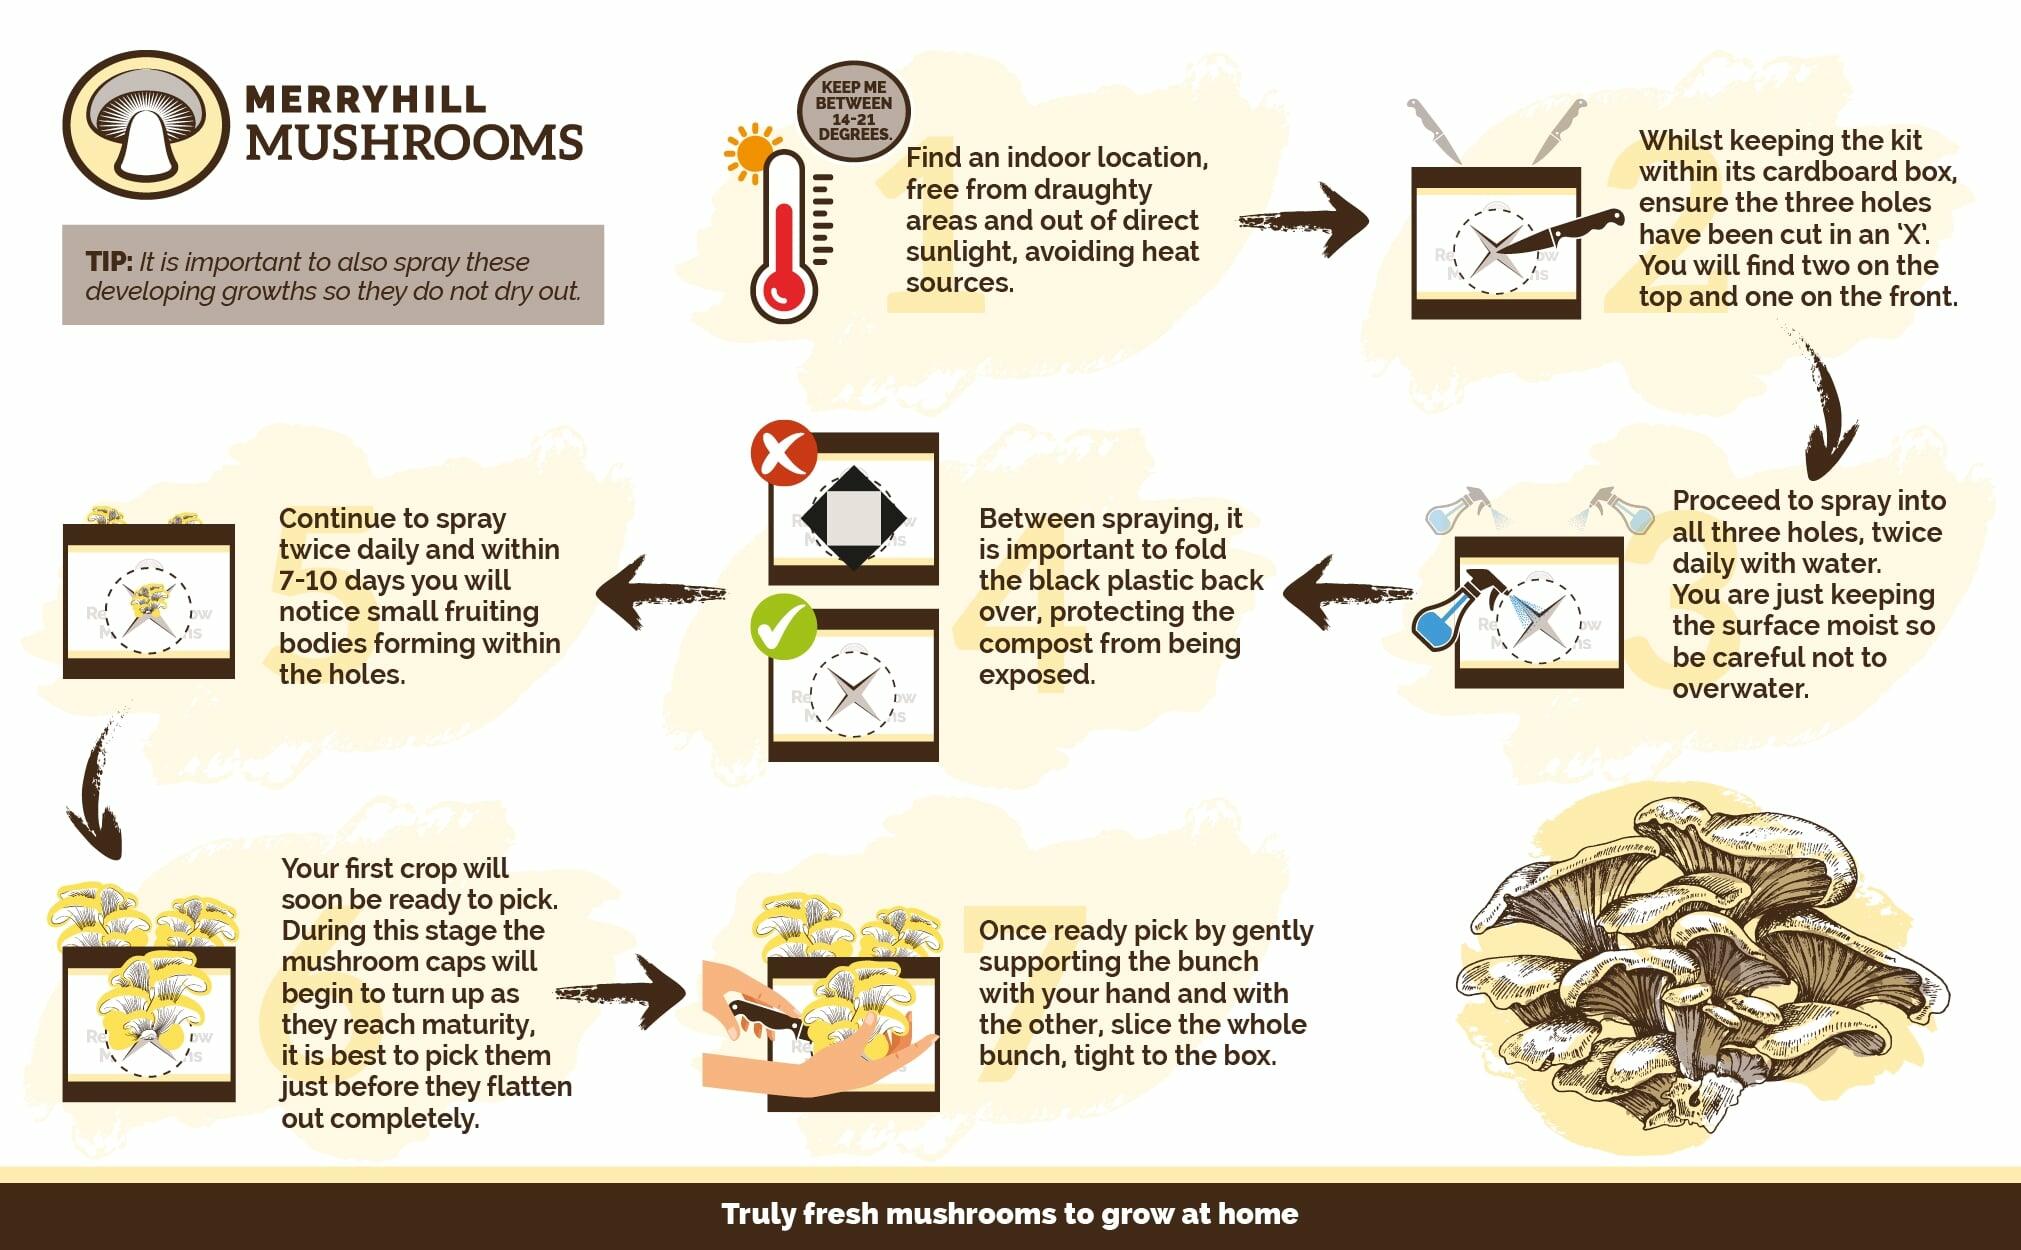
Understanding the Stages of Compost Development
As the Summer Oyster mycelium develops inside the sawdust compost, the substrate changes in appearance. Brown sawdust gives way to dense white coverage as the fungal network spreads through the material. Mushroom fruit bodies develop from that white layer and push out through the growing holes in the box.
White, cream, or beige growth at any stage is normal. Green, black, or pink patches in the compost itself can indicate contamination and are worth checking. Contact the Merryhill support team with a photo and they'll help you identify what you're looking at.
What to Expect: Summer Oyster Growth Day by Day
Every kit develops at its own pace. Temperature and humidity both affect the speed. At 19 to 21°C with regular misting, first pins usually appear by day 3 to 5, and first harvest arrives between day 7 and 10. Cooler rooms within the 14 to 22°C range still produce results, just a few days later at each stage.
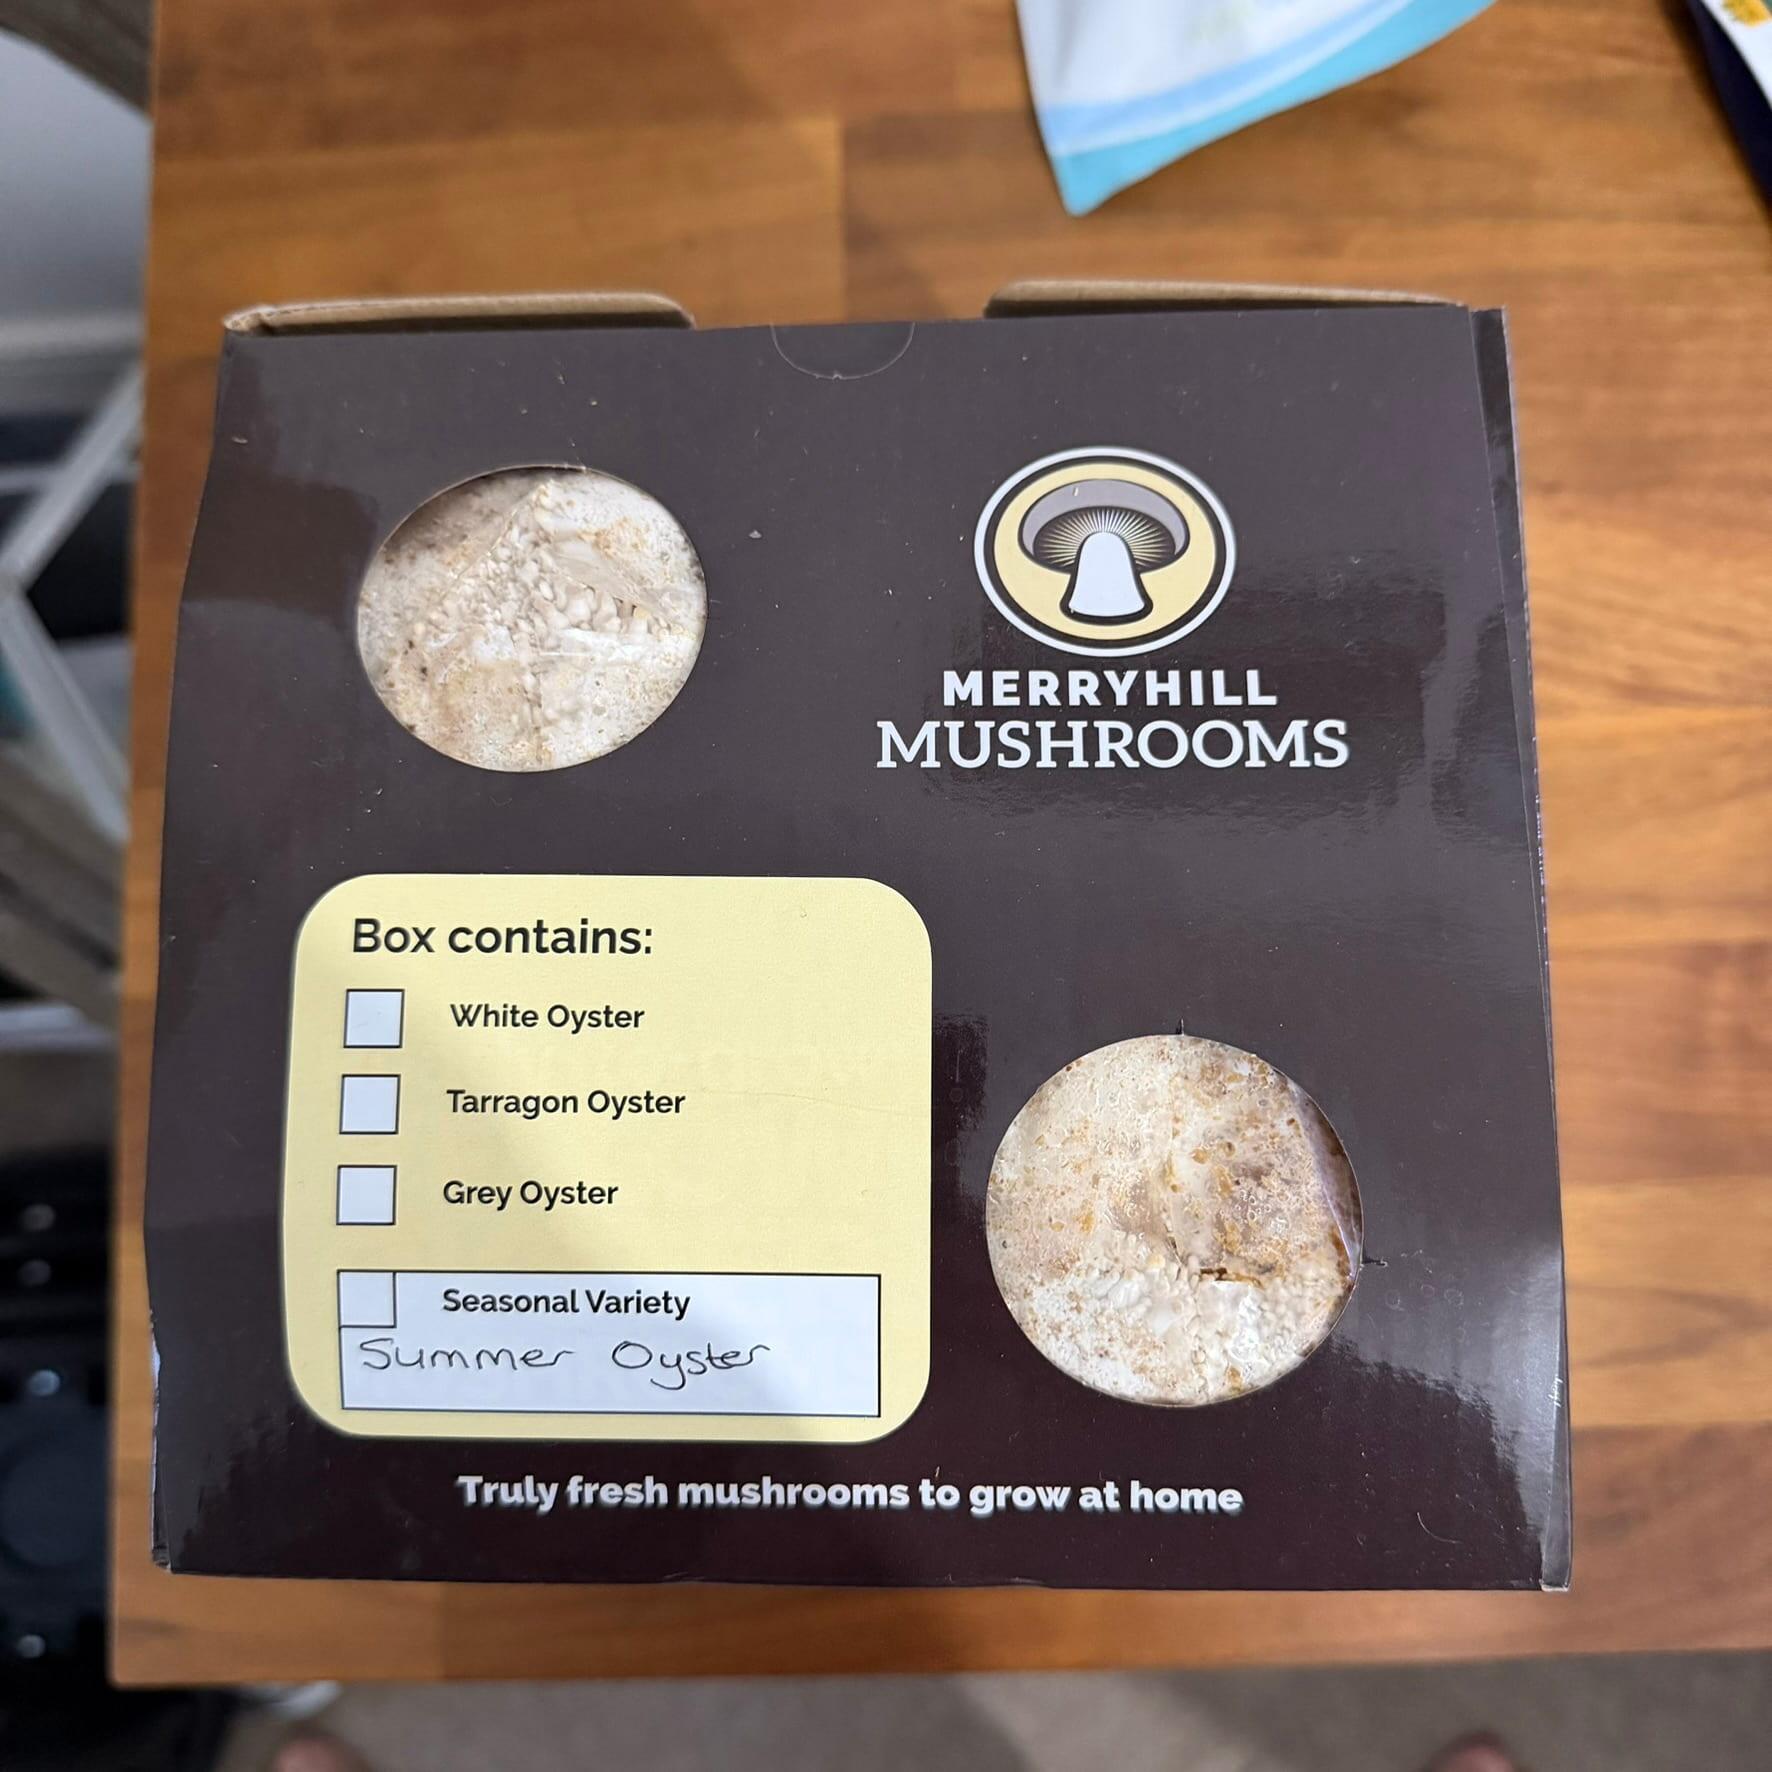
Day 1 - Setup
Remove the kit from the postal box as soon as it arrives. Healthy white mycelium should be visible through the holes. Position in a warm room with indirect daylight and good airflow, between 14 and 22°C, and begin misting twice daily into each hole.
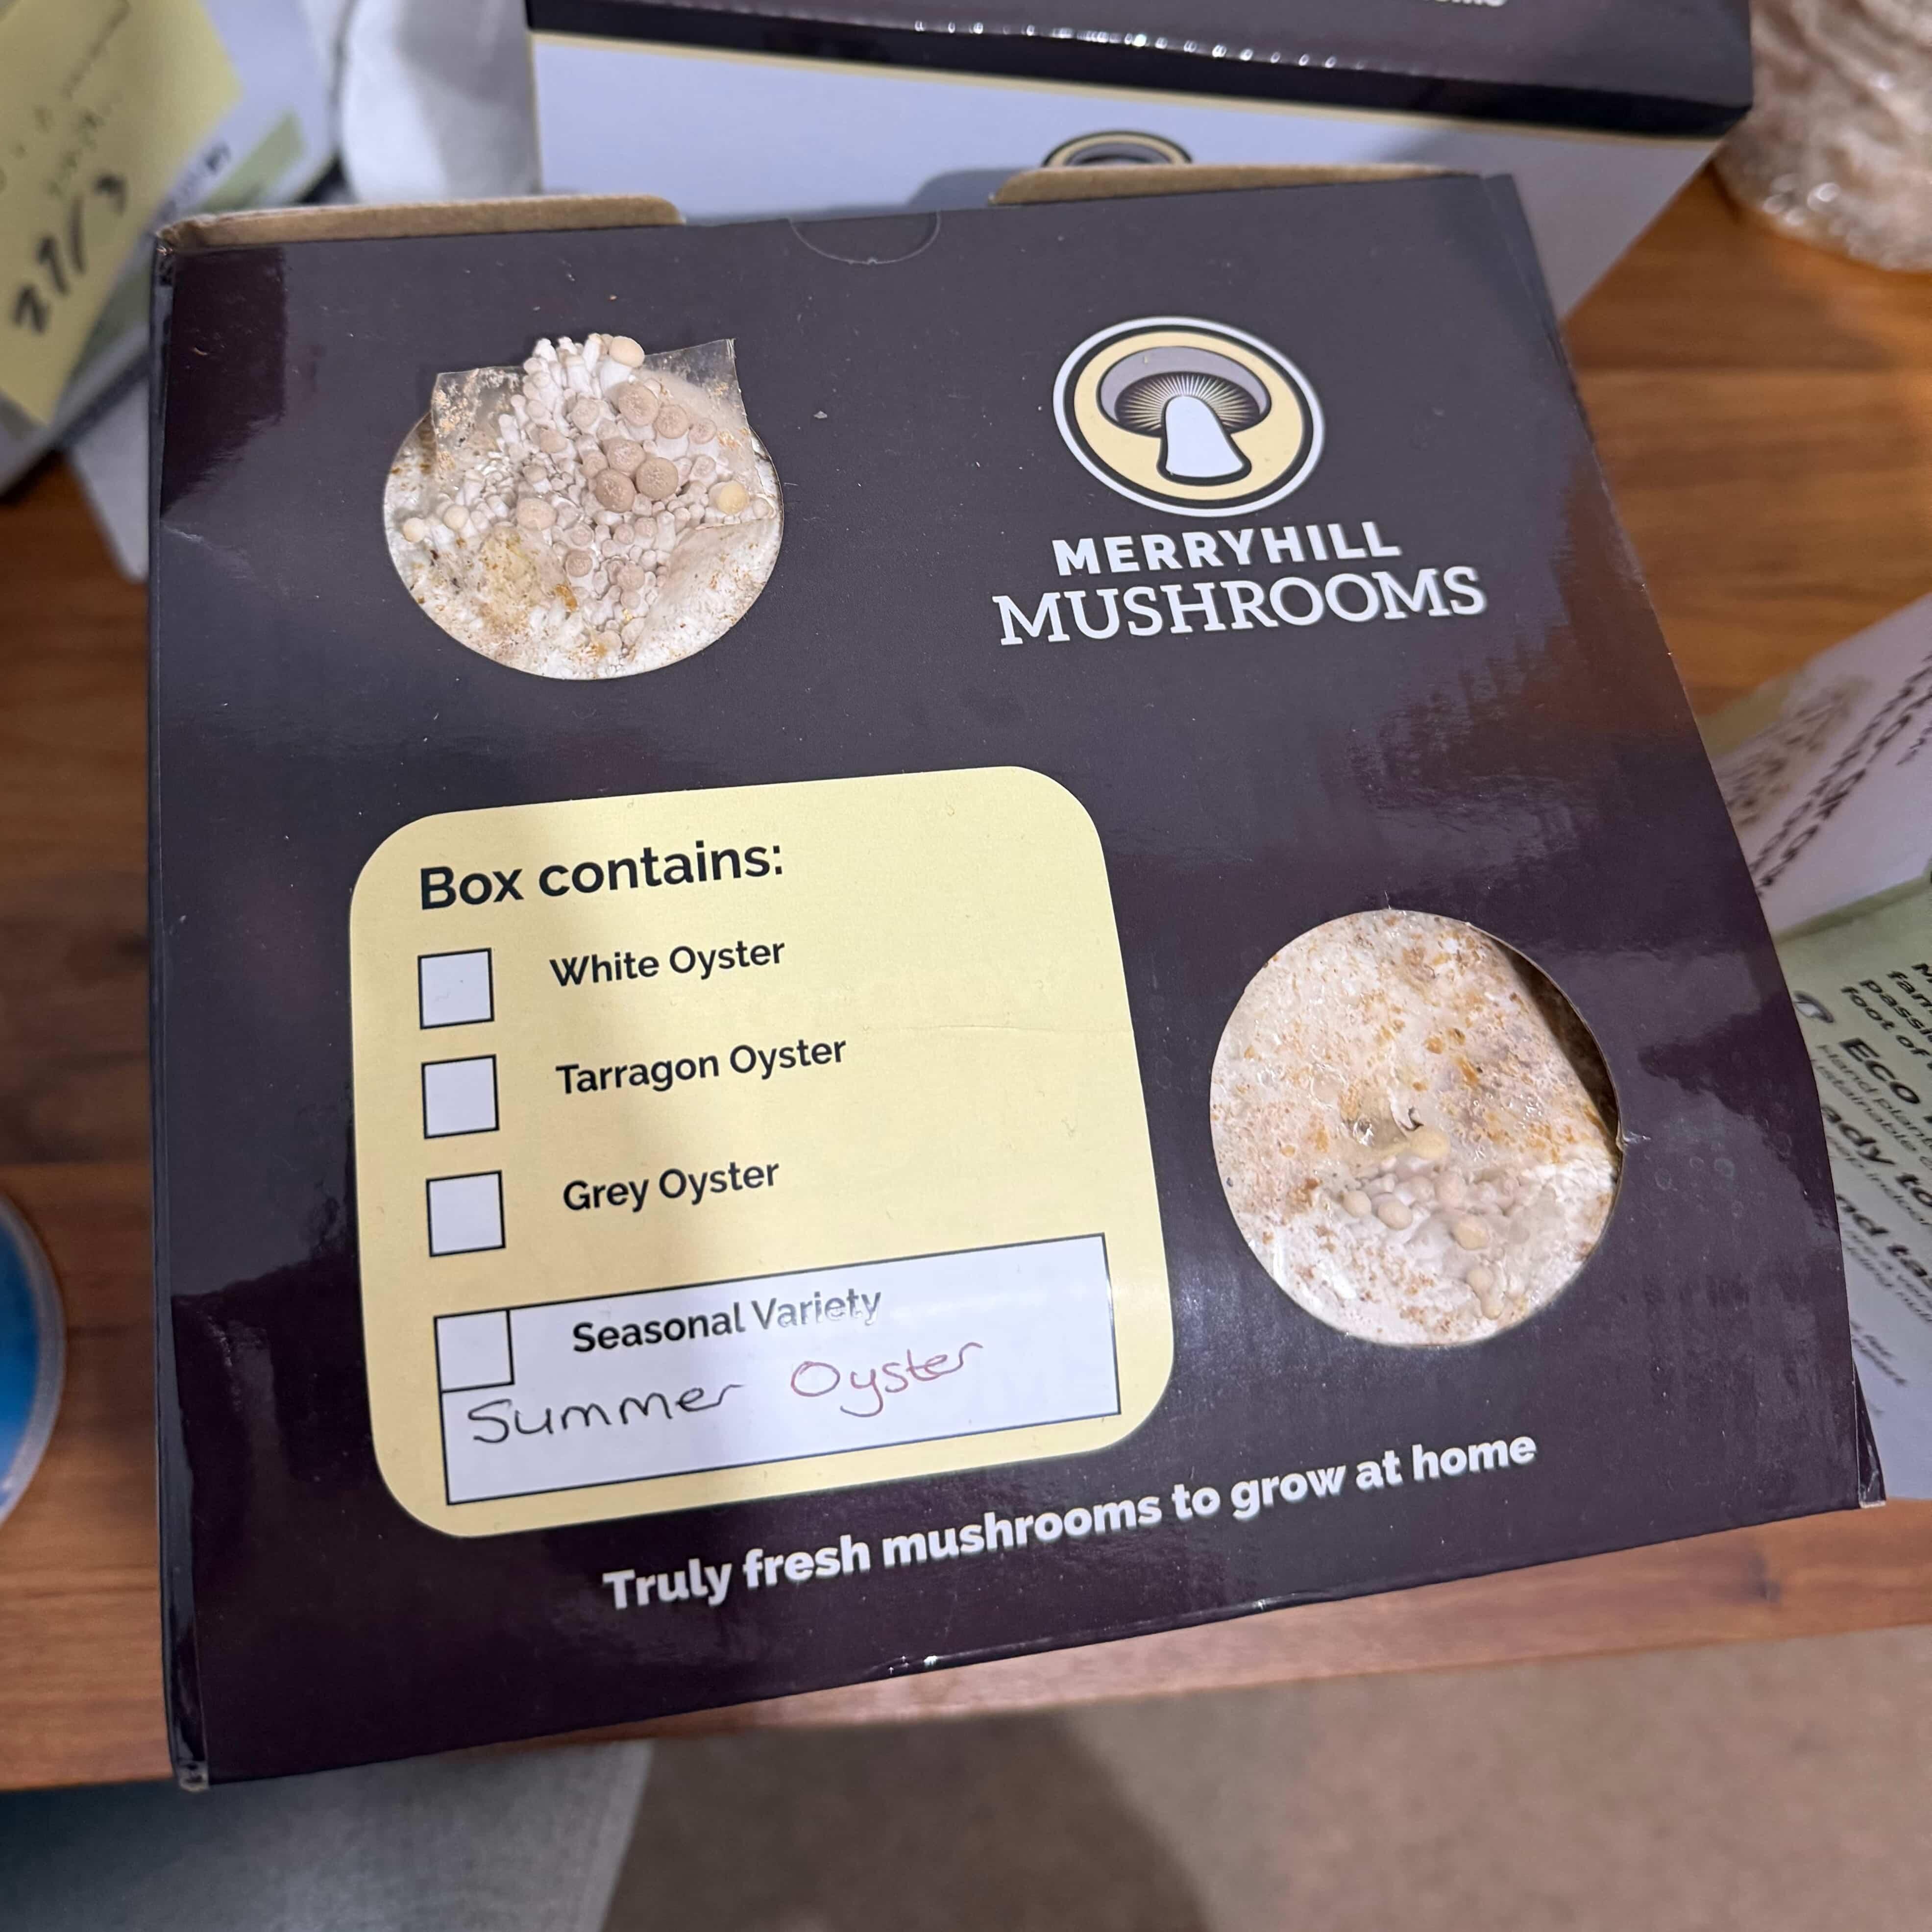
Day 3-5 - Pins Appear
Small pale bumps appear near the openings. In rooms at 19 to 21°C, Summer Oyster pins form faster than most other oyster varieties. Growth often picks up overnight once moisture and airflow are stable.
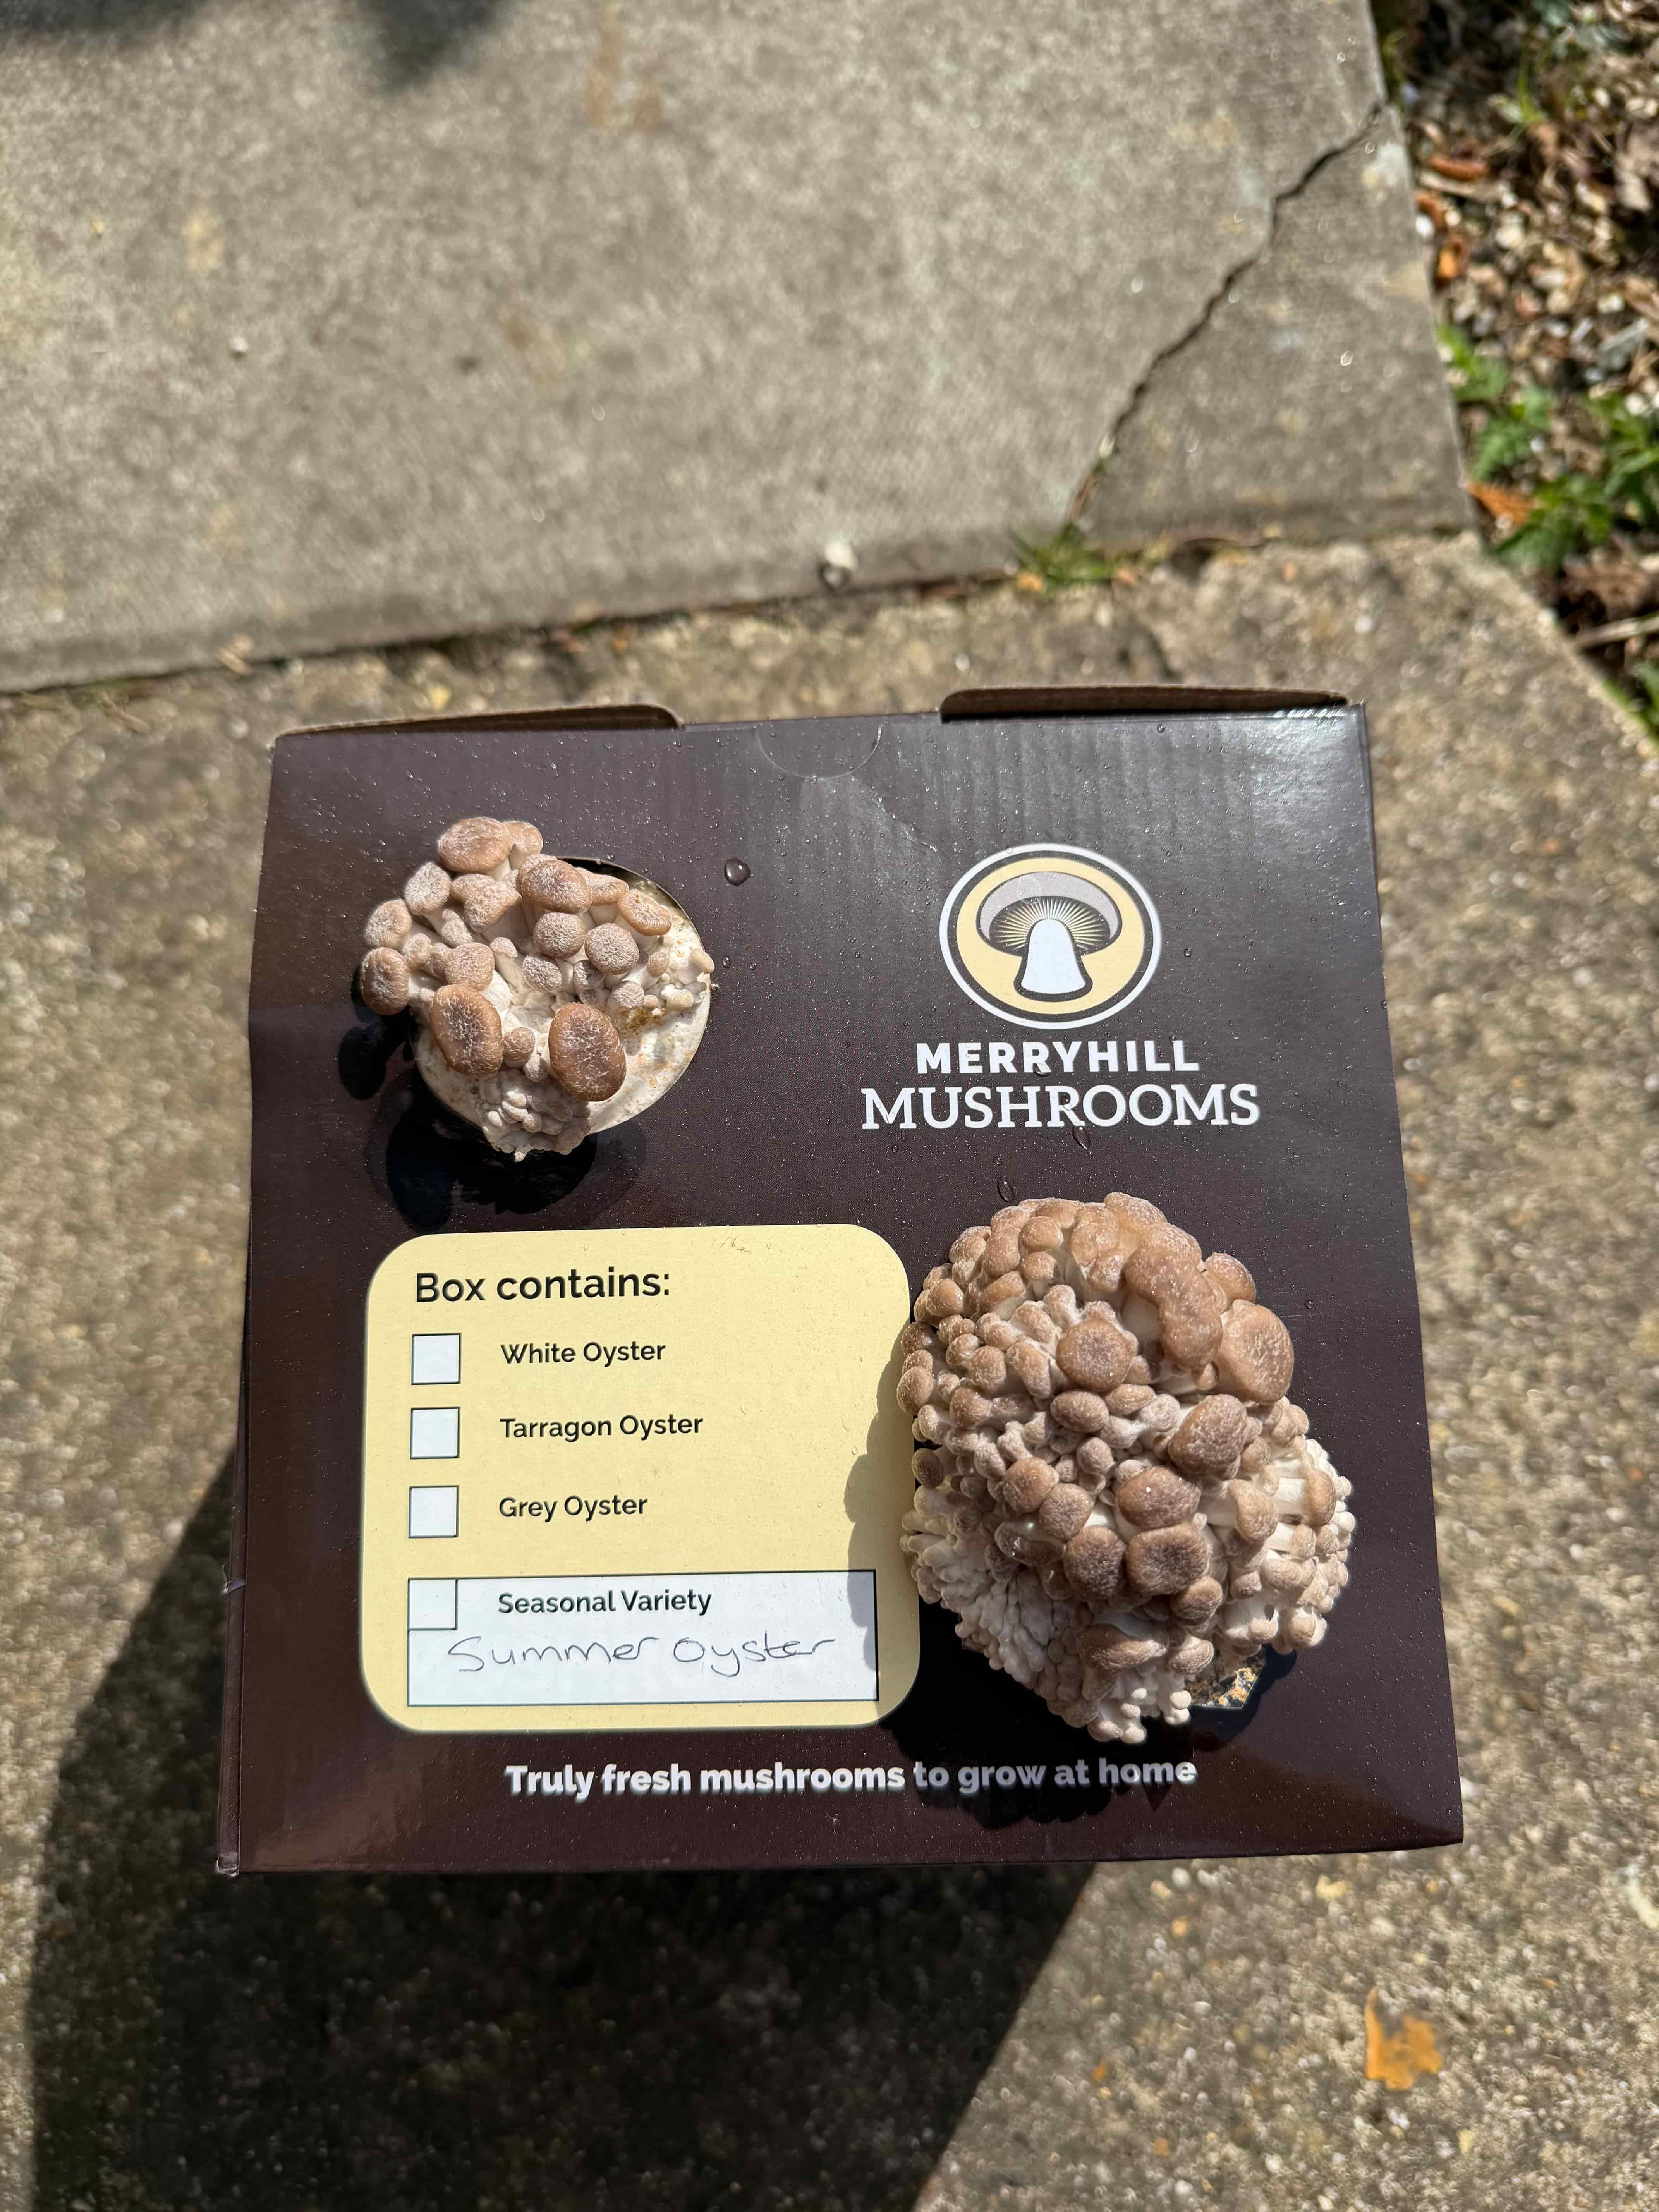
Day 5-6 - Clusters Expand
Cluster growth becomes clearly visible as the mushrooms push outward and start forming the familiar oyster shape. Caps tend to be more mottled and textured than White Oyster. This is exactly what healthy Summer Oyster looks like at this stage.
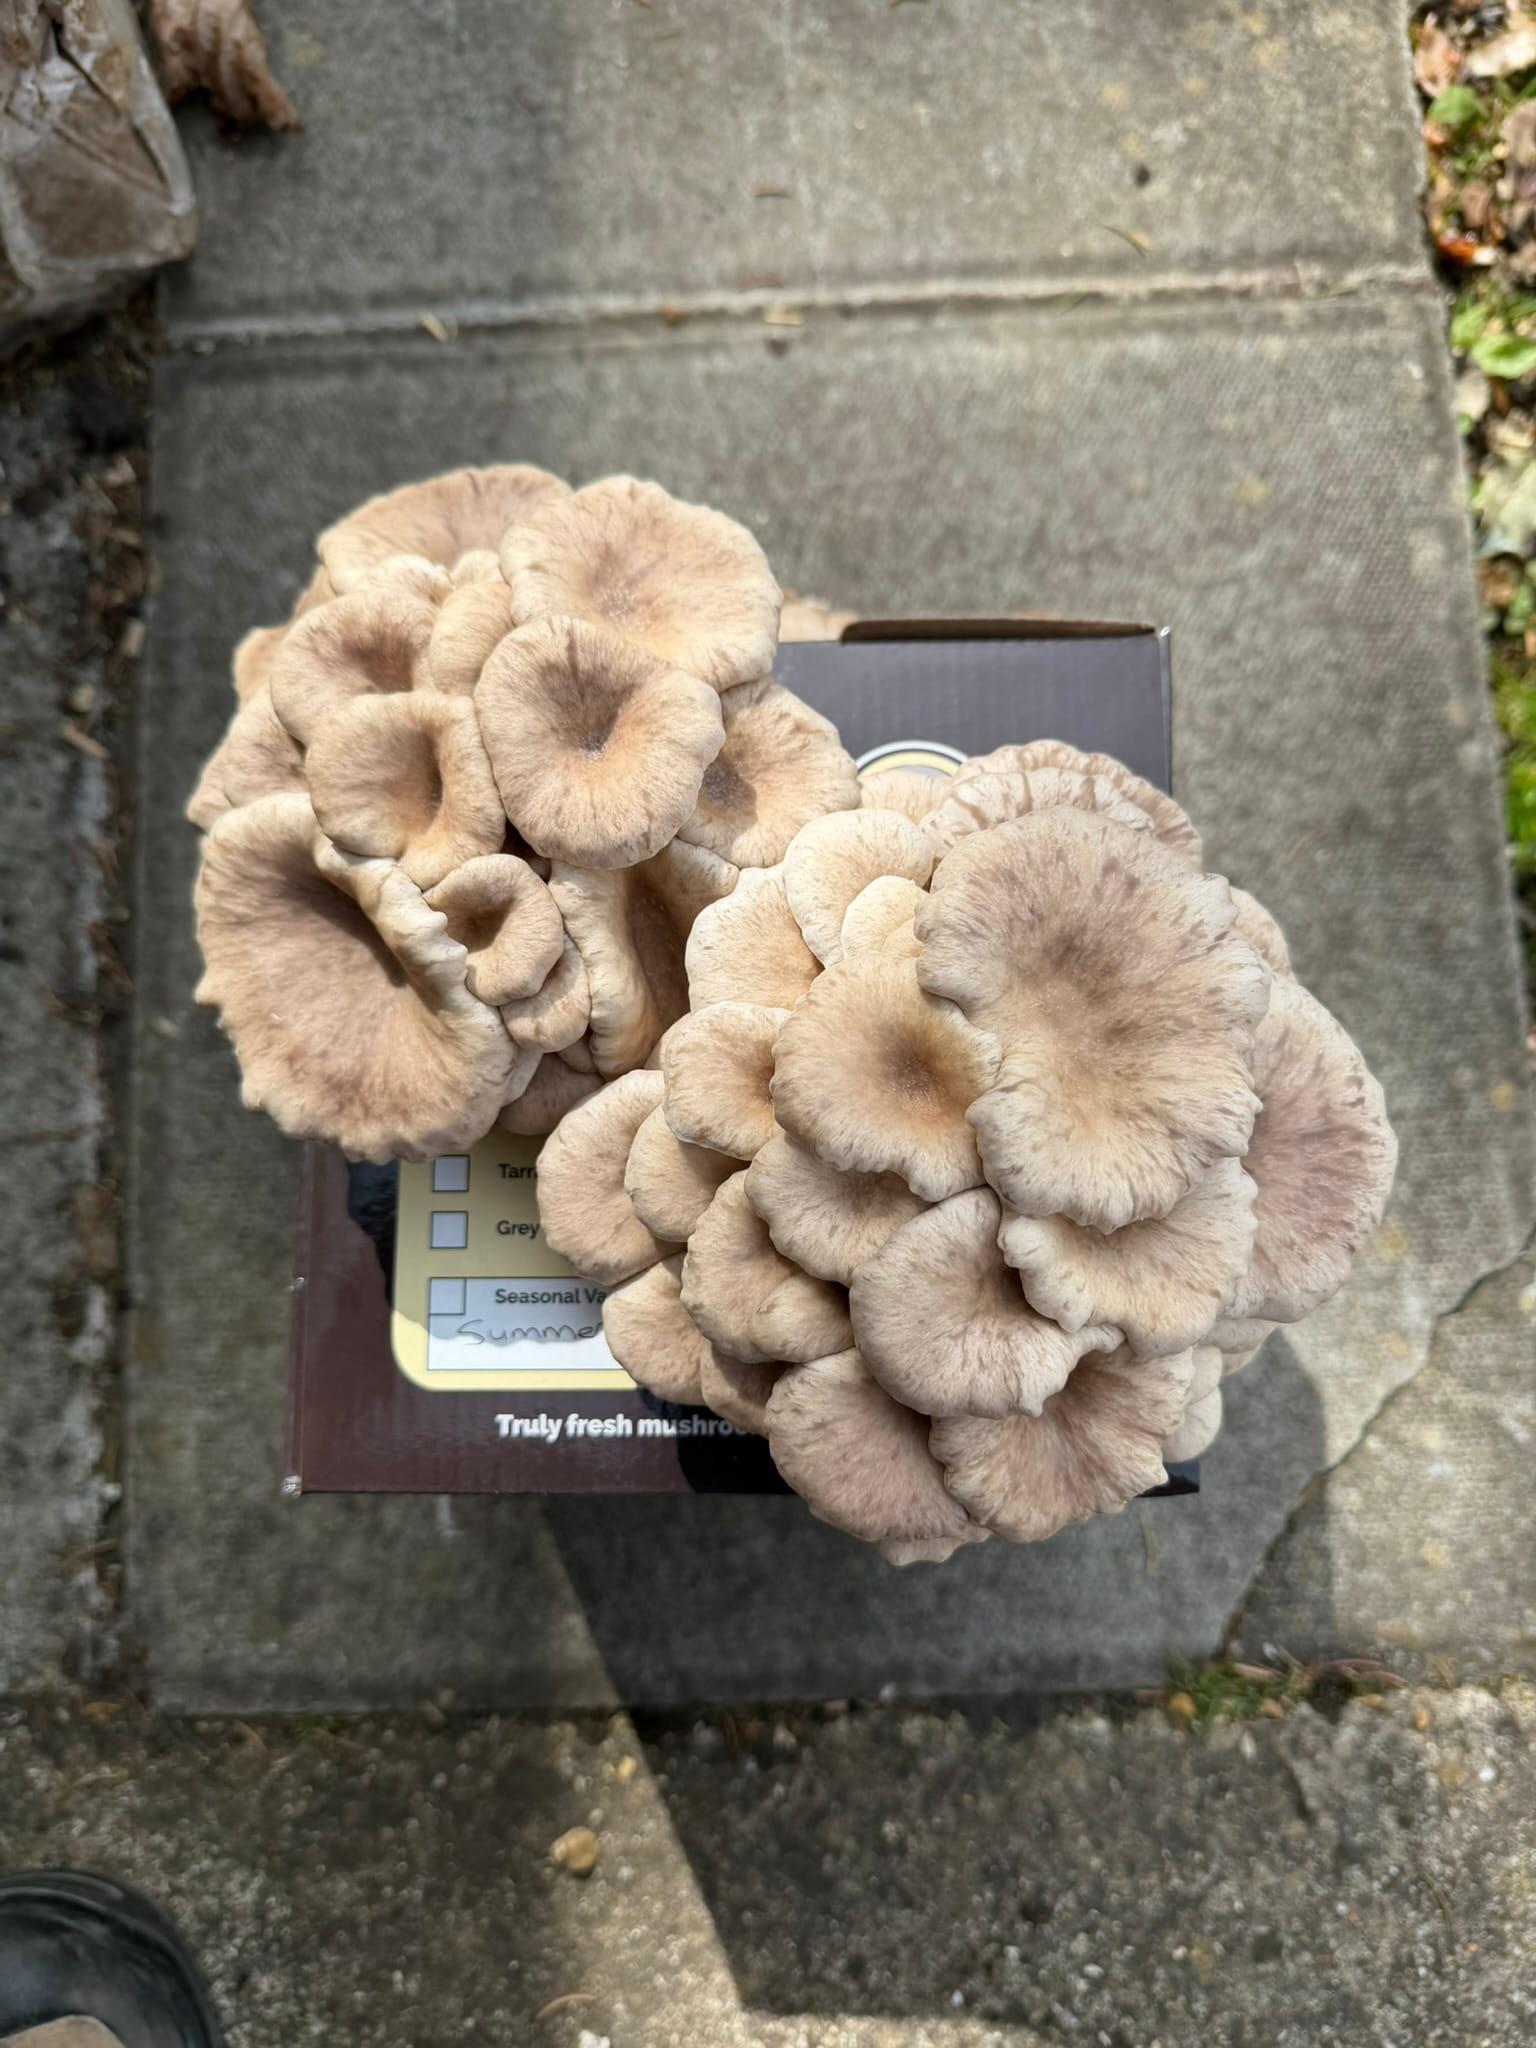
Day 6-7 - Approaching Harvest Size
The caps fill out as the cluster takes shape. Good humidity at this stage keeps the edges healthy and the caps expanding evenly. Some crinkled texture on the cap surface is completely normal for this variety.
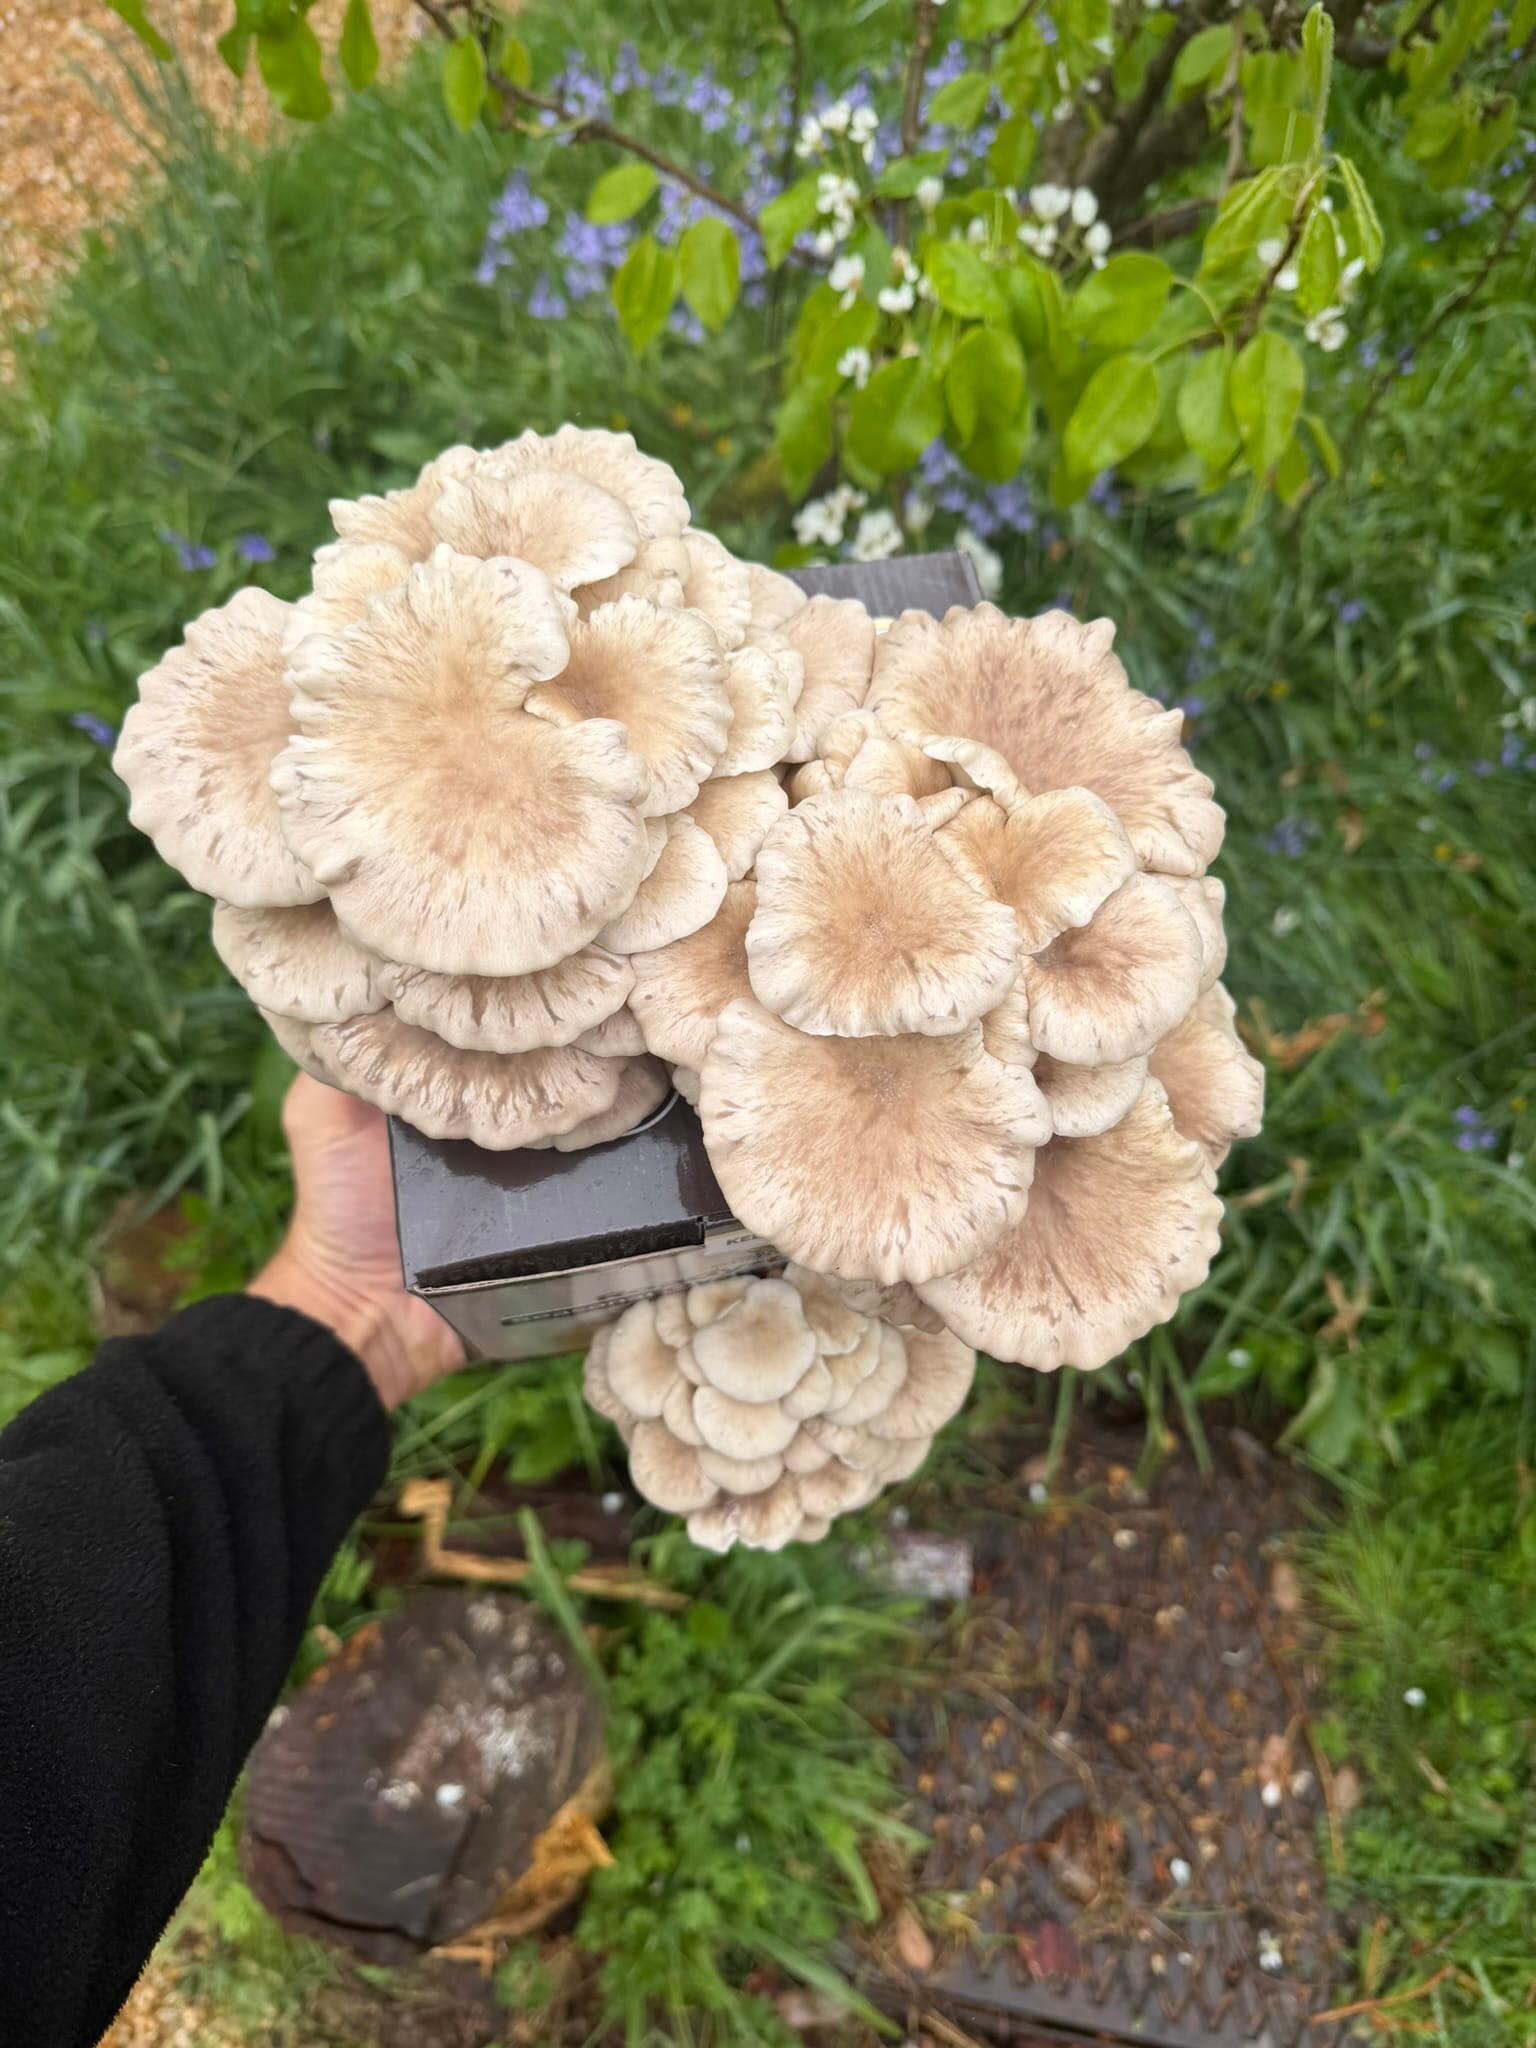
Day 7-10 - Harvest Time
Harvest when the caps have fully opened and flattened but before the edges curl upward. Fine white dust on the surface means spores are dropping. Pick promptly at that point. A firm twist and pull at the cluster base removes it cleanly. Keep misting after harvest and the next flush typically arrives within 1 to 2 weeks.
Timelines are typical results at 14-22°C with regular misting. View the full Summer Oyster growing timeline with real photos at each stage
Temperature, Humidity, and Fresh Air: What Controls Your Yield
Growing Tips
Keep room temperature between 19-21°C for fastest results. Summer Oyster grows well in British kitchens, living rooms, and conservatories through the warmer months with no extra equipment. Mist twice daily and keep air circulating around the kit. Long, thin stems with small caps mean the kit needs more fresh air. Move it to a better-ventilated spot and the next flush should reflect the difference.
Three things determine what your Summer Oyster kit produces: temperature, humidity, and fresh air. Neglect one and you'll see it in the mushrooms.
Temperature. Summer Oyster grows between 14 and 22°C. The fastest pinning and most developed caps happen at 19 to 21°C. Below 14°C growth crawls. Above 22°C, pin formation can stop entirely. During a British spring or summer, most indoor rooms sit naturally in this range with no intervention required.
Humidity. Mist twice daily into the growing holes throughout the life of the kit. Keep the compost surface damp, not saturated. If you're unsure whether you're applying the right amount, the Merryhill misting guide explains the difference and covers how to spot overwatering before it becomes a problem.
Fresh air exchange. This is the factor most growers overlook. CO2 builds up around the holes in a poorly ventilated space and the mushrooms respond by growing tall and thin rather than developing broad caps. Place the kit where air moves naturally. Avoid sealed spaces or cupboards. The fresh air exchange guide on Merryhill's site explains why this happens and how to fix it quickly.
Step Two - Pinning
Summer Oyster is a fast-cropping variety. At 19 to 21°C, small pale beige pin-heads start forming near the cut holes within 3 to 5 days of setup. Growth picks up quickly from there. Clusters that are small in the morning can be visibly larger by the same evening under good conditions.
That speed is part of what makes Summer Oyster forgiving for first-time growers. You see results fast, and the pace makes it easy to judge whether your misting and temperature are working. No pins after 7 days at the correct temperature? Check the Merryhill oyster mushroom troubleshooting guide for the most common causes and fixes.
Handy Growing Guide
Fruiting and Harvesting Summary
Summer Oyster grows in clusters with pale cream to soft beige caps. A mottled or slightly wrinkled cap surface is the natural look of Pleurotus pulmonarius at maturity, not a sign of damage. Mist twice daily, keep air moving around the kit, and harvest by gripping the cluster at the base and twisting it cleanly away. Long stems with small caps signal insufficient fresh air. Move the kit somewhere better ventilated and the next flush should improve. Keep misting after each harvest and the next flush follows within 1 to 2 weeks.
Step Three - Fruiting and Harvesting
Within 7 to 10 days, clusters will be pushing out of the holes and close to harvest size. Summer Oyster always fruits in clusters. That's normal, and it's also how this species grows in the wild. A typical first flush produces one or more generous clusters per hole, though not all three holes will necessarily produce at the same time.
The entire fruit body is edible except for the very base of the stem, closest to the compost. Summer Oyster harvests cleanly with a firm twist and pull at the cluster base. A knife is rarely needed.
Pick when the caps have fully opened and flattened out, but before the edges start to curl upward. A fine white dust on the surface of the box or the surrounding area means the mushrooms are releasing spores. They're still safe to eat at that point, but pick them without delay. Leaving them past spore-drop doesn't add weight or size. It makes the texture more brittle and shortens shelf life. Once harvested, Summer Oyster keeps well in the fridge for up to a week, best stored wrapped in a damp paper towel inside an open paper bag.
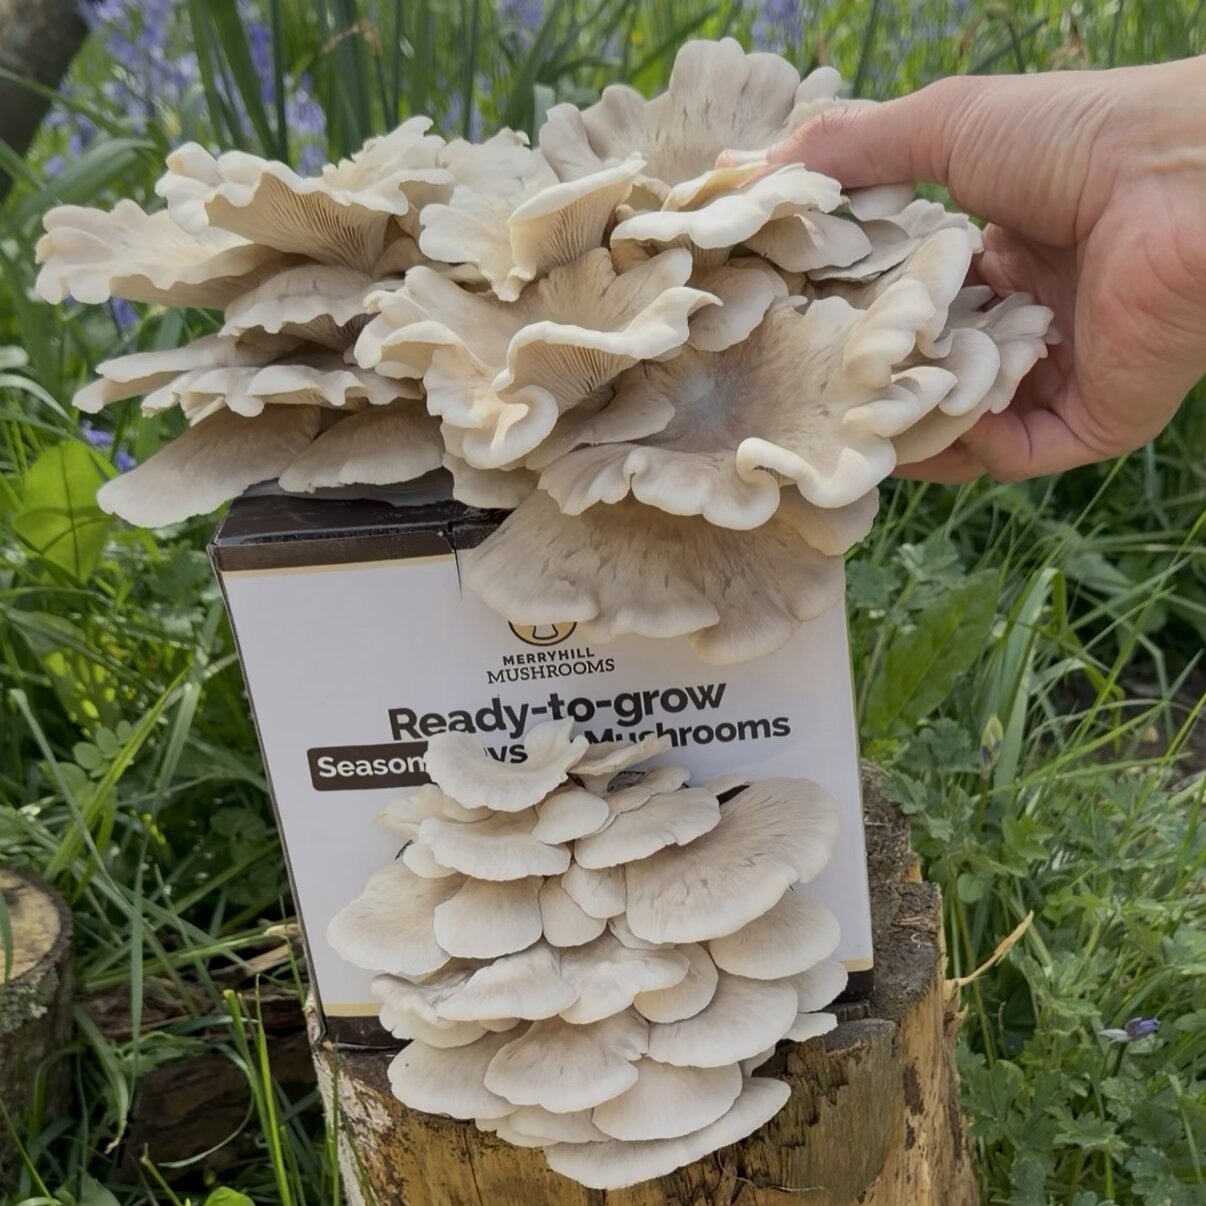
How and When to Harvest Summer Oyster Mushrooms
Grip the entire cluster firmly at the base and twist it away from the kit in one clean movement. Summer Oyster releases without a knife in most cases. If any base material stays stuck to the box, trim it cleanly, then discard only the root end. The stems and caps are both edible. After each harvest, continue misting twice daily and the next flush will follow in 1 to 2 weeks.
Most Merryhill Summer Oyster kits produce 2 to 3 harvests across their growing life, with the first flush being the largest. Total yield typically sits between 800g and 1.2kg. The Merryhill yield comparison guide breaks expected output down flush by flush across every kit in the range, which is useful if you're planning meals or comparing varieties for your next order.
Nutritional Profile of Summer Oyster Mushrooms
Summer Oyster (Pleurotus pulmonarius) delivers a solid nutritional return for something that takes almost no effort to grow. A 100g serving sits at around 33 kcal with roughly 3.3g of protein, negligible fat, and about 2.3g of dietary fibre. Mushrooms picked minutes before cooking retain more of their nutritional content than supermarket varieties that have been in transit and cold storage for days.
Cooking with Summer Oyster Mushrooms
The flavour is mild and lightly savoury with a gentle nuttiness that comes out well when pan-fried. The texture is tender but holds its shape in heat. Pan-fry in butter or oil over medium-high heat and it develops a quiet depth that doesn't compete with other ingredients. That restraint is what makes Summer Oyster genuinely useful in a weeknight kitchen rather than just interesting.
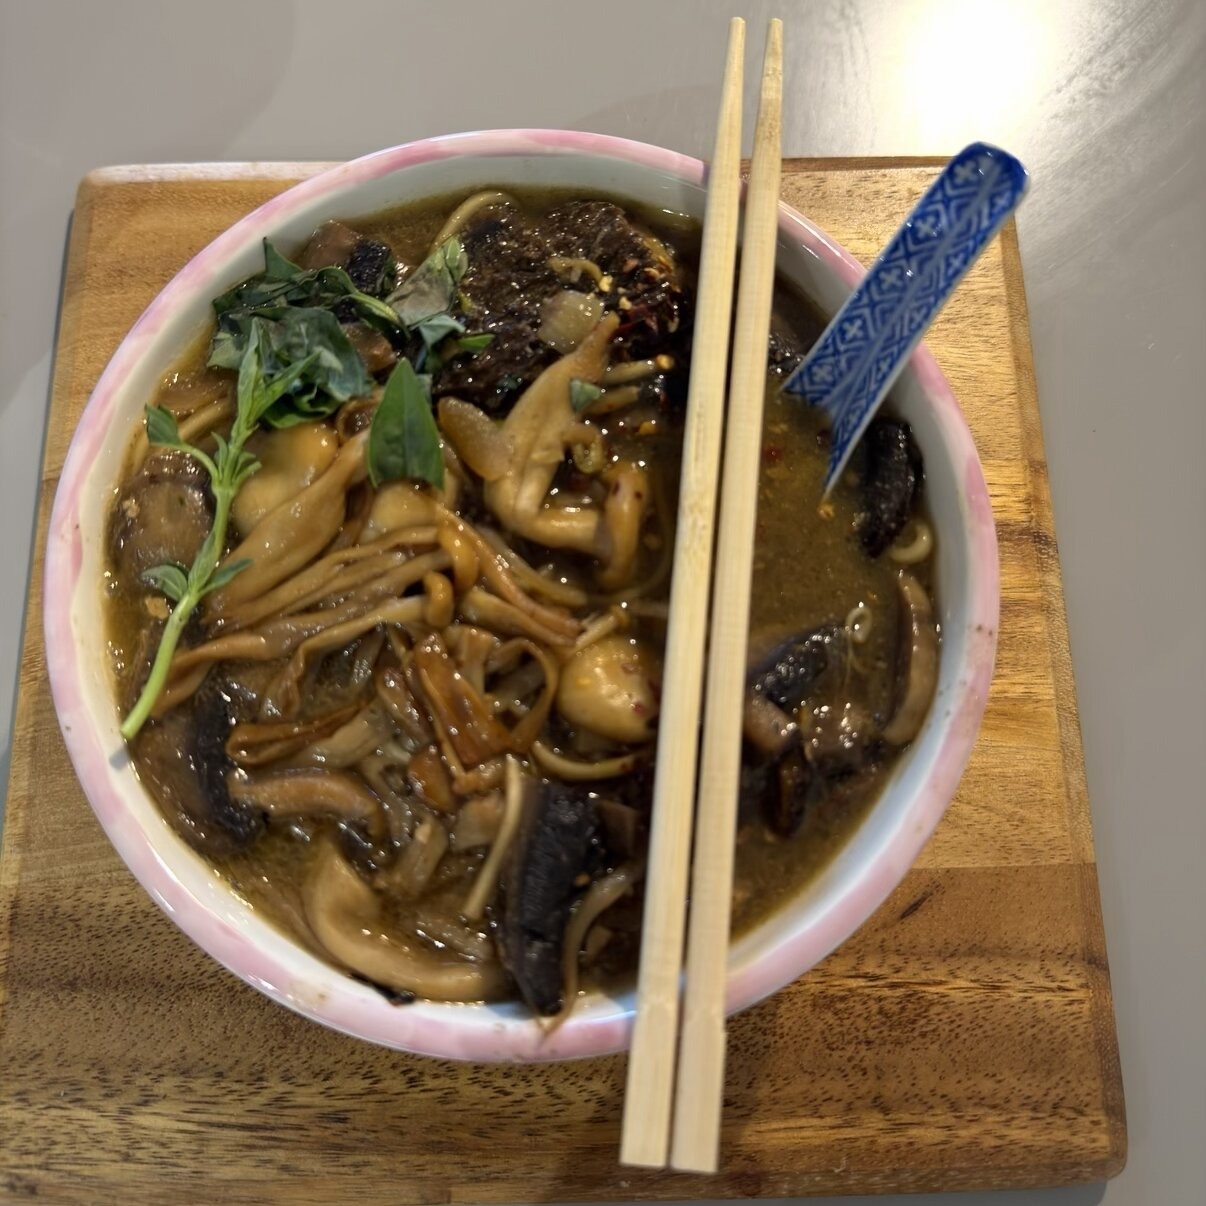
The pale cream caps hold their colour during cooking better than Pink Oyster, so they work in light-coloured dishes: cream pasta, risotto, omelettes. Solid in stir-fries and miso soups too, and a natural fit alongside grilled meat or fish. One flush from a Merryhill kit typically gives you enough for several meals comfortably.
For prep: tear or slice the clusters rather than chopping them finely, trim only the very base of the stem, and don't soak them before cooking. Oyster mushrooms absorb water quickly and release it in the pan if they go in waterlogged. For technique, the Merryhill oyster mushroom cooking guide covers timing, heat, and seasoning across all oyster varieties. For Summer Oyster recipes specifically, visit the Merryhill recipe blog.
Frequently Asked Questions
At 19 to 21°C with regular misting, expect your first harvest between day 7 and day 10 of setup. Cooler rooms within the 14 to 22°C range will still produce, just a few days later at each stage. Second and third flushes each take around 1 to 2 weeks after the previous harvest.
Between 14 and 22°C, with 19 to 21°C producing the fastest and most consistent results. Most UK living rooms, kitchens, and conservatories sit naturally in this range through spring and summer. Keep the kit away from radiators, cold windows overnight, and rooms that fluctuate significantly in temperature.
Almost always a fresh air issue. Carbon dioxide builds up around the holes in a poorly ventilated space and the mushrooms grow tall and thin rather than developing broad caps. Move the kit to a room with better natural airflow. The Merryhill oyster kit growth guide covers this and other common variations in kit behaviour.
Two to three flushes across 3 to 4 weeks, totalling roughly 800g to 1.2kg. The first flush is normally the largest. Keep misting after each harvest and the next flush follows in 1 to 2 weeks. Once the kit stops producing, the spent compost works well as a garden soil amendment.
In the fridge, wrapped in a damp paper towel inside an open paper bag. Good for up to a week. Avoid sealed plastic bags or containers, which trap moisture and speed up deterioration. Clean them just before cooking rather than before storing.