Mushroom Harvest Guide: How to Pick Every Variety at the Perfect Moment
Mushroom Harvest Guide: How to Pick Every Variety at the Perfect Moment
Most home-grown mushrooms are ready to harvest when the caps have fully formed but the edges have not yet flattened or curled upward. That single visual cue applies across nearly every variety Merryhill Mushrooms sells, but each kit has small differences in shape, timing, and picking technique that shape the final result. This guide shows exactly what ripe looks like for every variety in the range, how to remove mushrooms cleanly, and what happens if you wait a day too long.
Key takeaways
- Pick when caps are fully shaped but the edges have not flattened out or turned upward.
- Too early means smaller yield and less flavour. Too late means soft texture, spores, and shorter shelf life.
- Oyster clusters come away in one piece with a firm twist at the base of the stem.
- Shiitake, King Oyster, Lion's Mane, and Black Pearl are usually cut cleanly with a sharp knife.
- Chestnut and White mushrooms are picked individually with a gentle twist and pull.
- Leaving mushrooms a day too long drops spores, softens texture, and shortens shelf life.
- Always clear any leftover stems or fragments from the block to protect the next flush.
Why does harvest timing matter so much?
Harvest timing shapes flavour, texture, shelf life, and the chance of a strong second flush. Mushrooms picked at the right moment are firm, fresh, and store well in the fridge for several days. Mushrooms left too long start releasing spores, which not only dusts the surrounding surfaces but also signals the mushroom to stop putting energy into growth and begin breaking down. A day too early usually costs yield. A day too late usually costs texture and shelf life.
The good news is that the ripeness window is usually generous. Most Merryhill Mushrooms ready growing kits give a clear 24 to 48 hour harvest window where the mushrooms are at their best. Checking the kit twice a day during this period is usually enough to catch the perfect moment.
How to use this guide
Find your kit variety below and compare your mushrooms against the "ready" image. Each section also shows what overripe looks like so you know how much time you have in hand. Harvest methods vary between varieties, so a picking technique that suits Pink Oyster will not always suit King Oyster or Lion's Mane. Reading the short method note for each variety before picking gives the cleanest result and protects the block for a second flush.
When should you harvest a Pink Oyster mushroom kit?
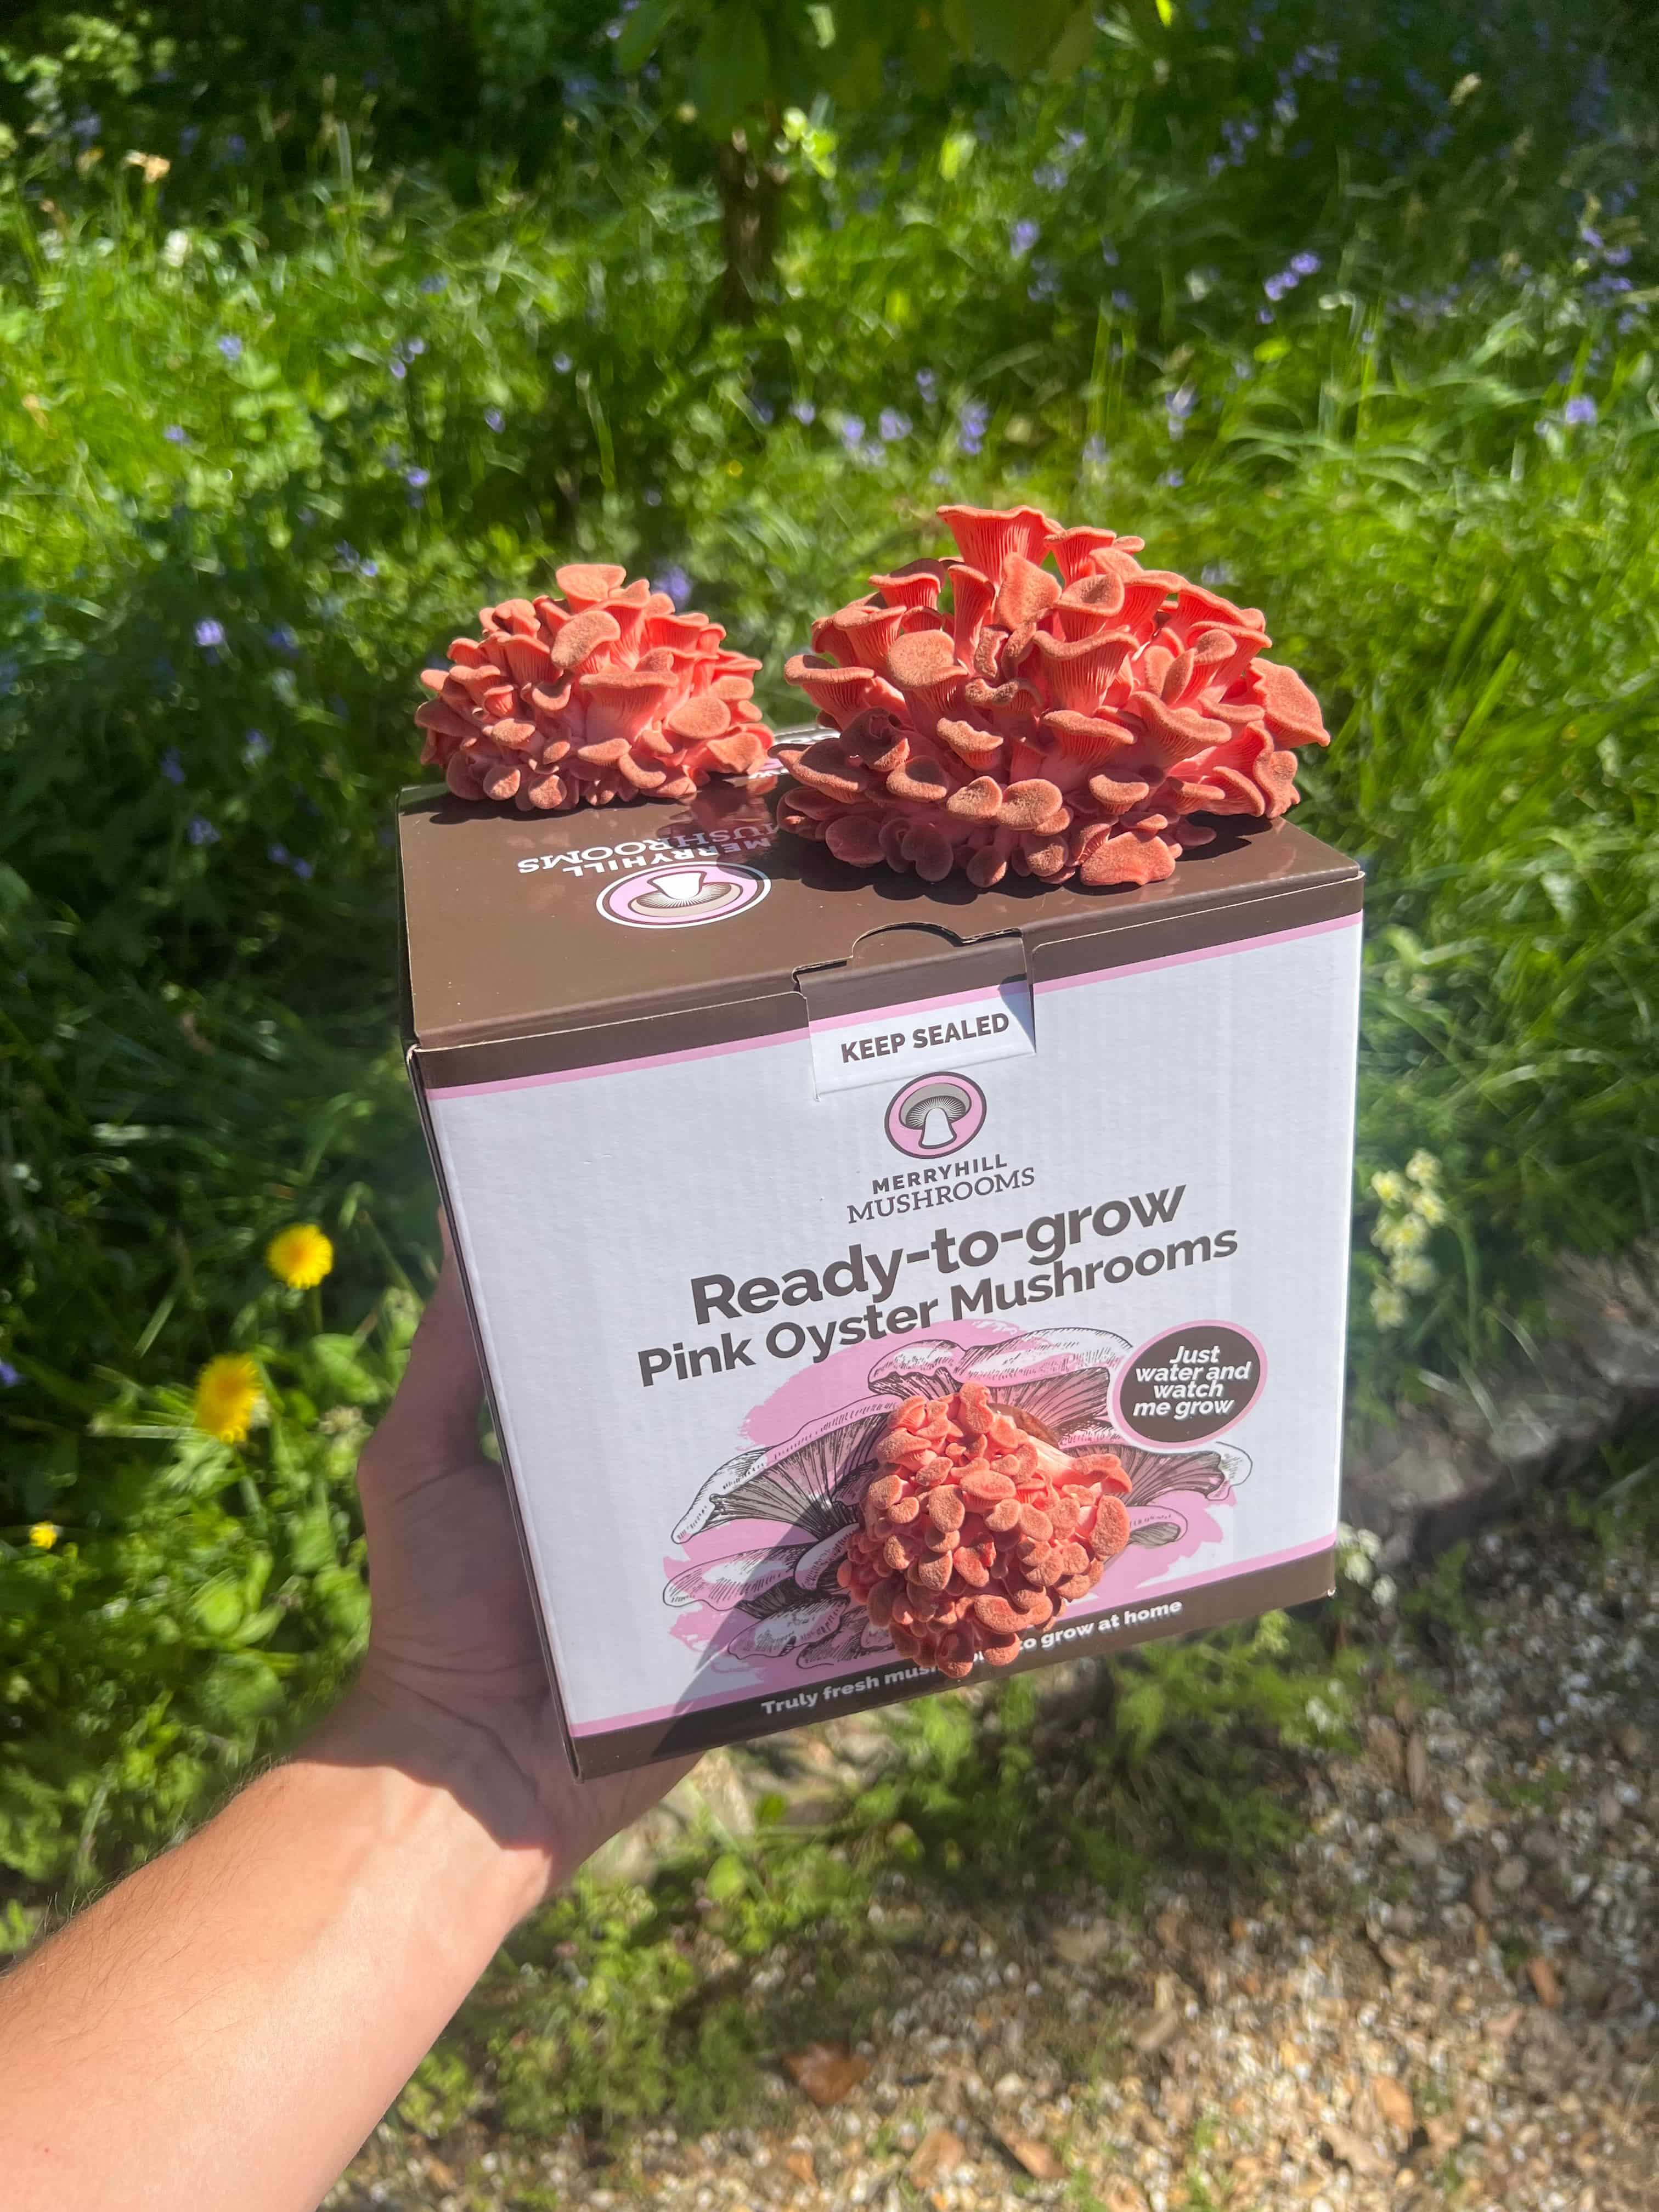
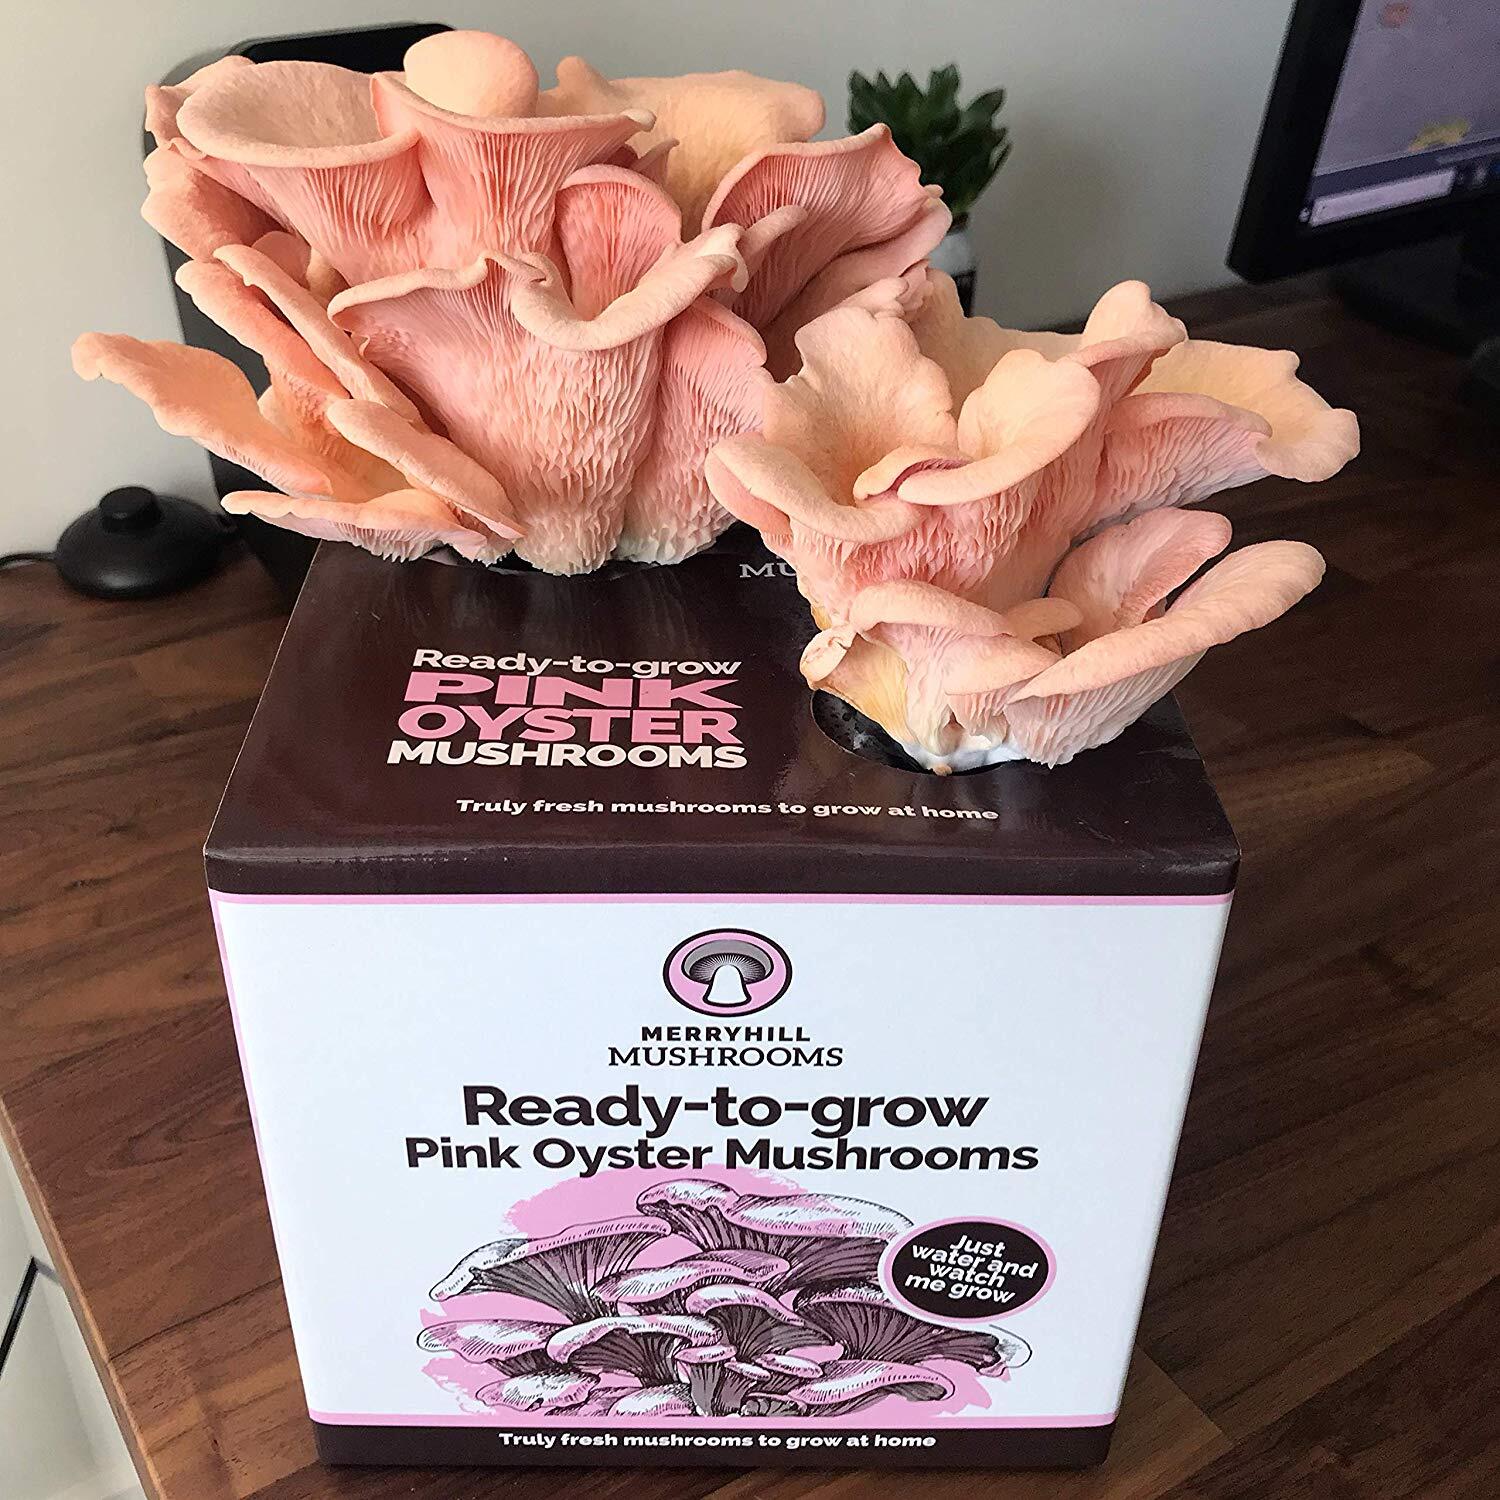
Pink Oyster is ready to harvest once the cluster has reached full size, the caps have fanned out, and the edges are still slightly curled under rather than lying flat. The pink colour is usually at its most vivid during the harvest window and starts fading to a paler salmon shade as the mushrooms age. Pink Oyster moves fast, so the gap between "almost ready" and "starting to drop spores" can be as little as 12 hours.
Too early
Caps are still forming and the cluster has not filled out. Picking now means smaller yield and less developed flavour. Wait another day or two.
Ready to pick
Caps are fully formed, bright pink, and the edges still turn slightly downward. The cluster feels firm when lifted from underneath.

Left too long
Caps flatten and turn upward, colour pales towards salmon, and a fine white spore dust settles on nearby surfaces. Texture turns soft and shelf life drops to a day or two.
How to pick
Slide your fingers underneath the whole cluster, grip close to the base, and twist gently while pulling away from the block. The entire cluster should lift off as one piece. Avoid cutting individual mushrooms because any stump left behind can rot and affect the next flush.

Twist the whole Pink Oyster cluster at the base to remove it in one piece.
How do you know when Lion's Mane is ready to harvest?
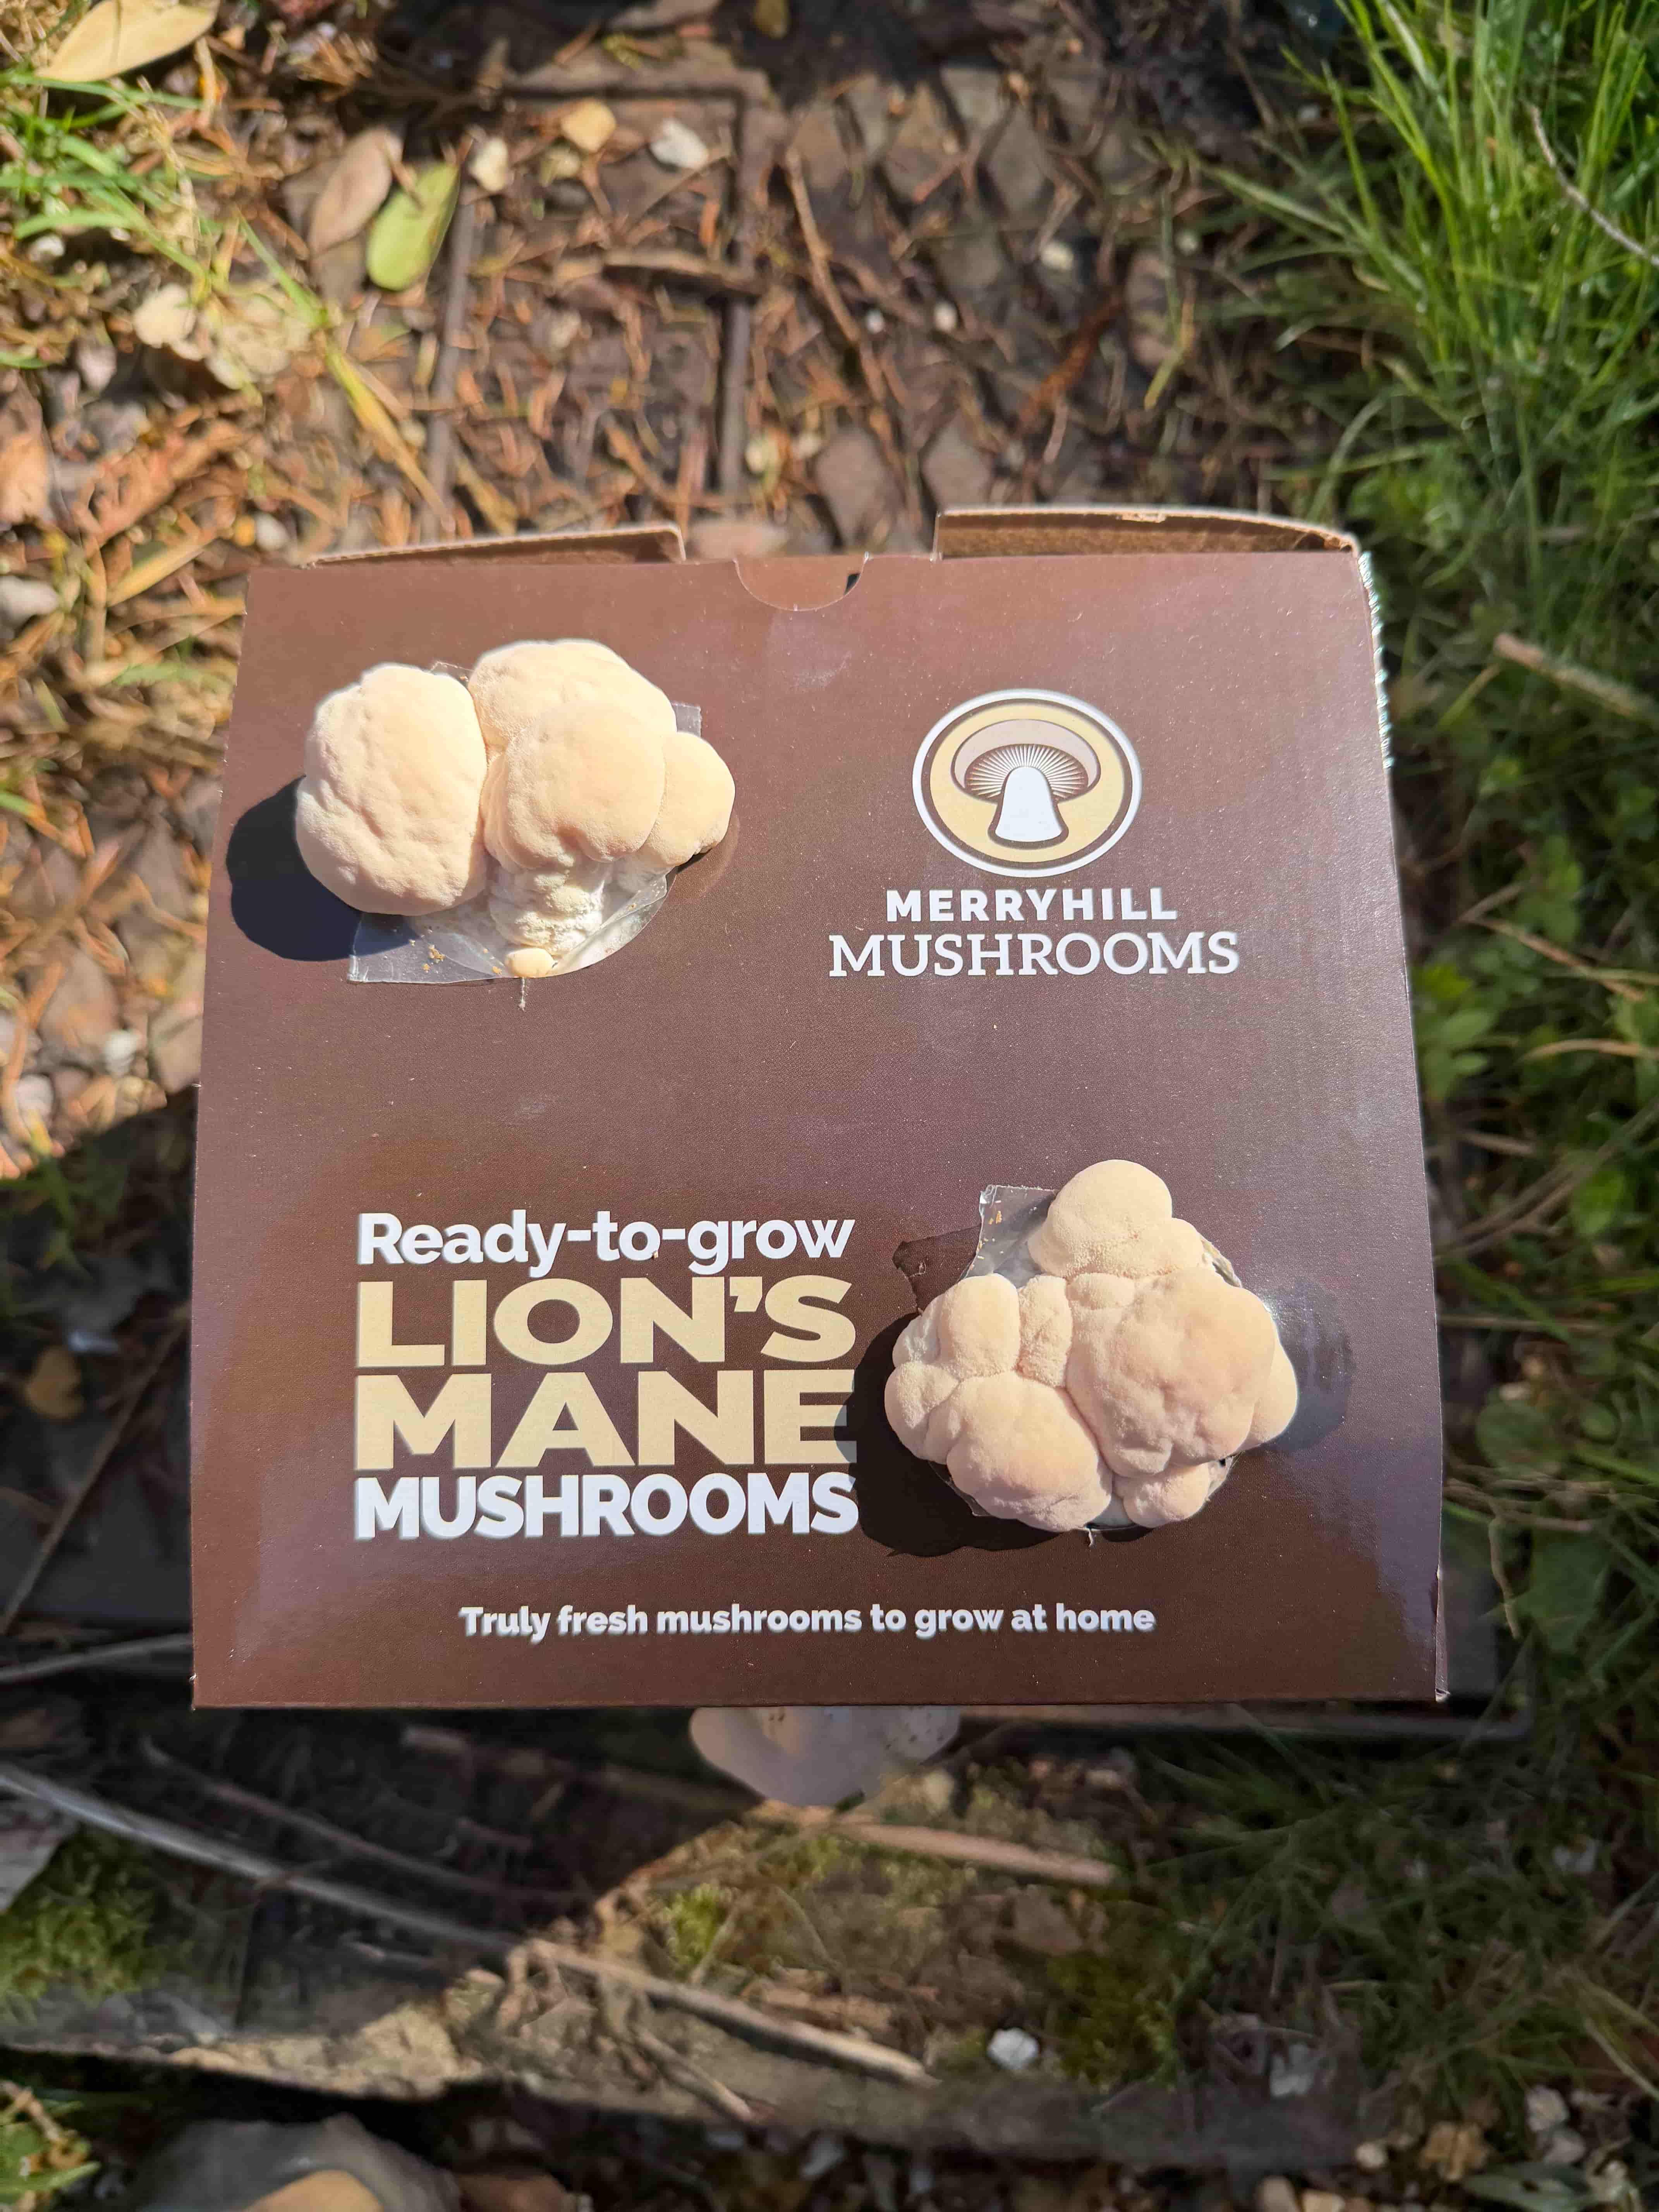
Lion's Mane is ready when the fruit body is pure white, firm to the touch, and the long hanging spines have developed fully across the surface. The whole cluster should look like a soft icicle shape with clear shaggy texture. Timing matters more with Lion's Mane than with many other varieties because the white colour turns yellow or pink fairly quickly once the mushroom passes its peak.
Too early
Spines are just beginning to form and the body is still smooth in places. Picking now means smaller size and less of the shaggy texture that gives Lion's Mane its character.
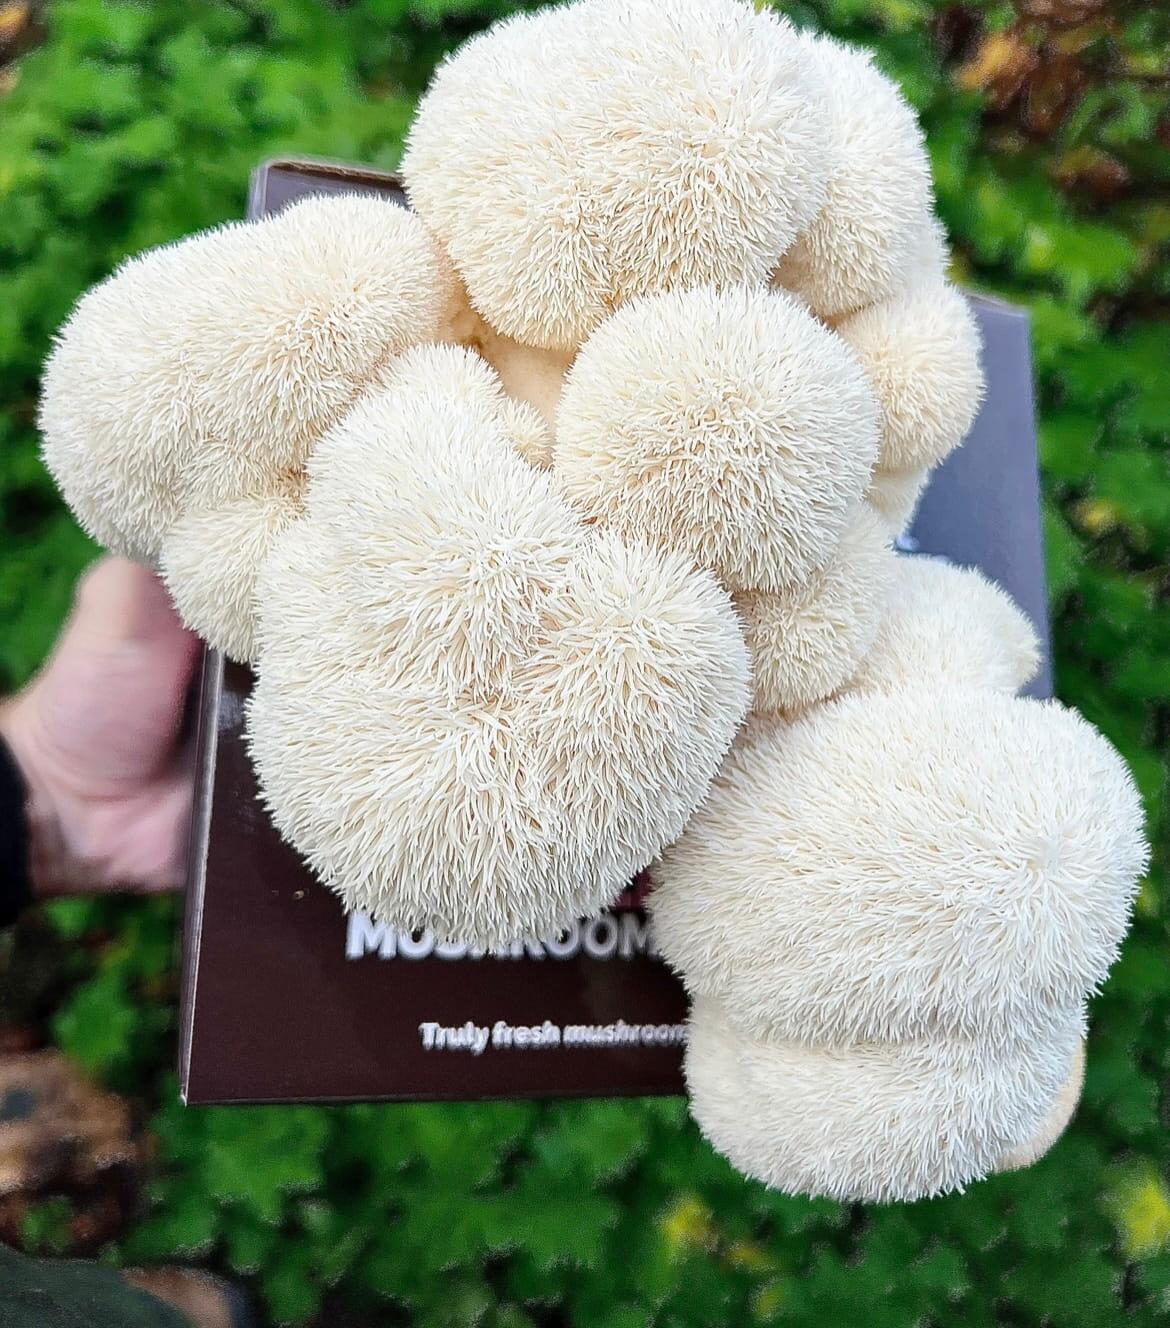
Ready to pick
Pure white colour, firm body, and spines clearly formed across the surface. The mushroom should feel dense rather than spongy.
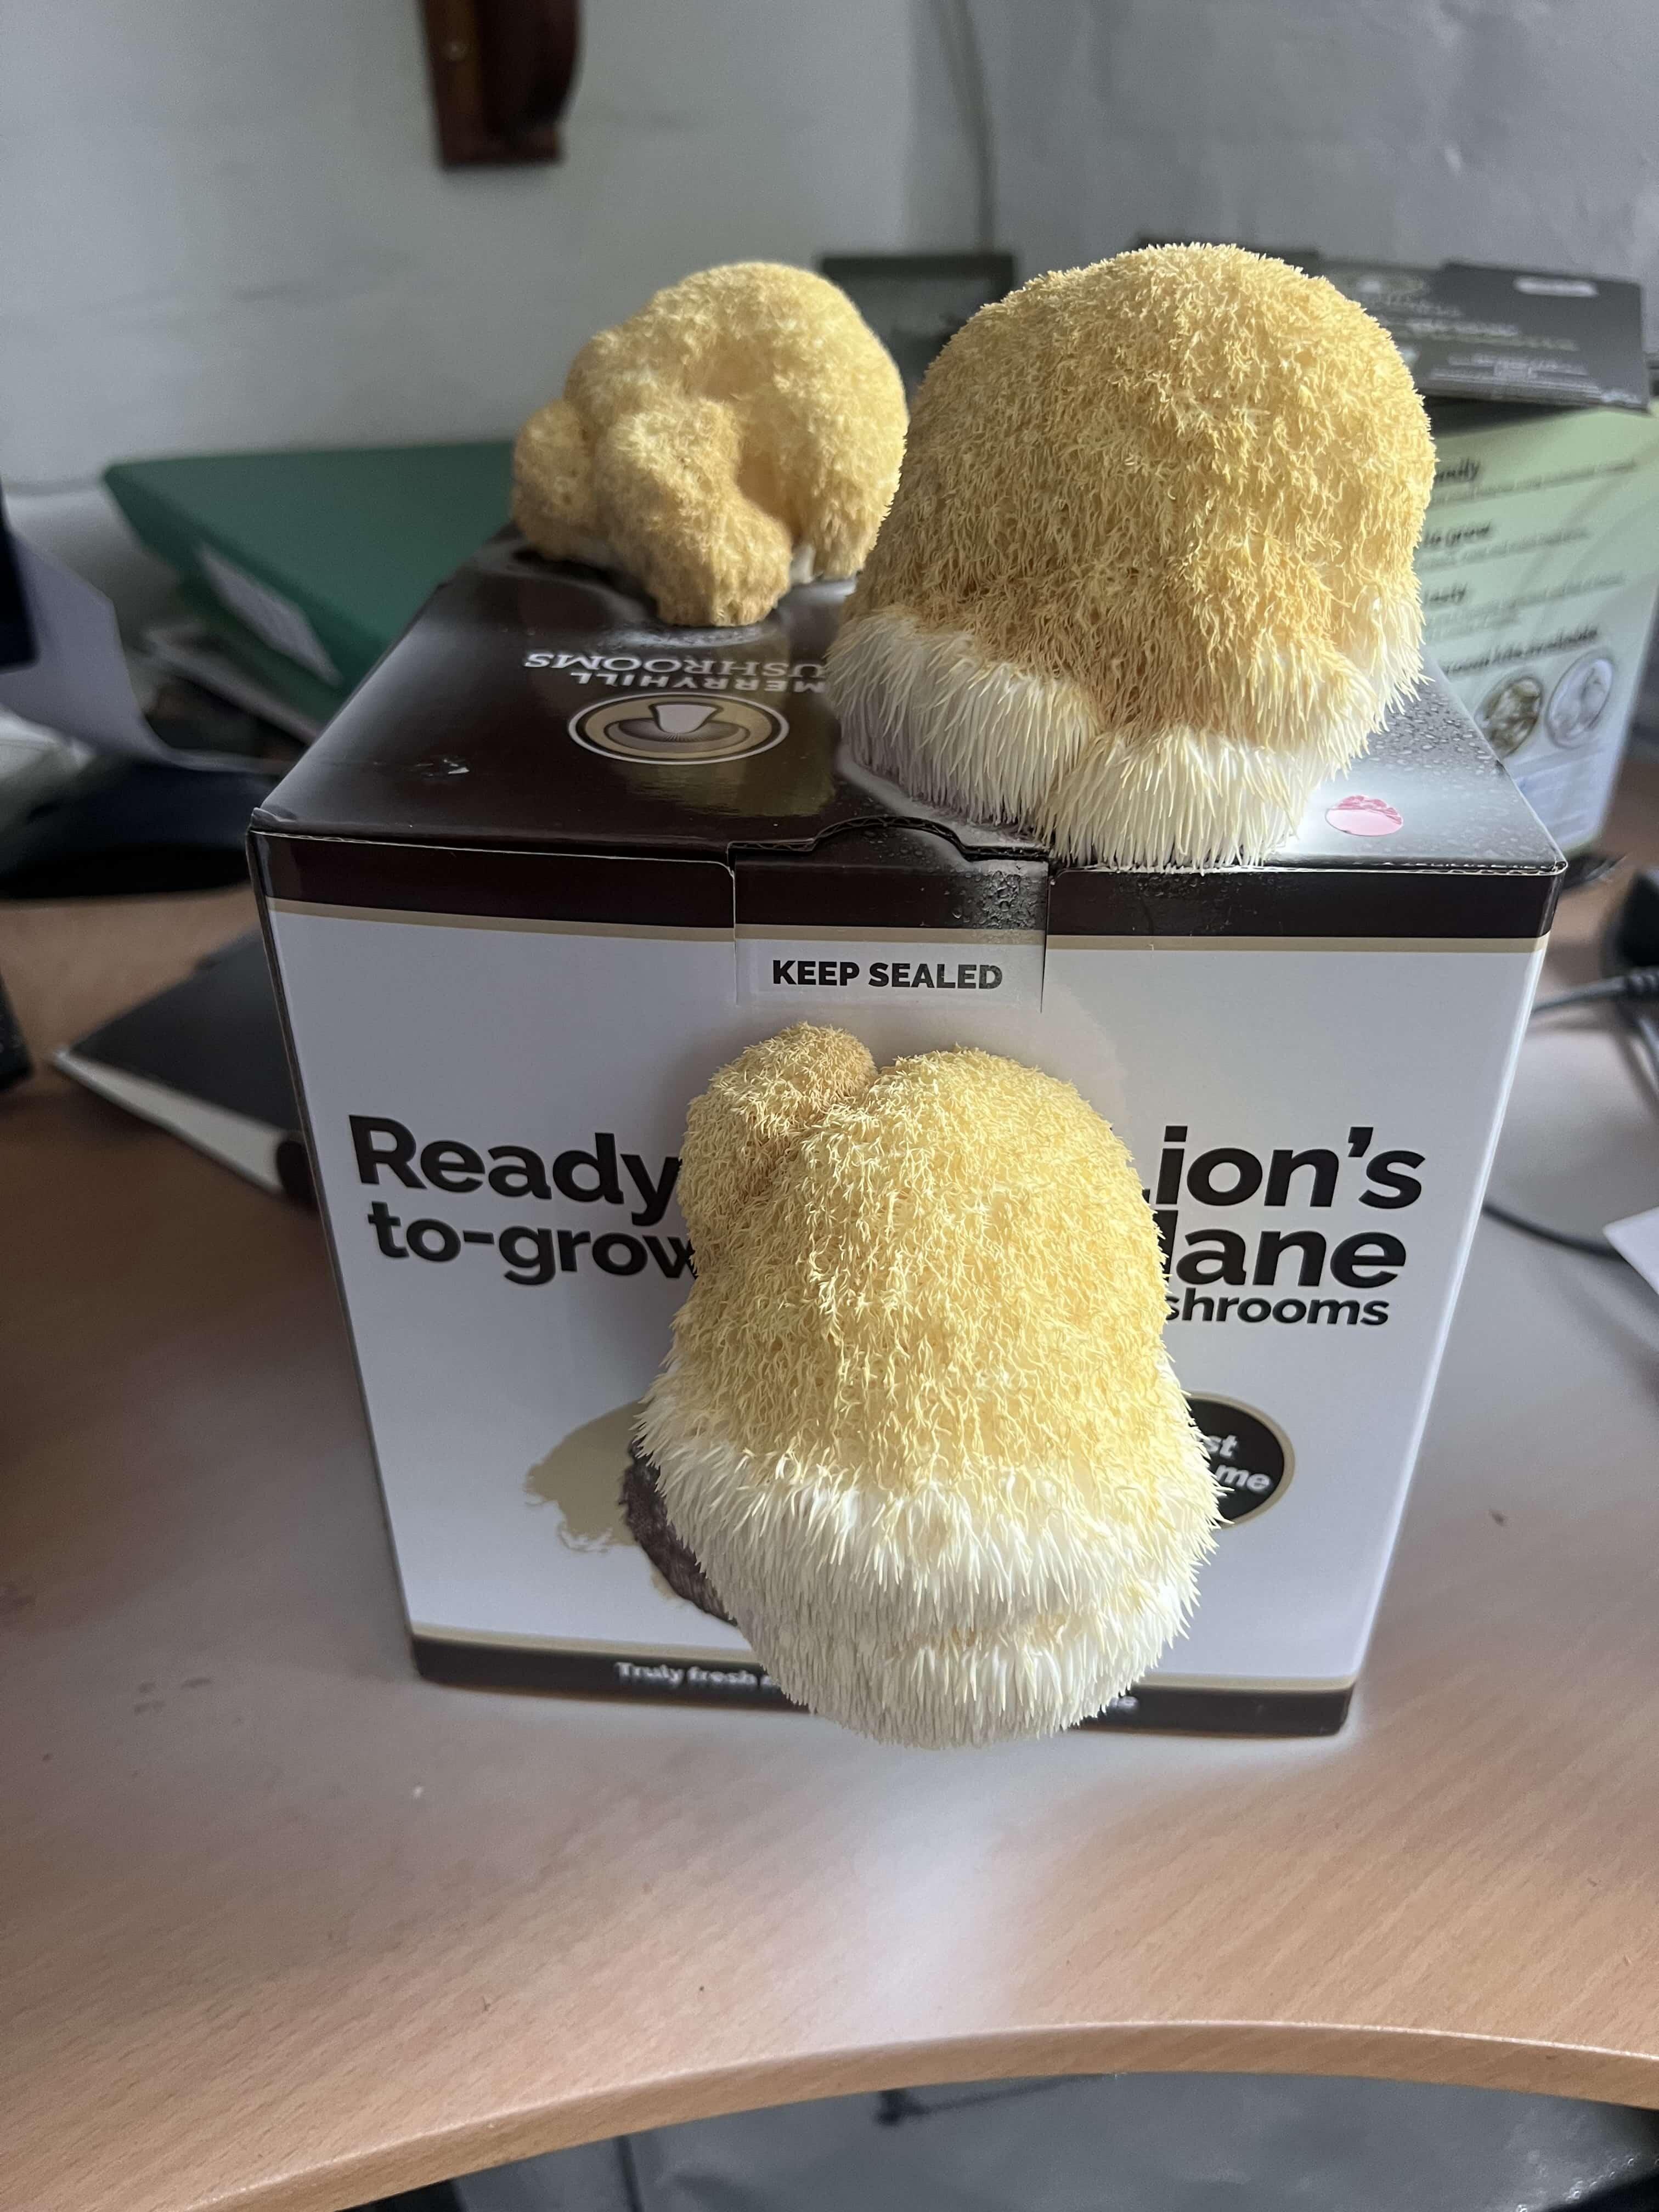
Left too long
Colour fades to cream or yellow and the surface can start to feel dry. Flavour turns slightly bitter once colour changes are visible.
How to pick
Use a twisting and pulling technique to remove the entire cluster as a whole. The full Lion's Mane instructions cover after-harvest care.
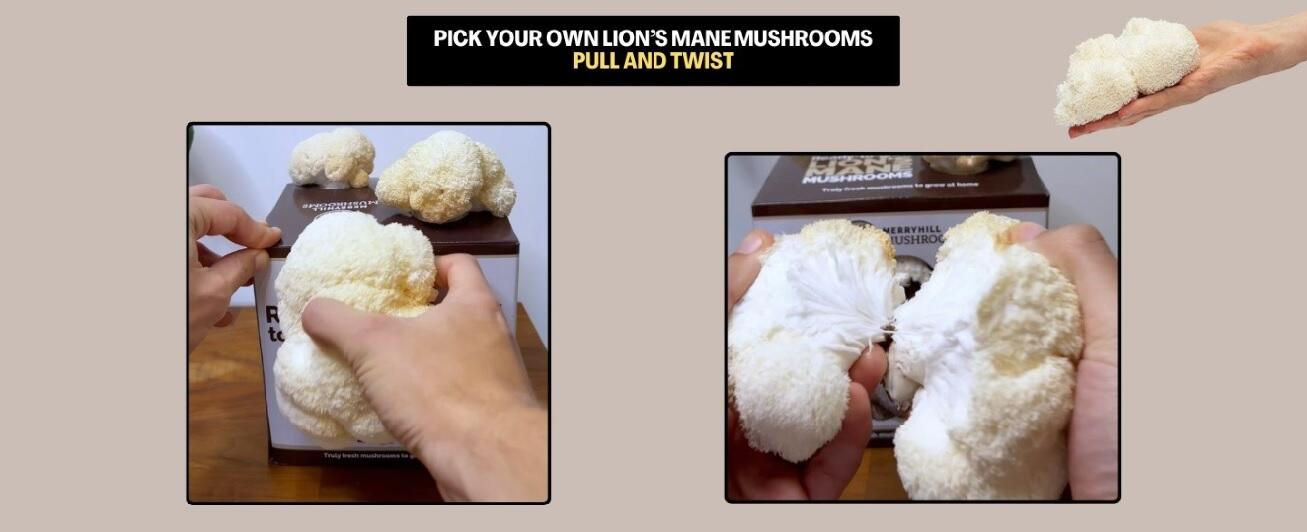
Pull Lion's Mane cleanly away from the box by twisting and pulling.
When is a Shiitake mushroom at its best for picking?
Shiitake is ready when the caps have opened to roughly the size of a two pound coin and the edges are still curled under, with the gills partially visible underneath. The cap should feel firm and the colour should be a rich tan brown. Shiitake has a wider harvest window than most oyster types, which makes it one of the more forgiving varieties to judge.

Too early
Caps are still small and tightly closed, with no gills visible underneath. Give them another day or two to open out and reach full size.
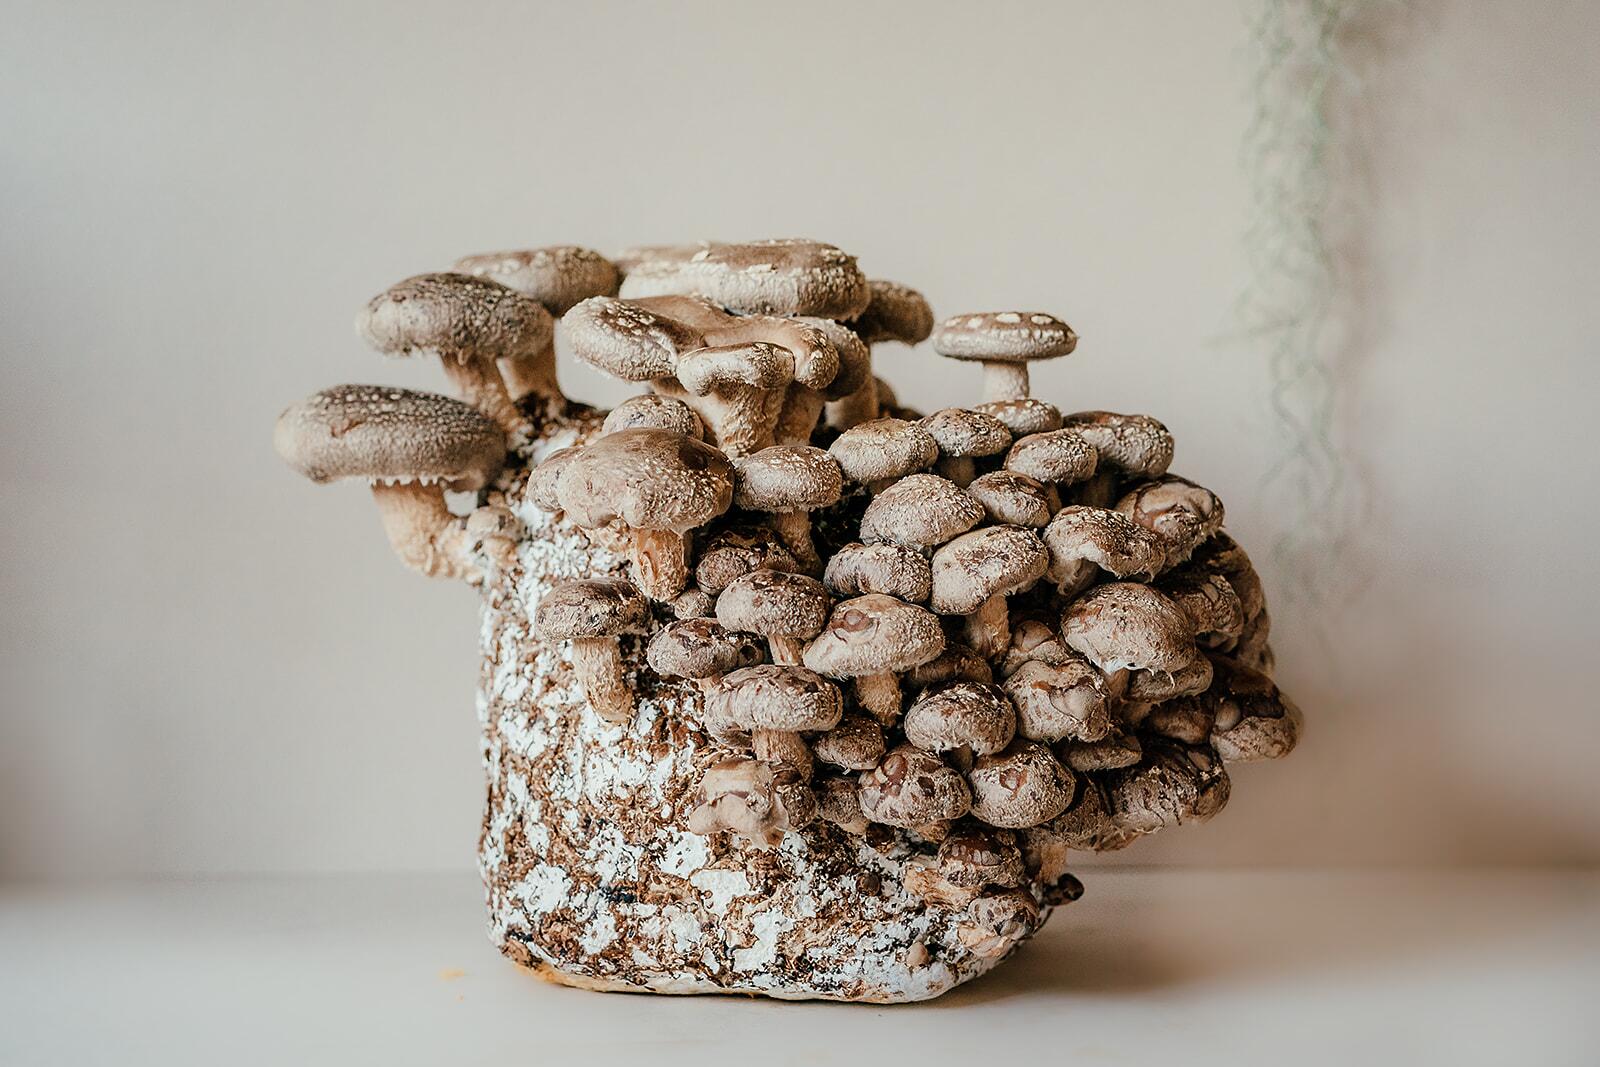
Ready to pick
Caps are open but the edges curl slightly under. Gills on the underside are visible but still tightly packed. The cap feels firm.
Left too long
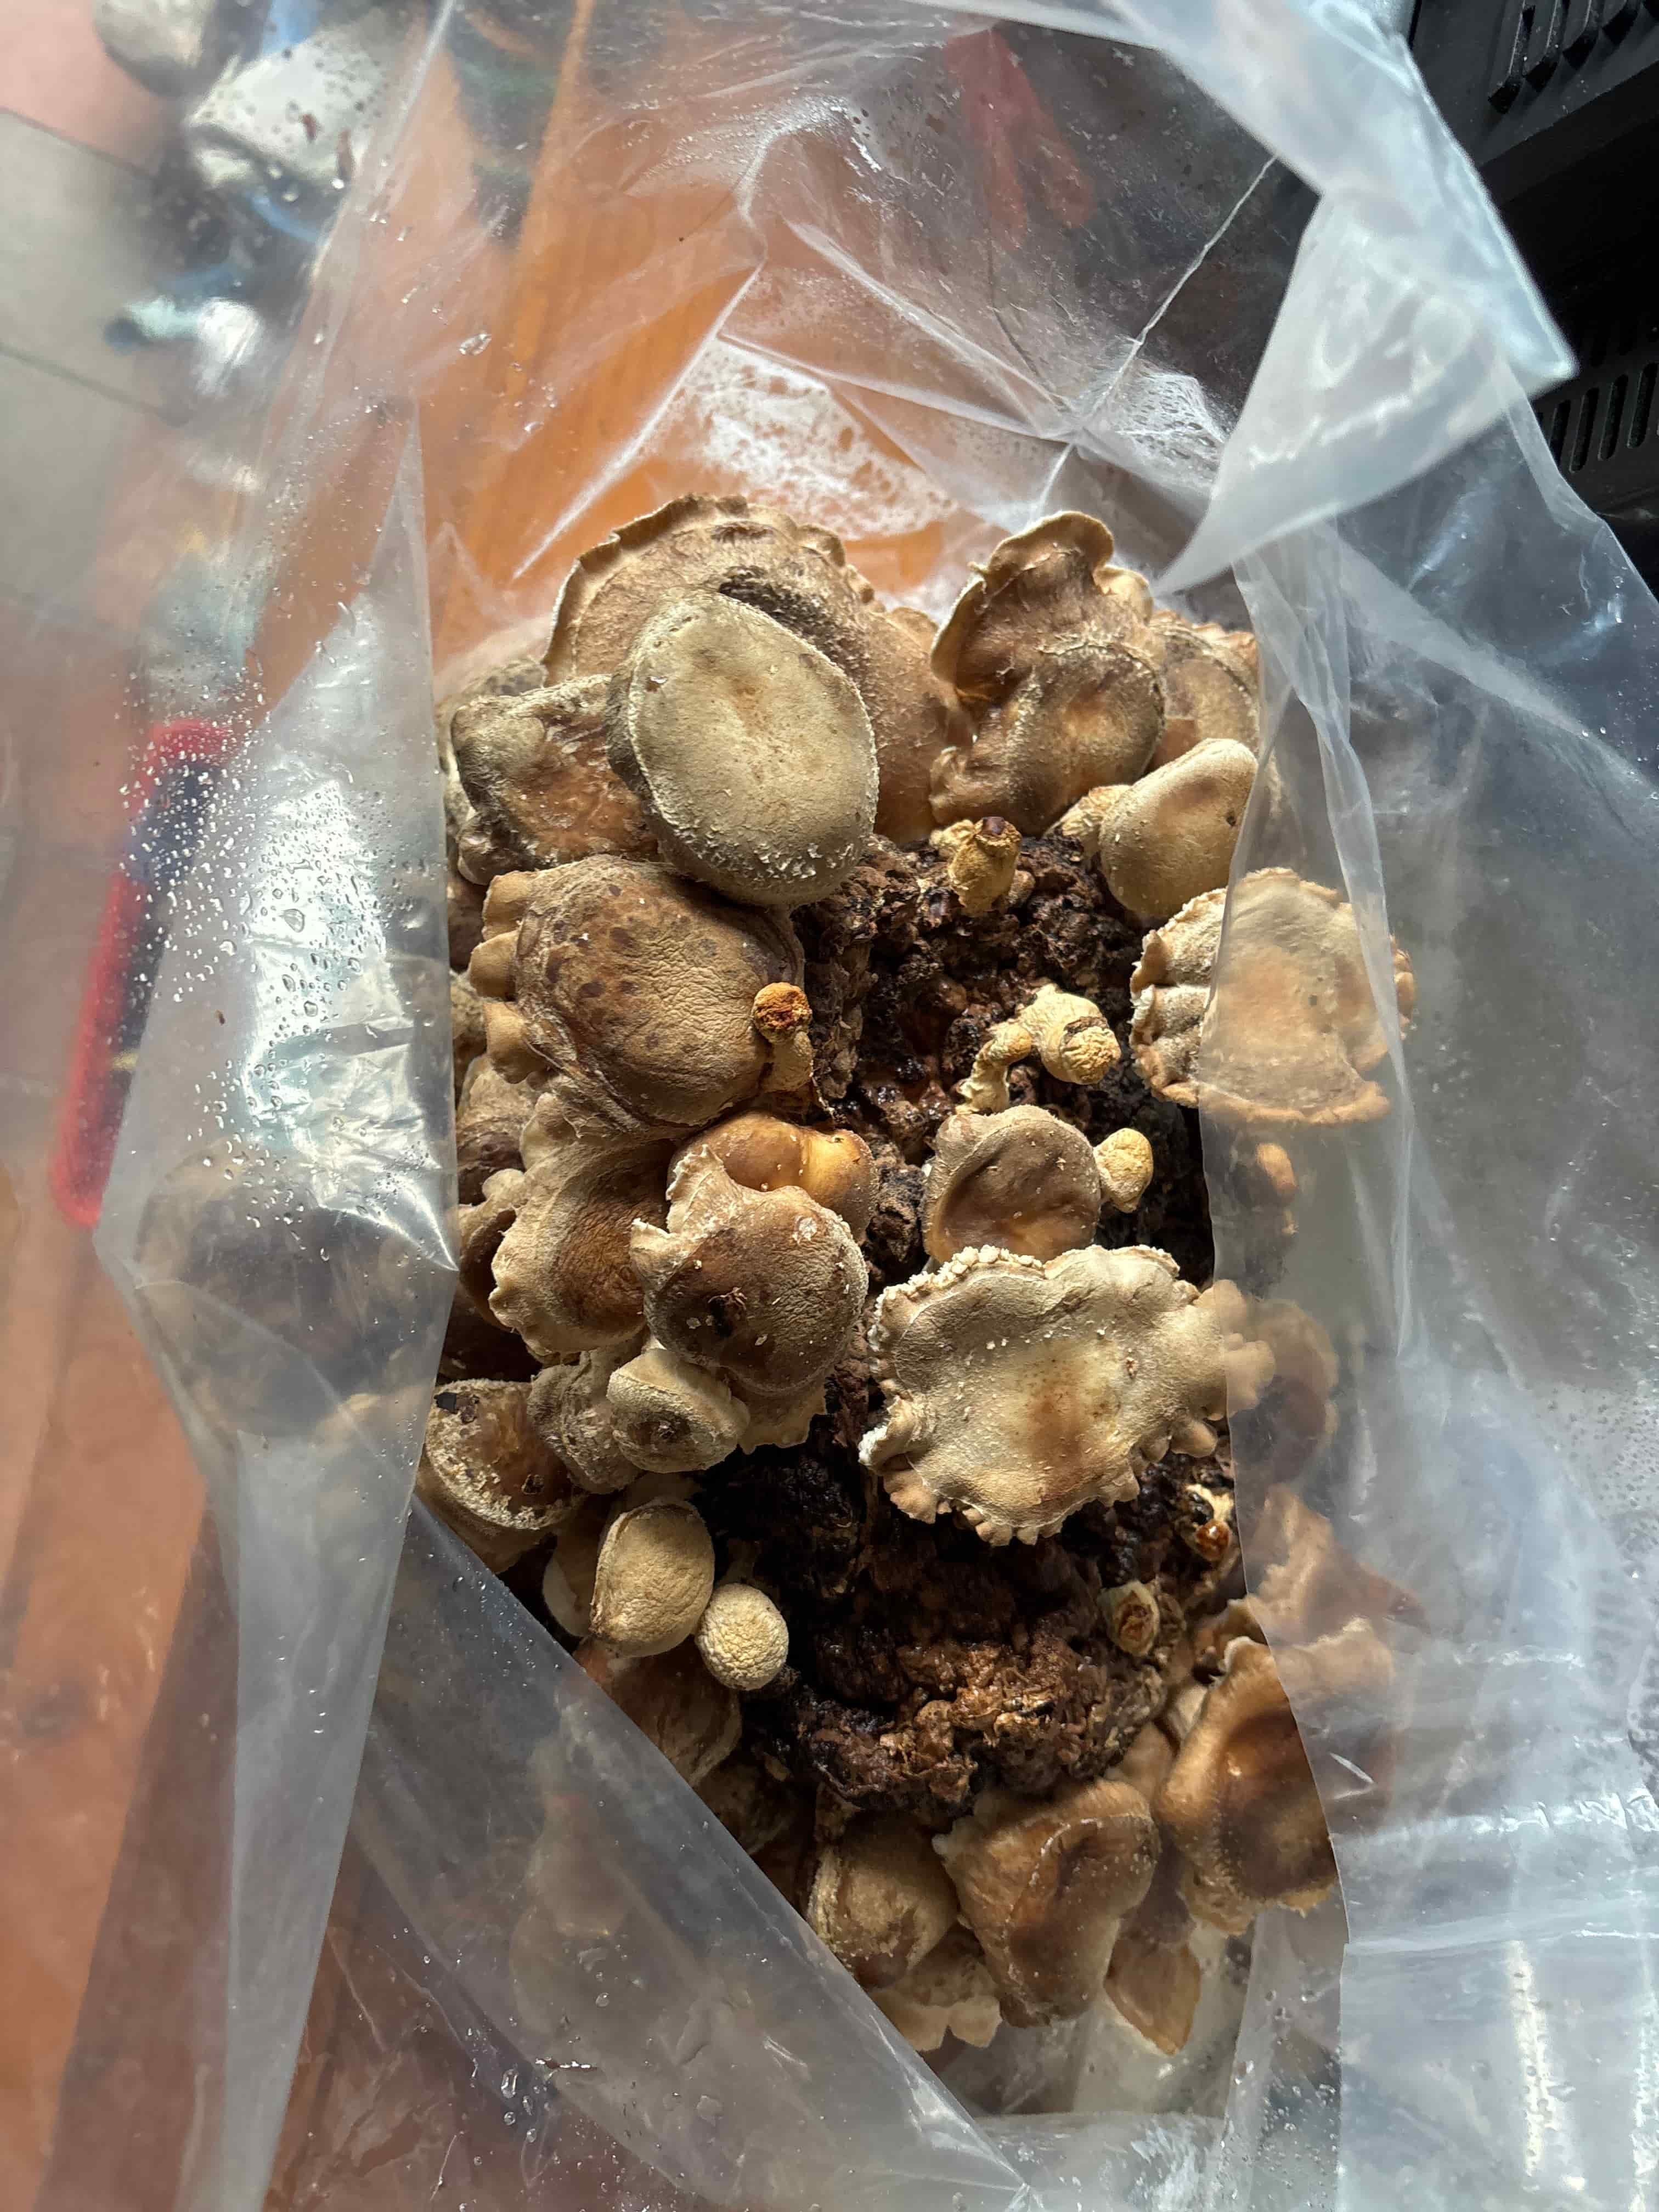
Caps flatten or upturn, gills darken and loosen, and spores start to drop. Texture turns leathery rather than meaty.
How to pick
Grasp the mushroom close to the base of the stem and slice away cleanly with a knife, close to the log. It is typically best to harvest the entire log at once, unless a mushroom is much further ahead than the rest.
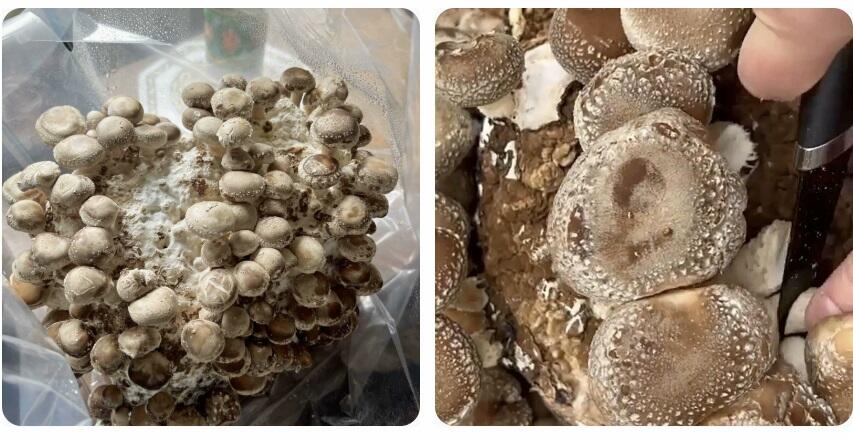
Pick Shiitake mushrooms with a clean knife as each mushroom reaches full size.
How should you harvest King Oyster mushrooms?
King Oyster is ready when the stems feel thick, dense, and firm under a gentle squeeze, while the small caps on top remain tight and rounded rather than opening out flat. The stem is the prized part of this variety, so the decision is almost always about stem size and firmness rather than cap shape. Picking before the caps open gives the best texture for slicing into medallions.
Too early
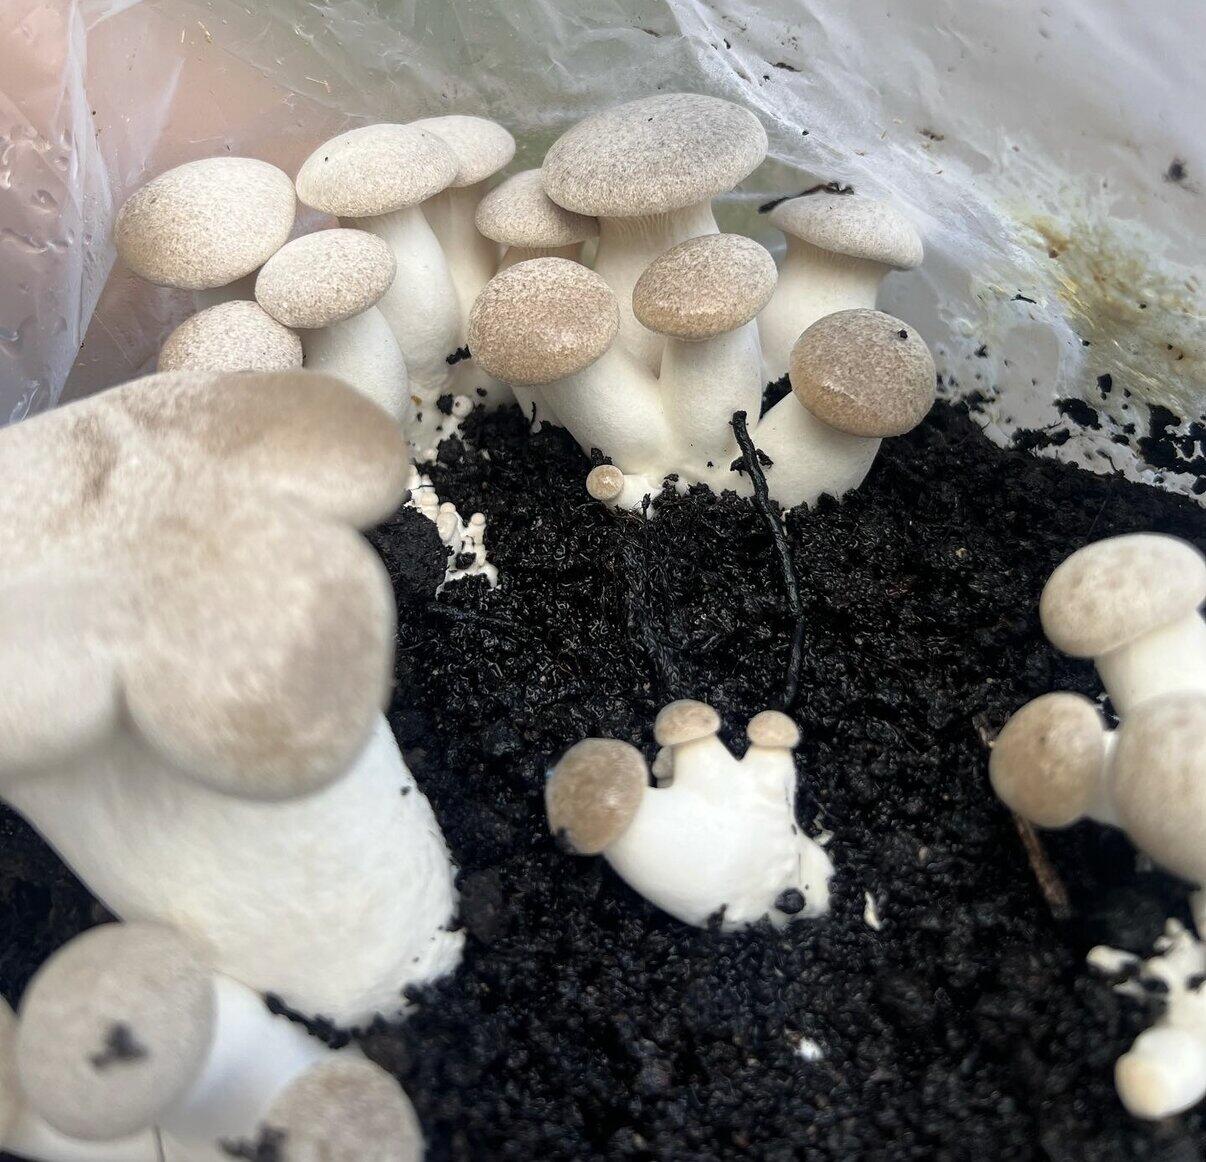
Stems are formed but still slender and light. The dense meaty texture builds during the last couple of days, so picking now loses much of the yield and character of this variety.
Ready to pick
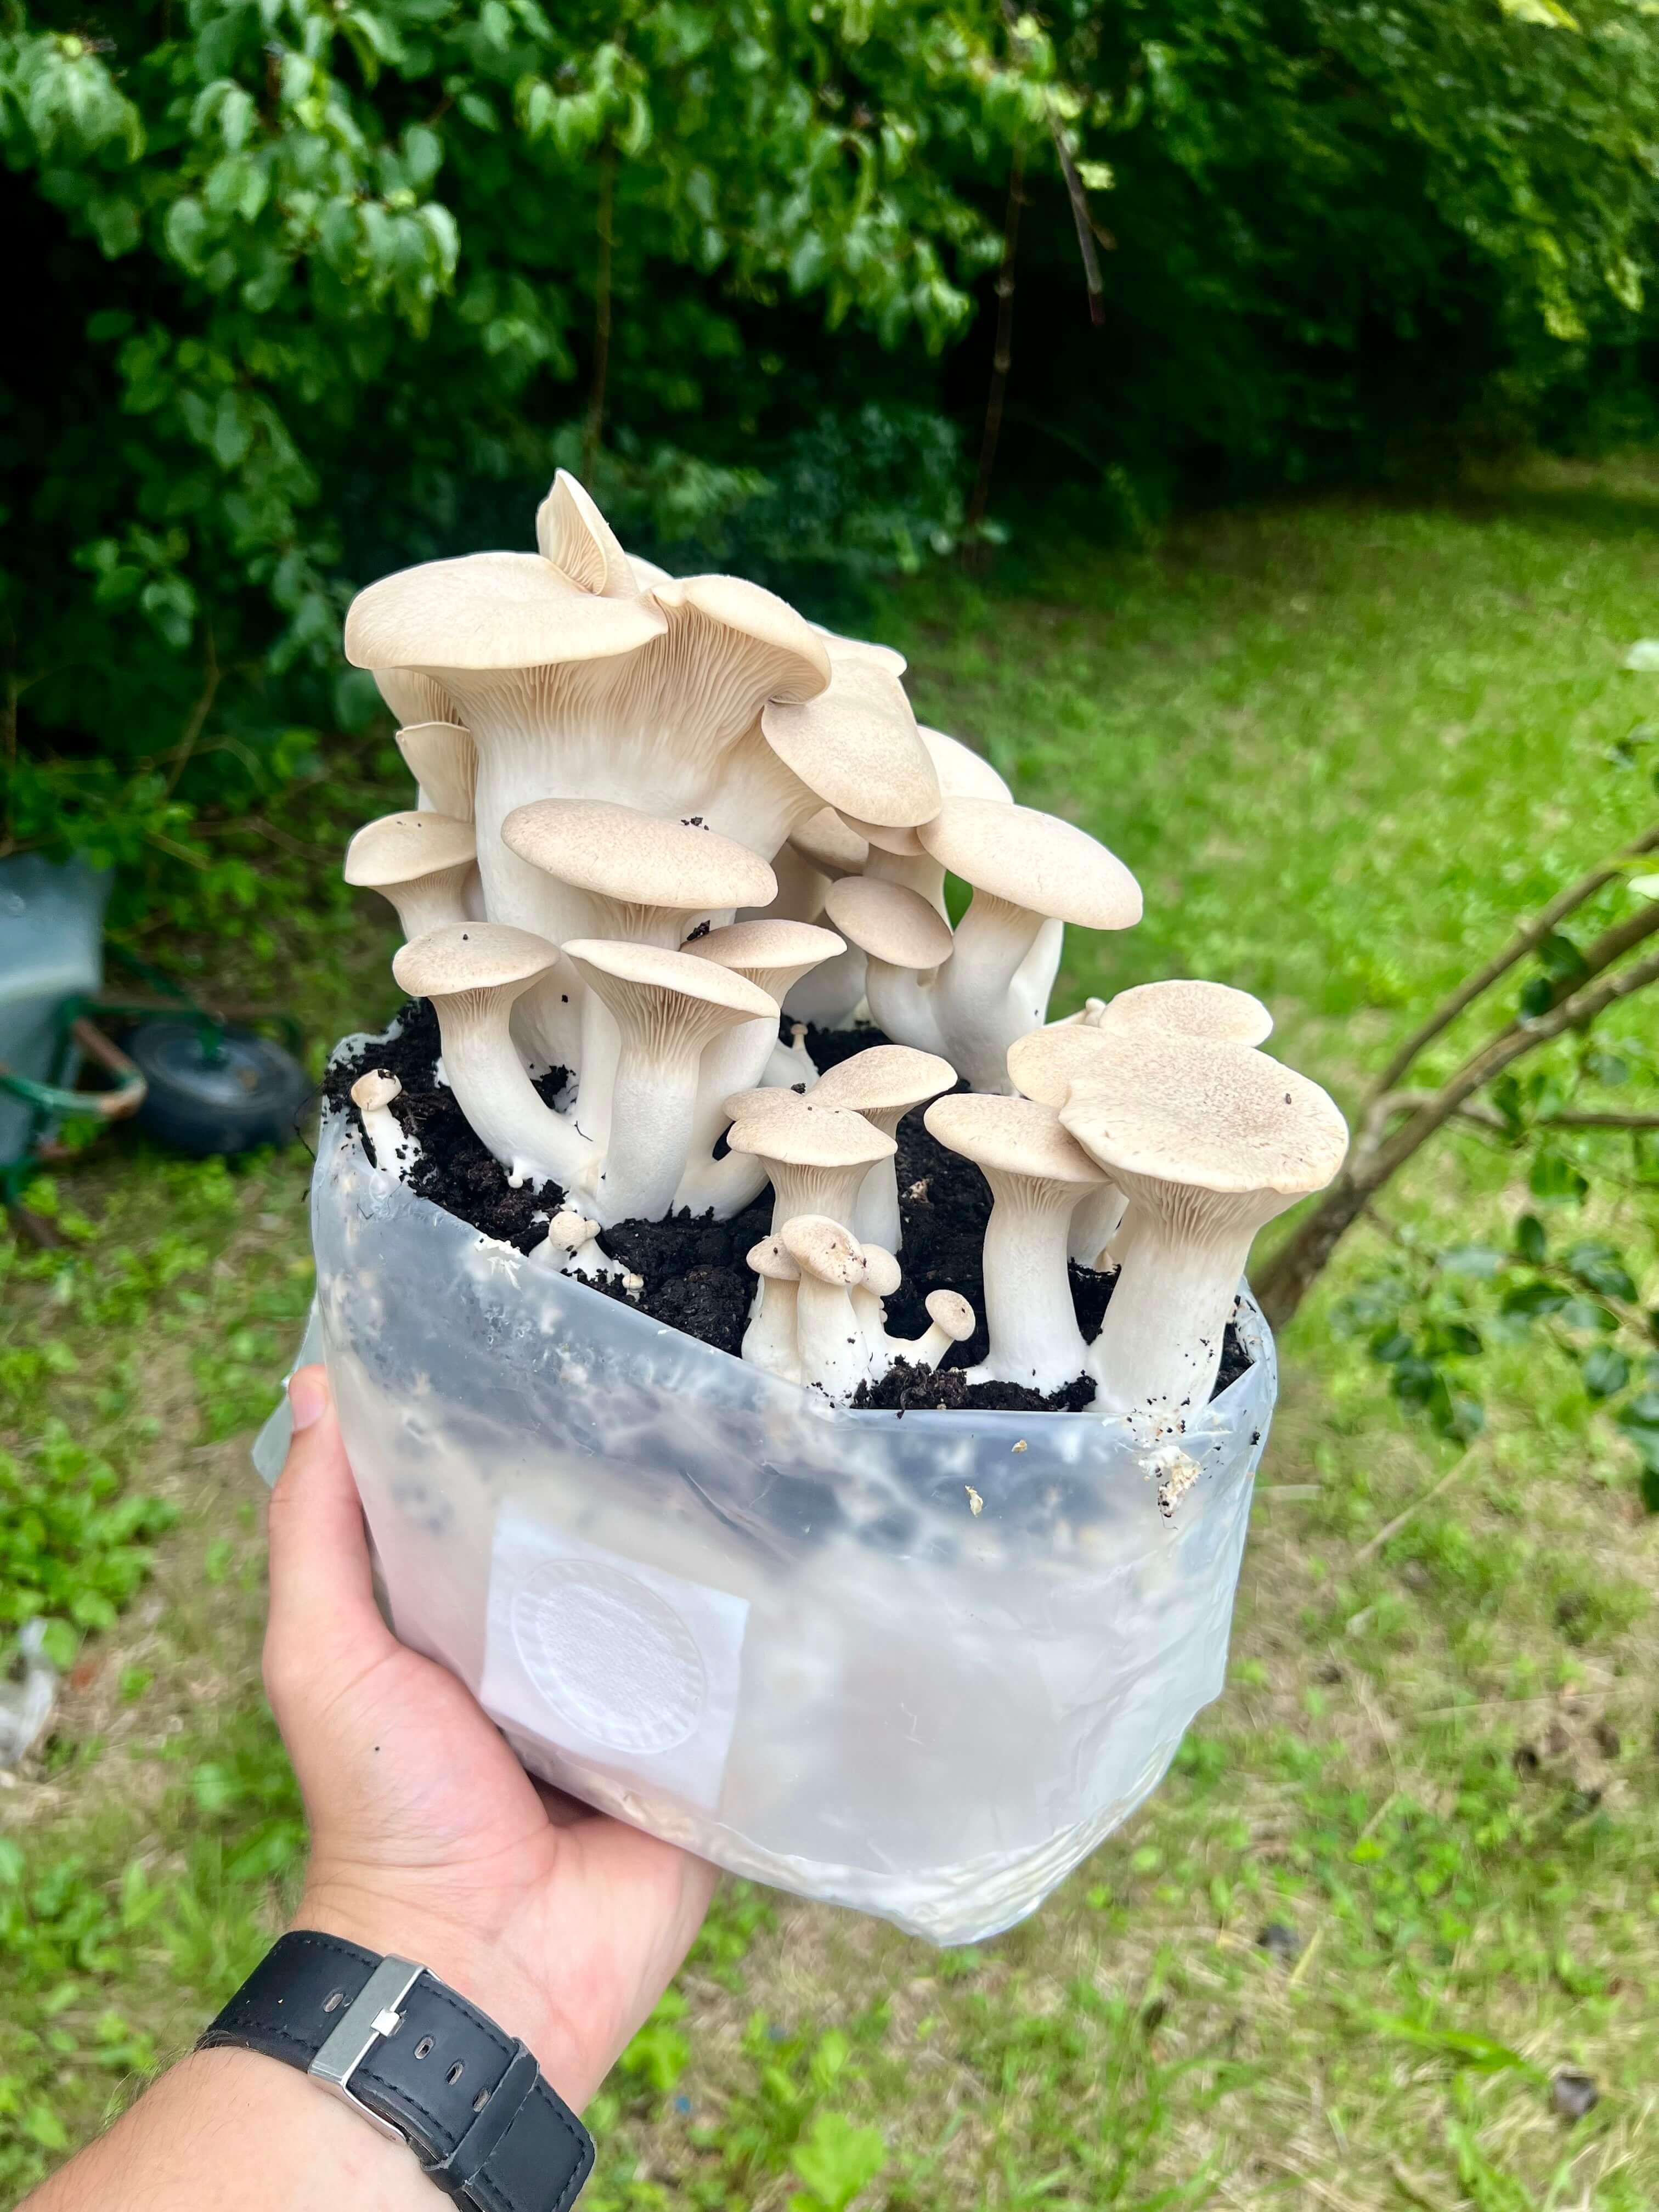
Thick dense stems with small tight caps still rounded on top. The mushroom feels heavy for its size and the surface is smooth and pale.

Left too long
Caps open into a broad umbrella shape, stems start to soften, and the dense meaty texture is lost. Spore drop becomes visible underneath the caps.
How to pick
Use a sharp knife to slice cleanly at the base of each stem, as close to the topsoil layer as possible. Knife removal is preferred here because the thick stems do not release cleanly with a twist and can pull out chunks of substrate. The full King Oyster guide covers after-harvest care.

Slice each King Oyster stem cleanly at the topsoil layer with a sharp knife.
When is a Black Pearl Oyster ready to harvest?
Black Pearl Oyster is ready when the caps reach full size and display their characteristic deep grey to near-black colour, while the stems remain firm and meaty. This hybrid variety shows cap colour as the clearest ripeness signal because young Black Pearls start pale grey and darken as they mature. Harvest is best just as the caps reach their darkest shade, before the edges begin to flatten.
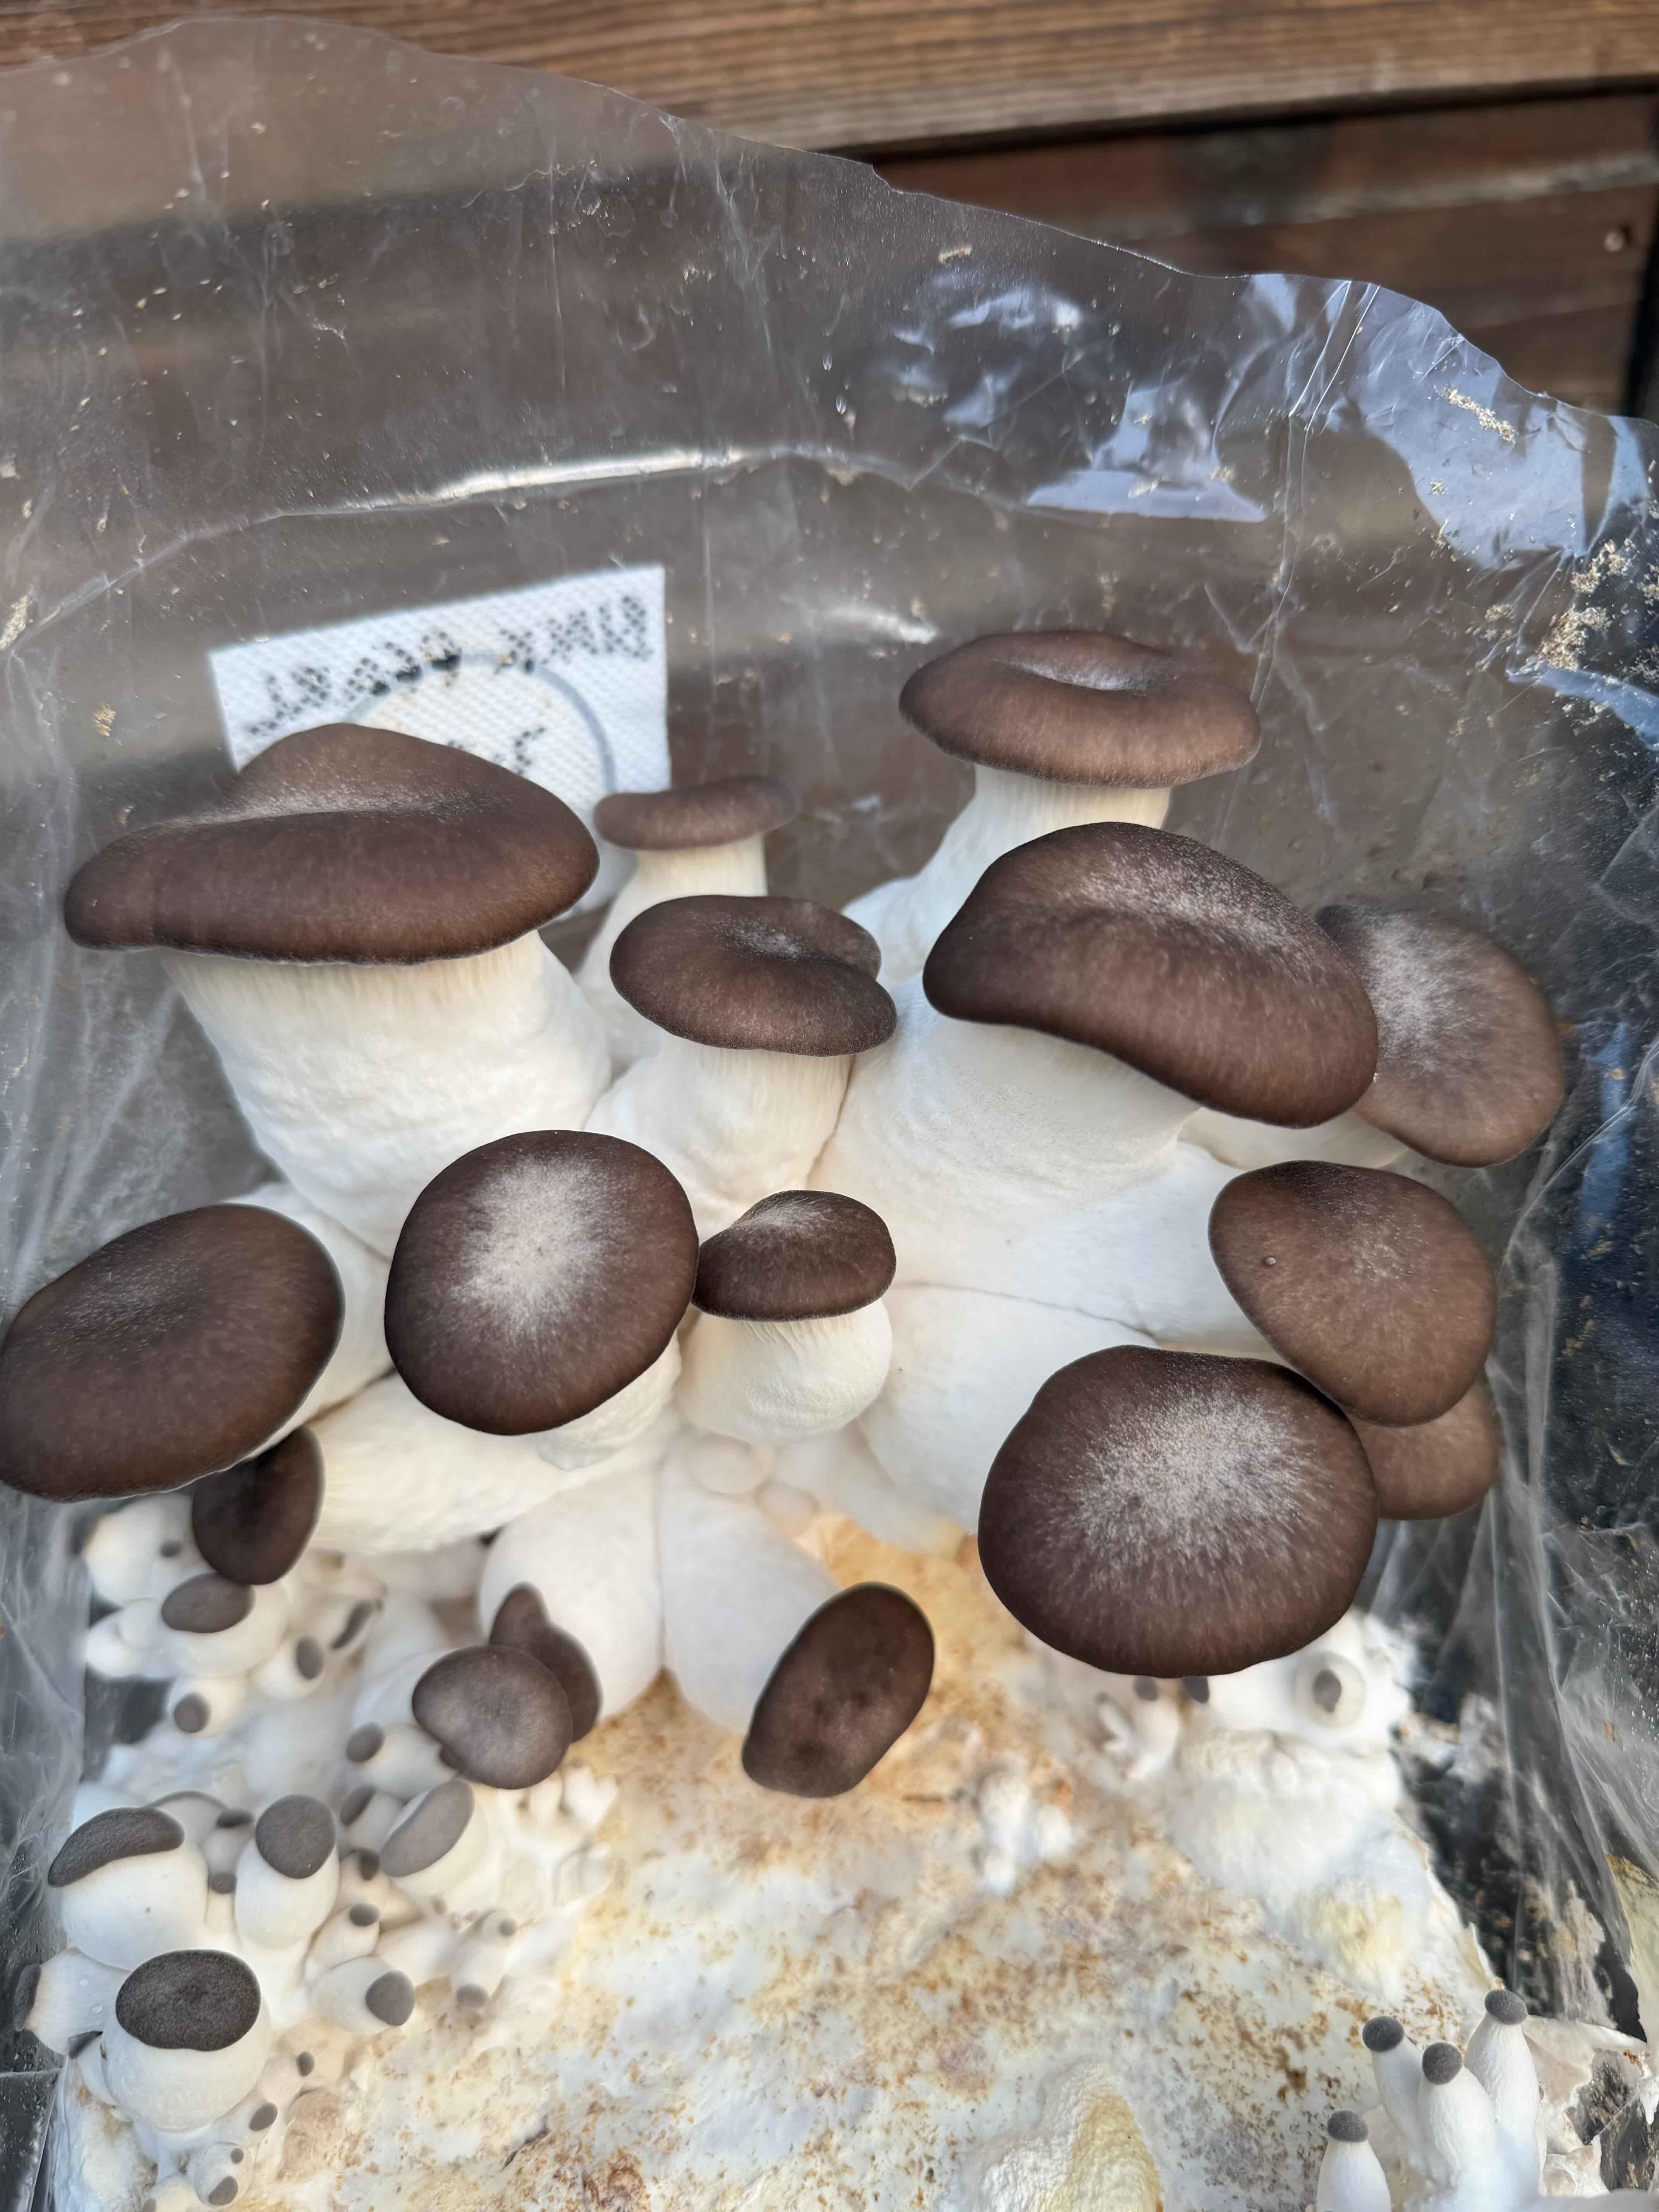
Too early
Caps are still mid grey rather than the deep dark shade that marks maturity, and the stems have not yet reached full thickness. Give the cluster another day or two.
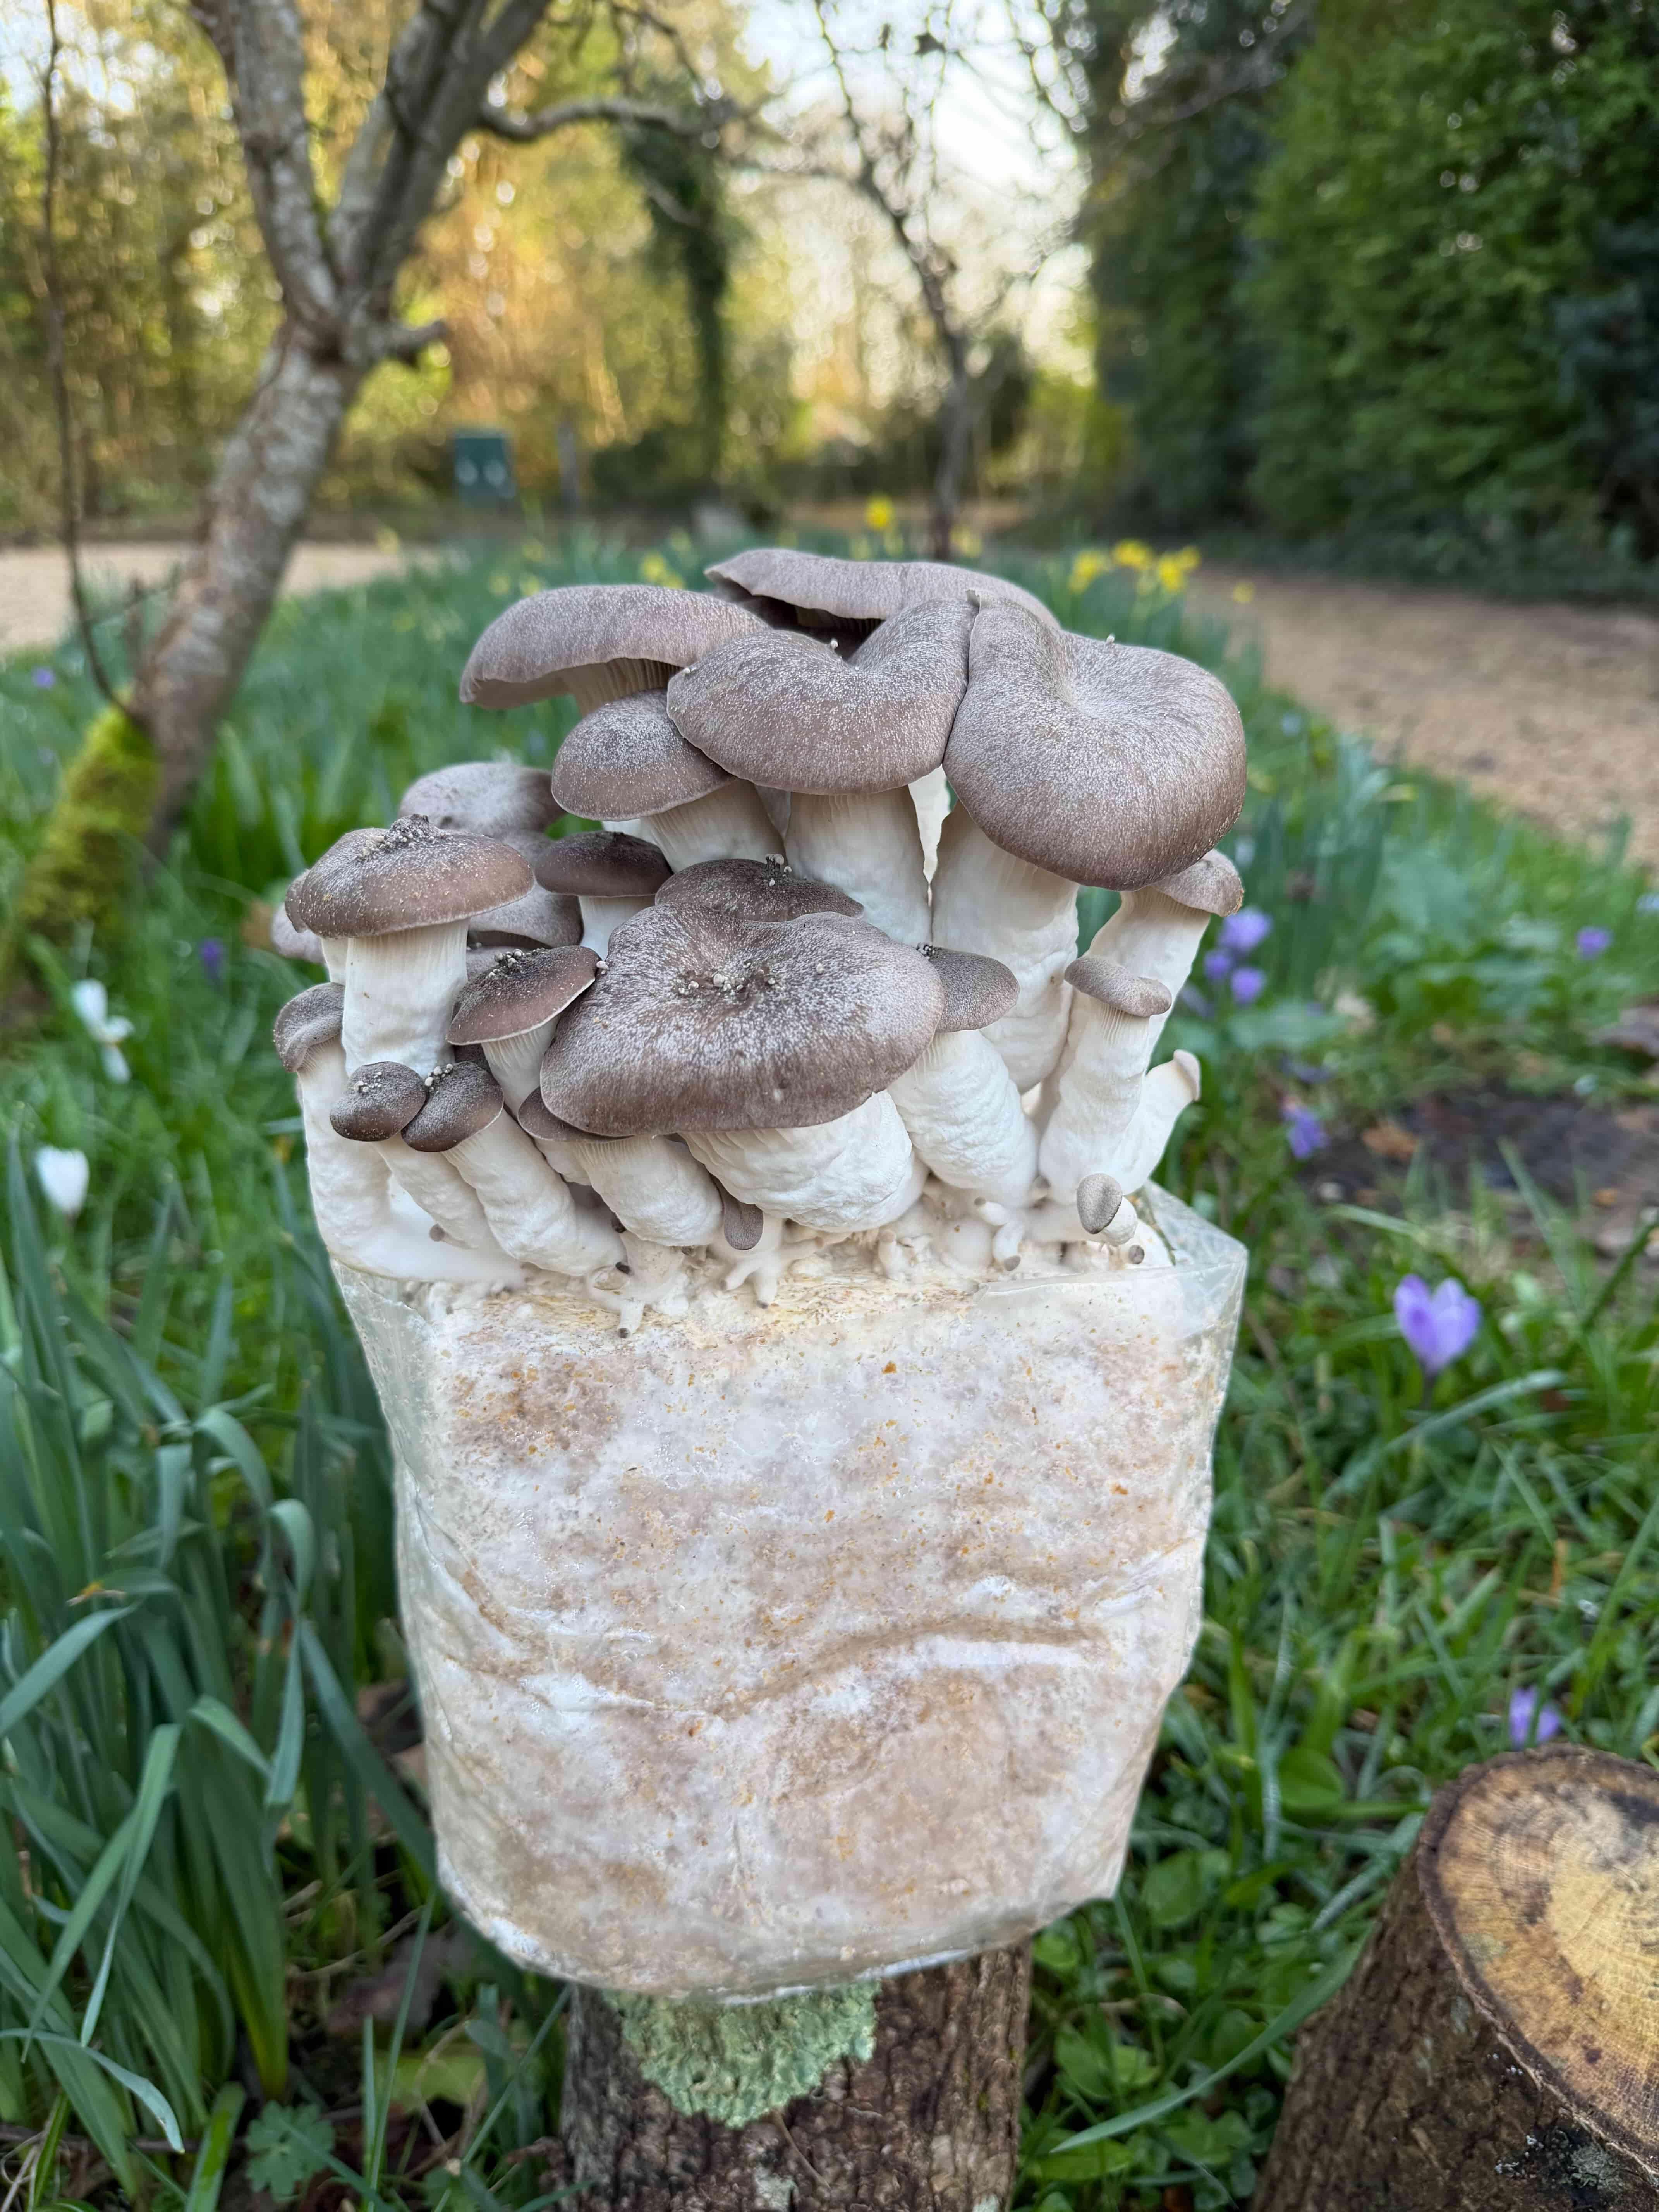
Ready to pick
Dark grey or near-black caps with firm stems and edges that still curl slightly under. The cluster feels dense and heavy when lifted.
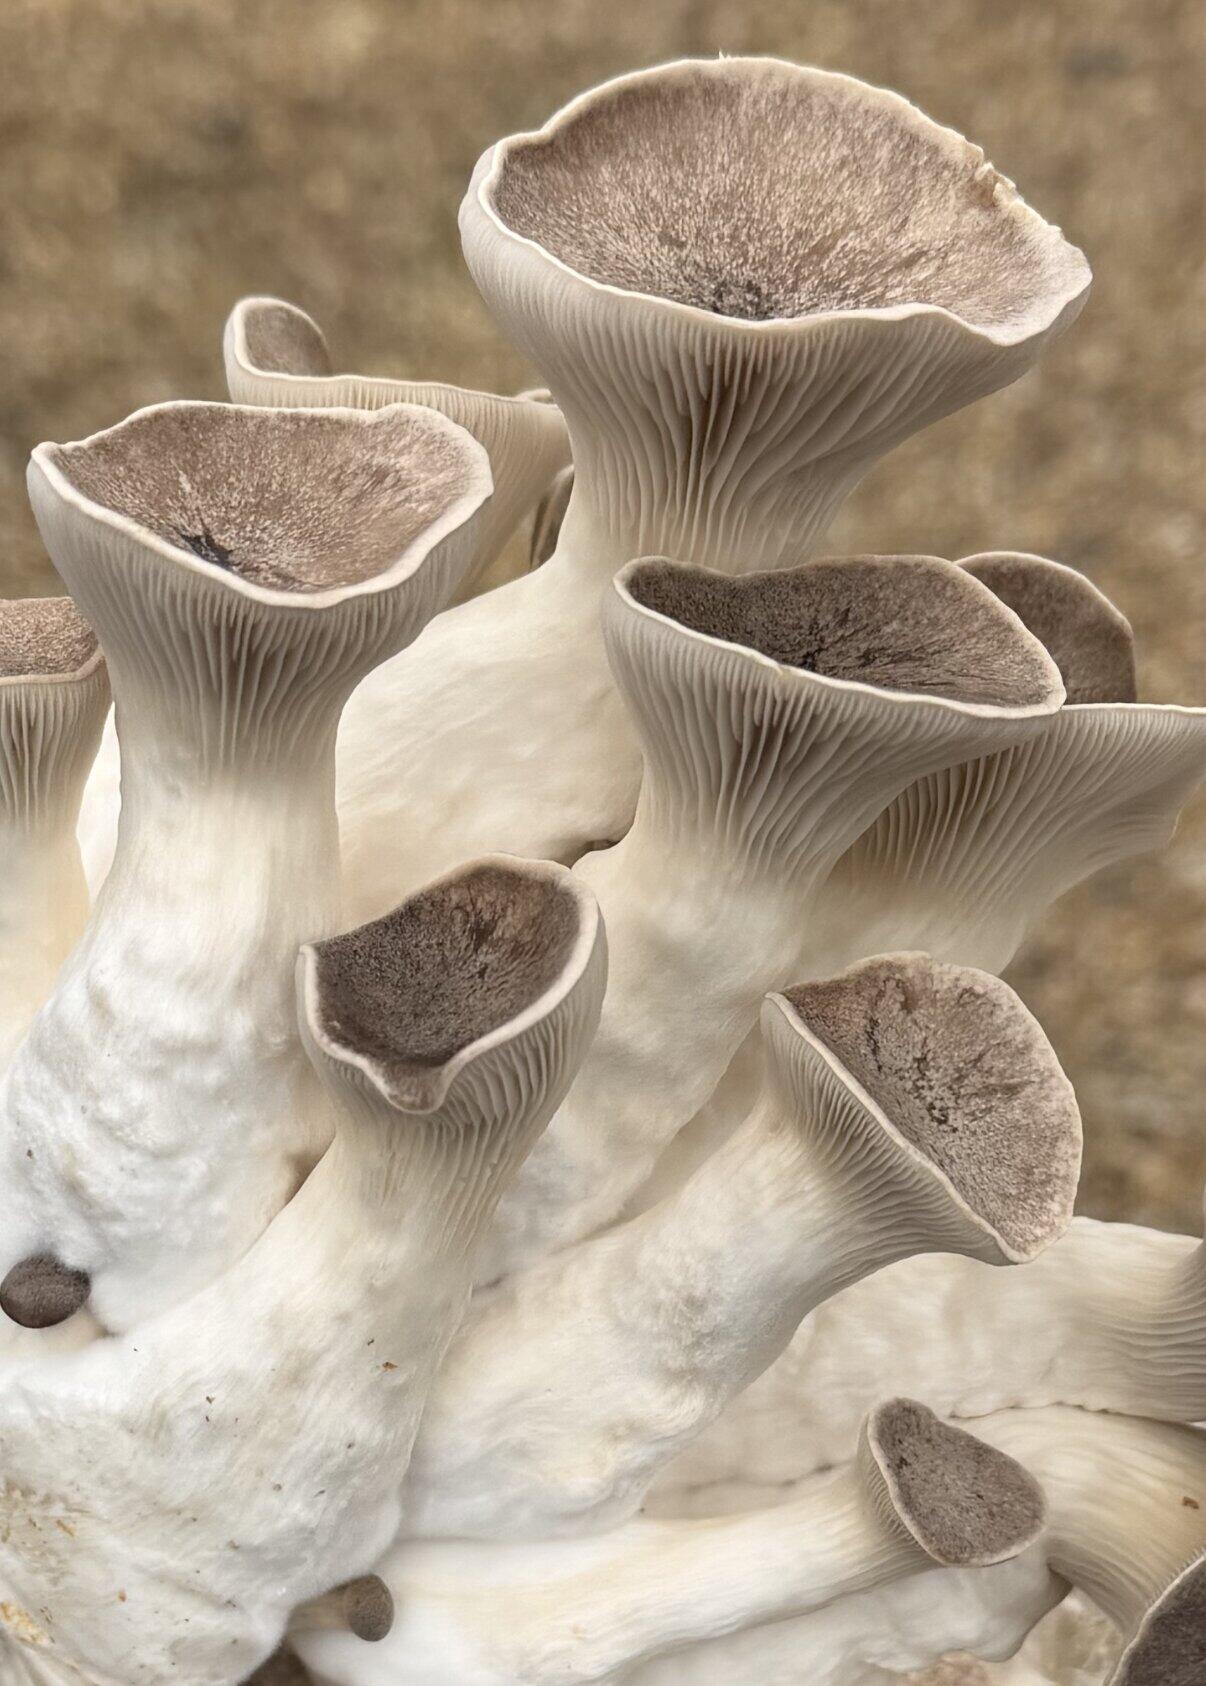
Left too long
Caps pale towards mid grey, edges flatten or turn upward, and the stem loses its firmness. Texture softens and shelf life drops quickly.
How to pick
You should pull and twist the mushrooms away from the substrate, supporting at the base.
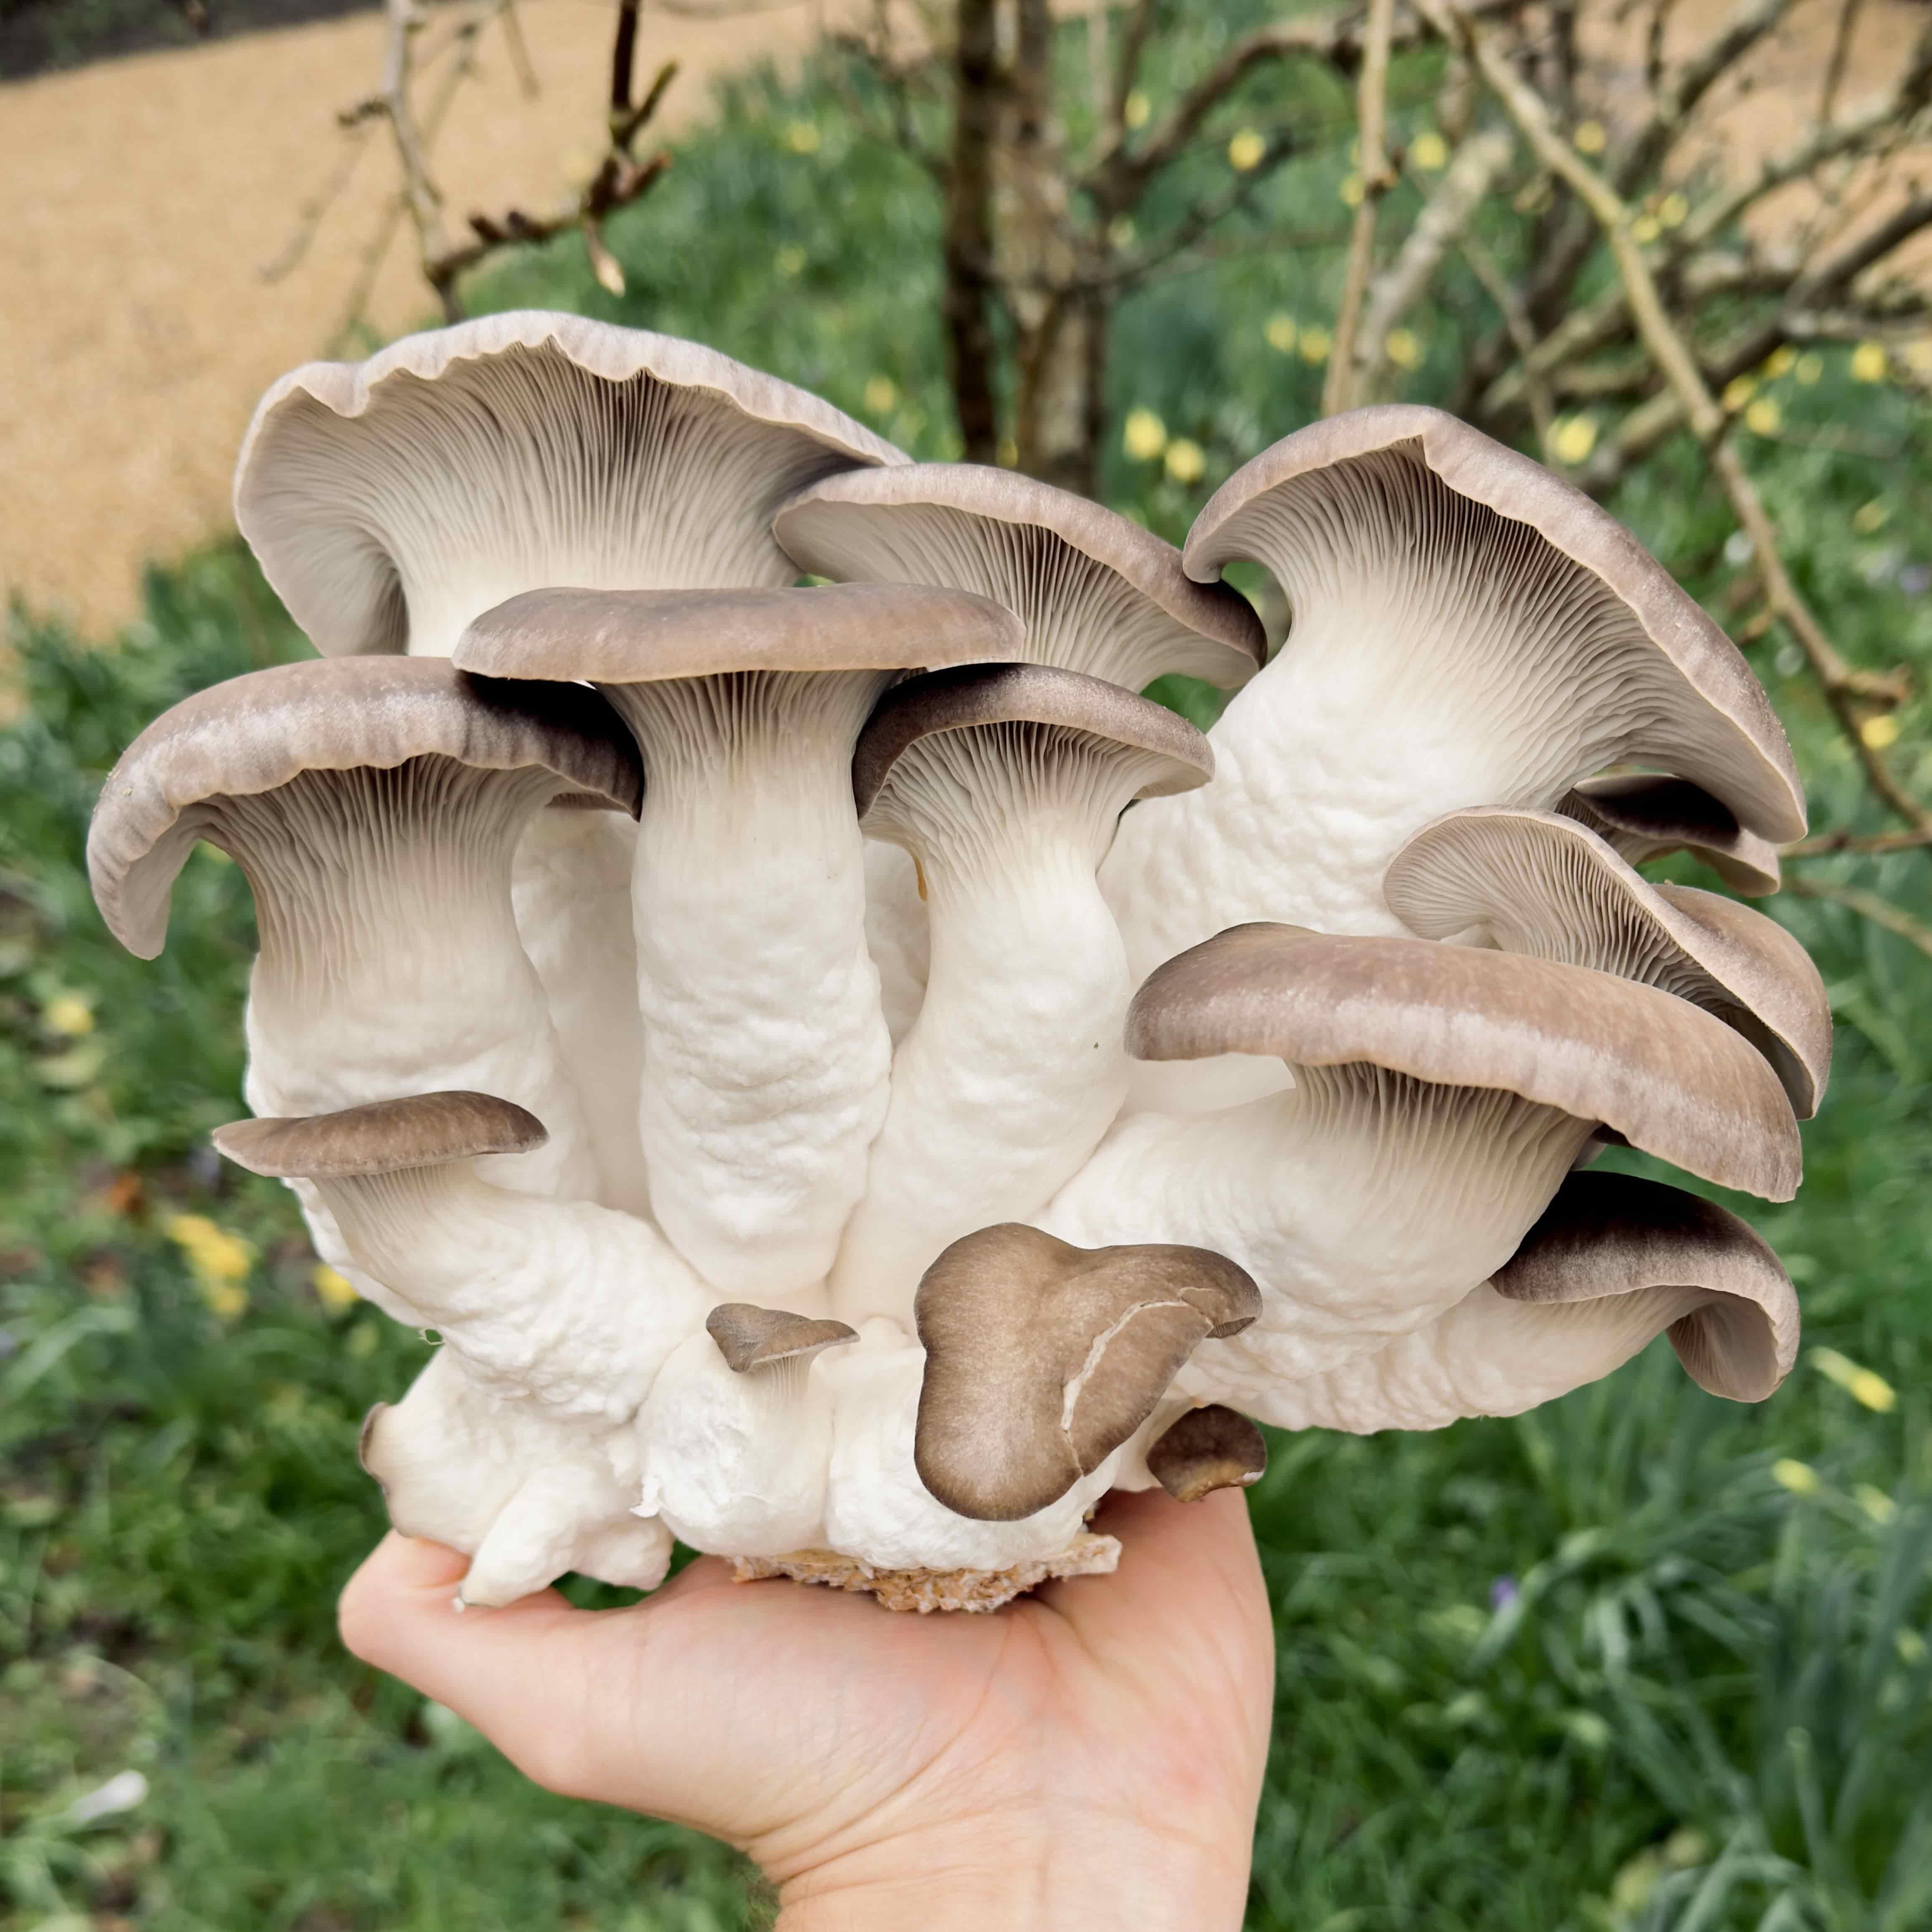
Harvest by pulling away from the kit as a whole crop.
Shop Black Pearl Oyster Growing Kit
How should you harvest a White Oyster mushroom kit?
White Oyster is ready when the whole cluster has reached full size, the caps have fanned out into the familiar oyster shape, and the edges are still curled slightly downward. Like Pink Oyster, this variety grows in tight tiered clusters and is always harvested as a single group rather than mushroom by mushroom. The bright white colour is at its best during the harvest window and is one of the clearest freshness signals after picking.
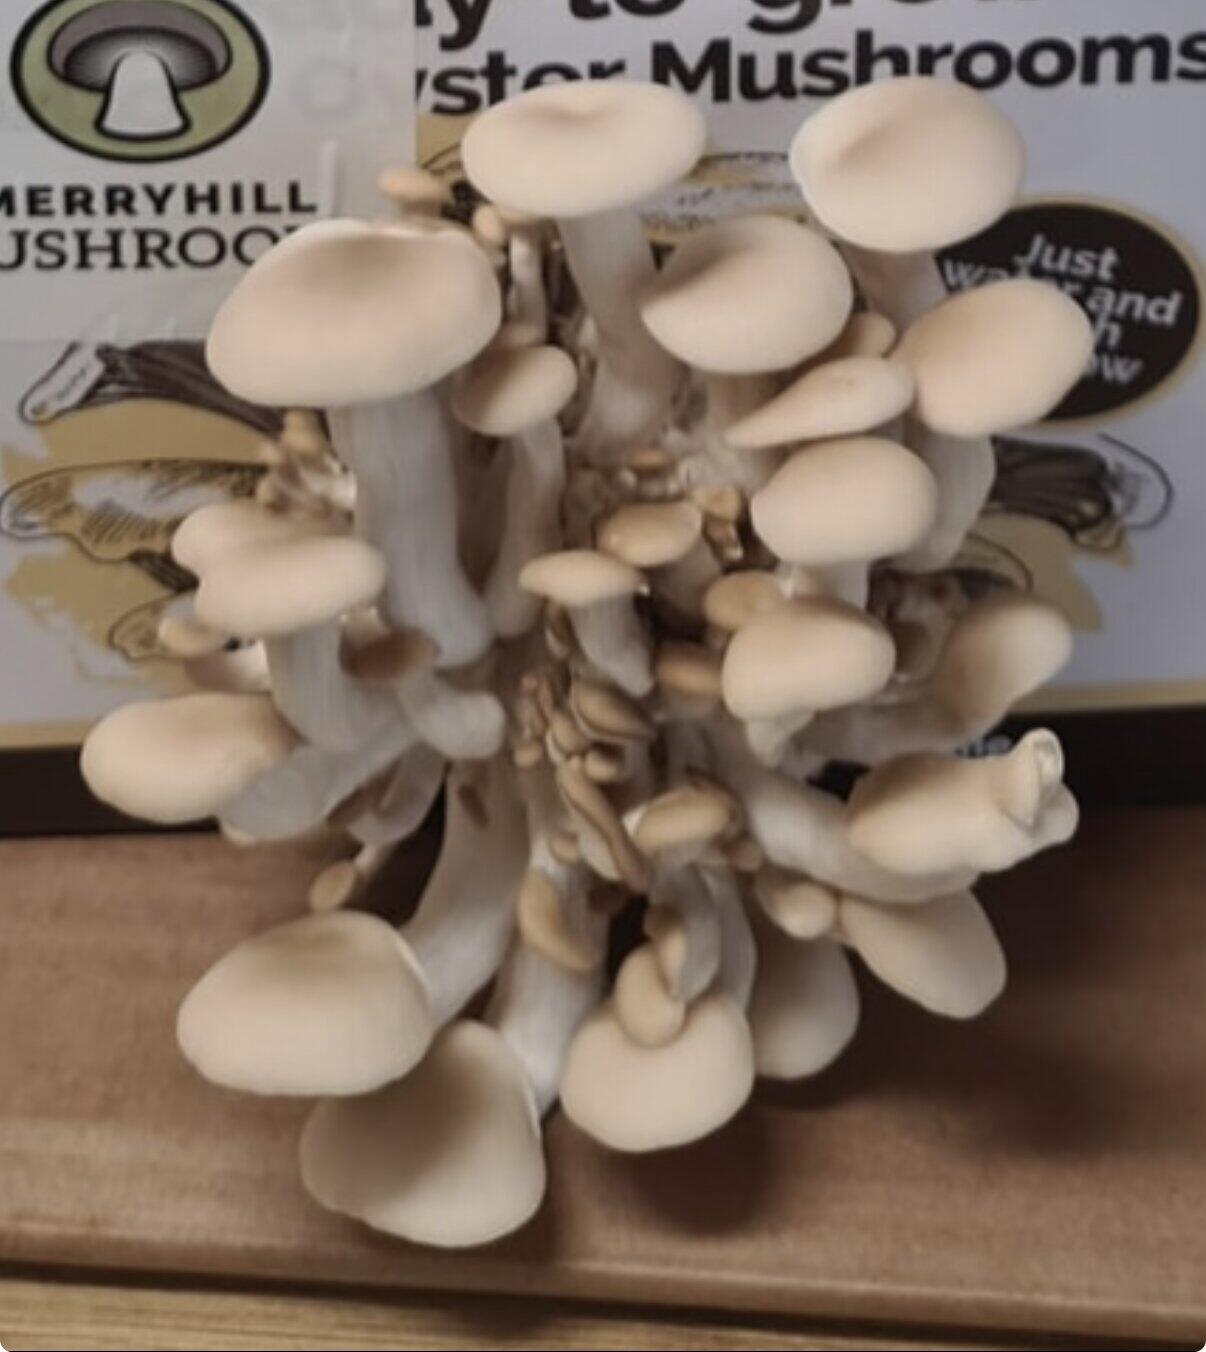
Too early
Caps are still small and the cluster is tightly bunched rather than fanned out. Another day of growth usually doubles the size and gives a much better yield.
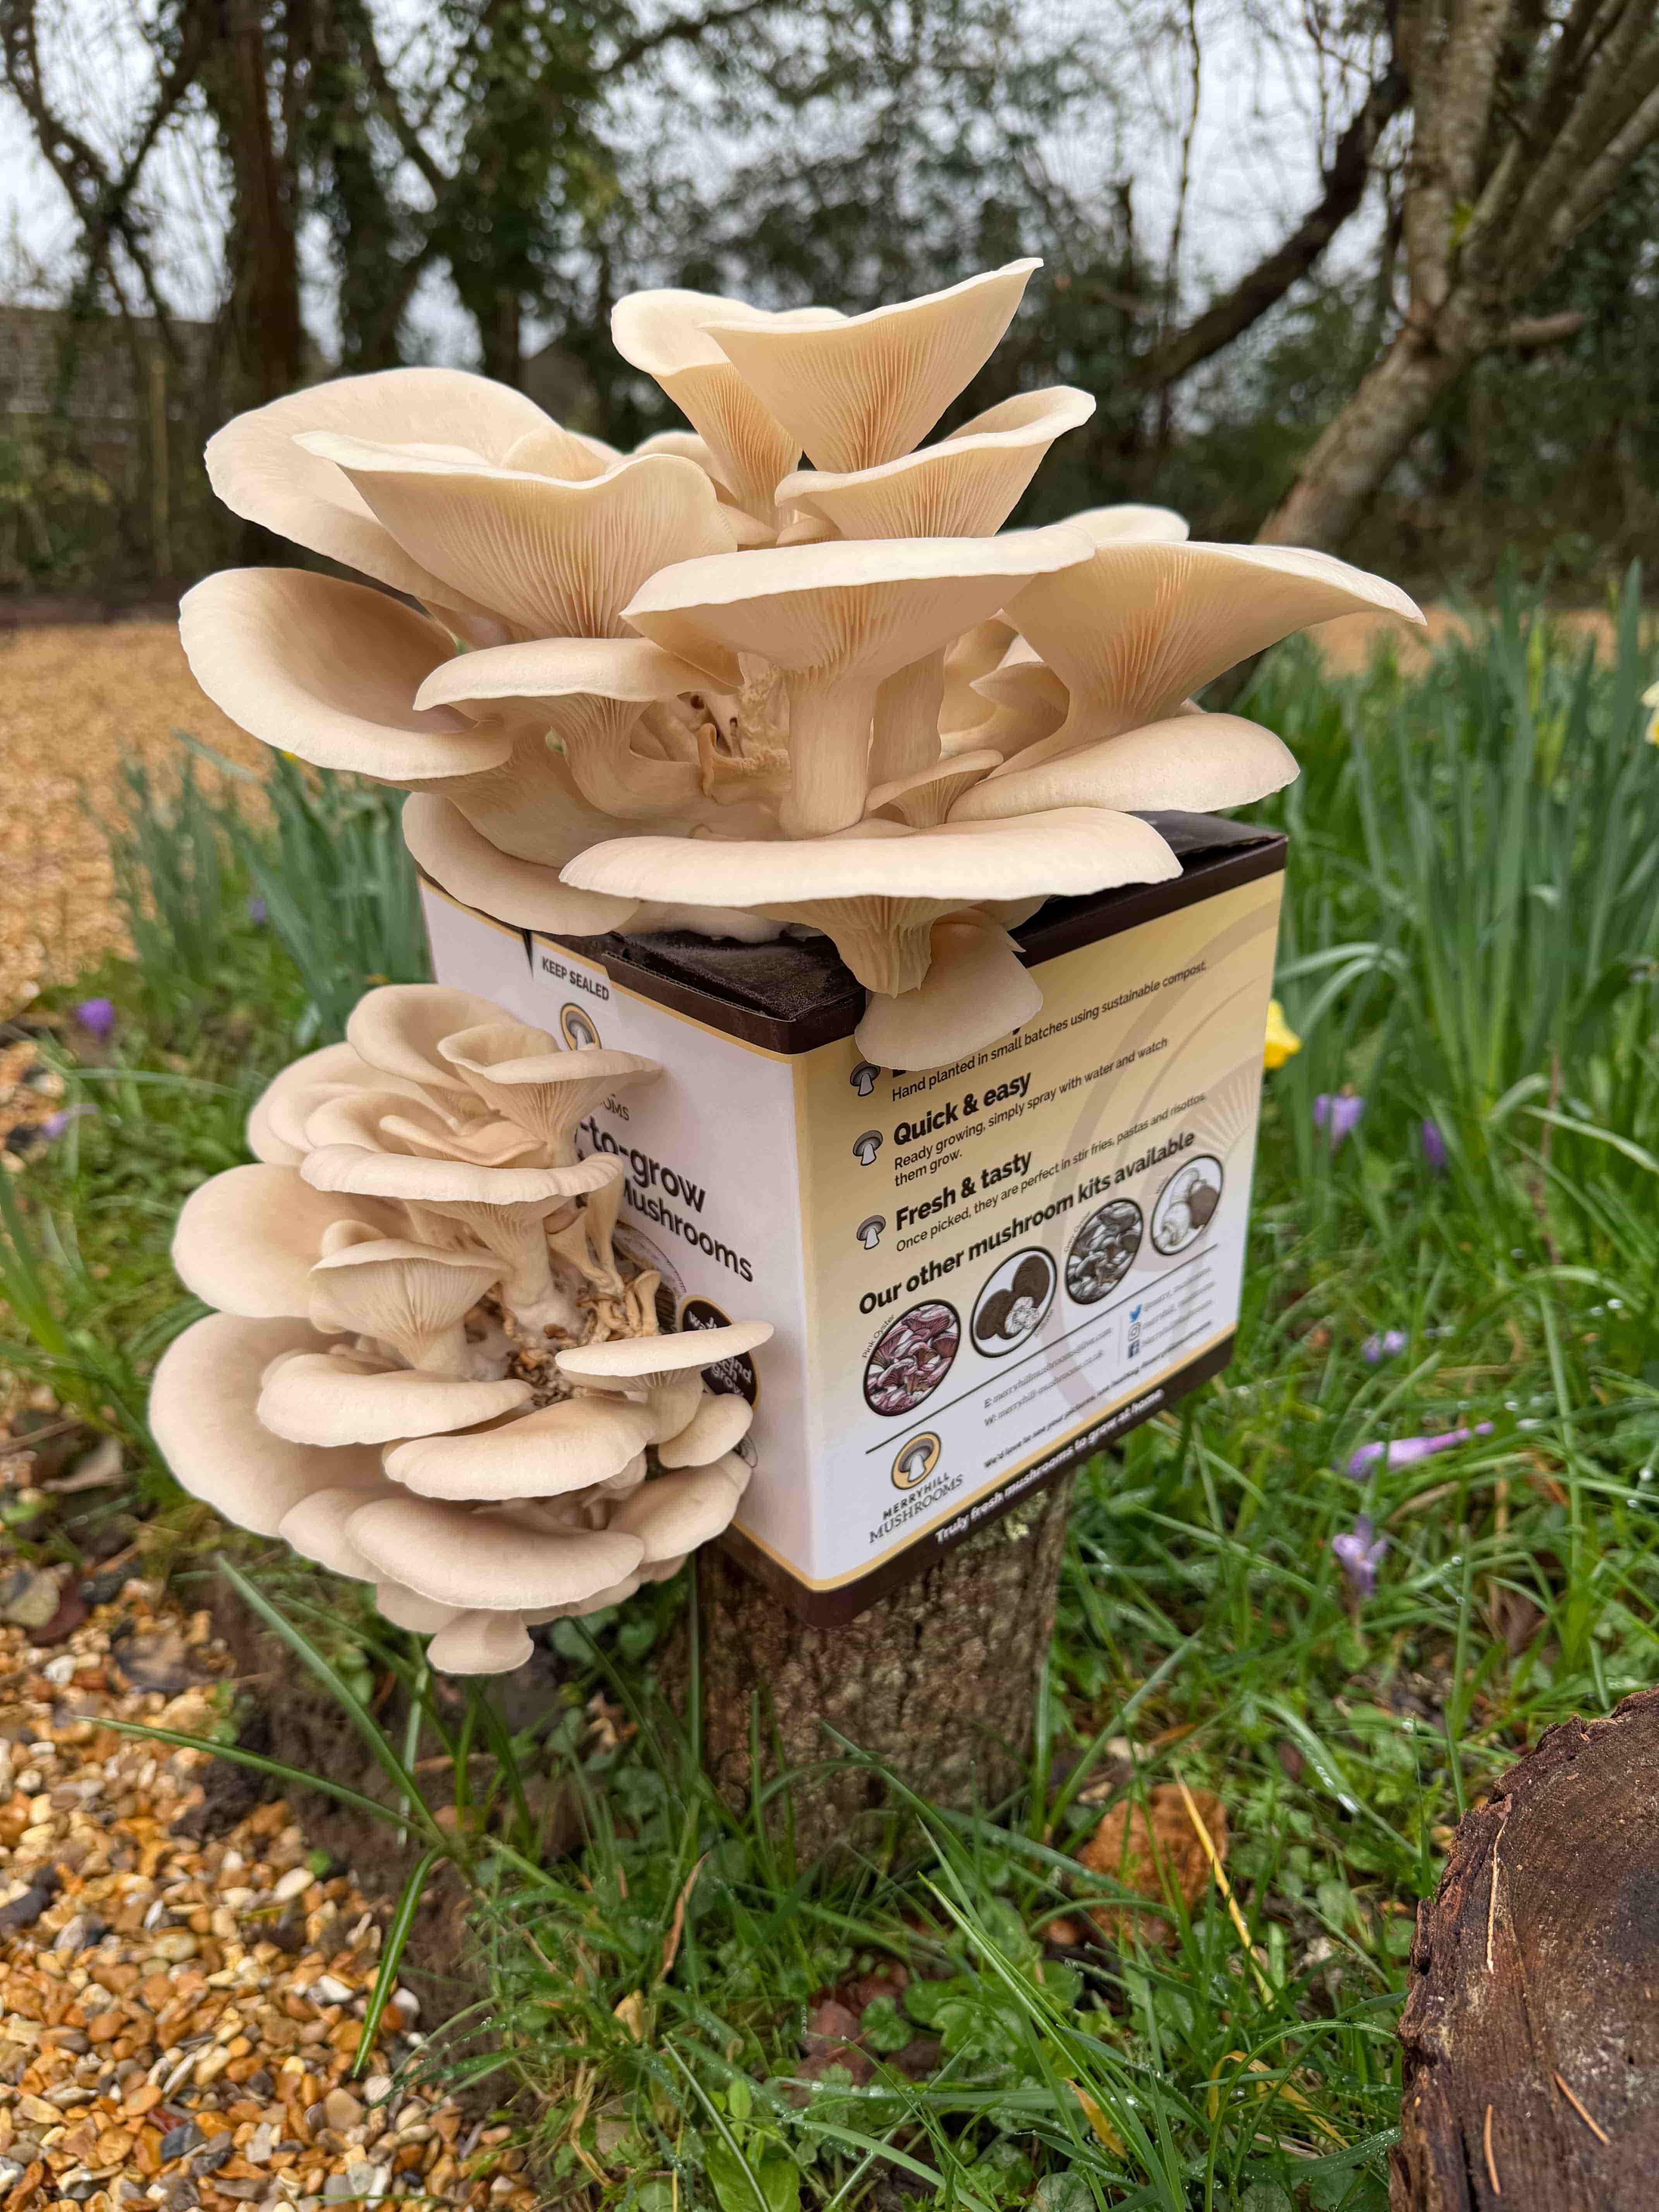
Ready to pick
Cluster reaches full size, caps are bright white and fanned out, and the edges still turn slightly under. The cluster feels firm but not brittle.

Left too long
Caps flatten, then turn upward at the edges, and a white spore dust appears on surfaces below the kit. Colour fades slightly and texture softens.
How to pick
Slide your fingers underneath the cluster, grip close to the base of the combined stems, and twist firmly while pulling away from the block. The whole cluster should lift off as one piece. Clear any small stem fragments left behind with a fingertip to keep the surface clean for the next flush.
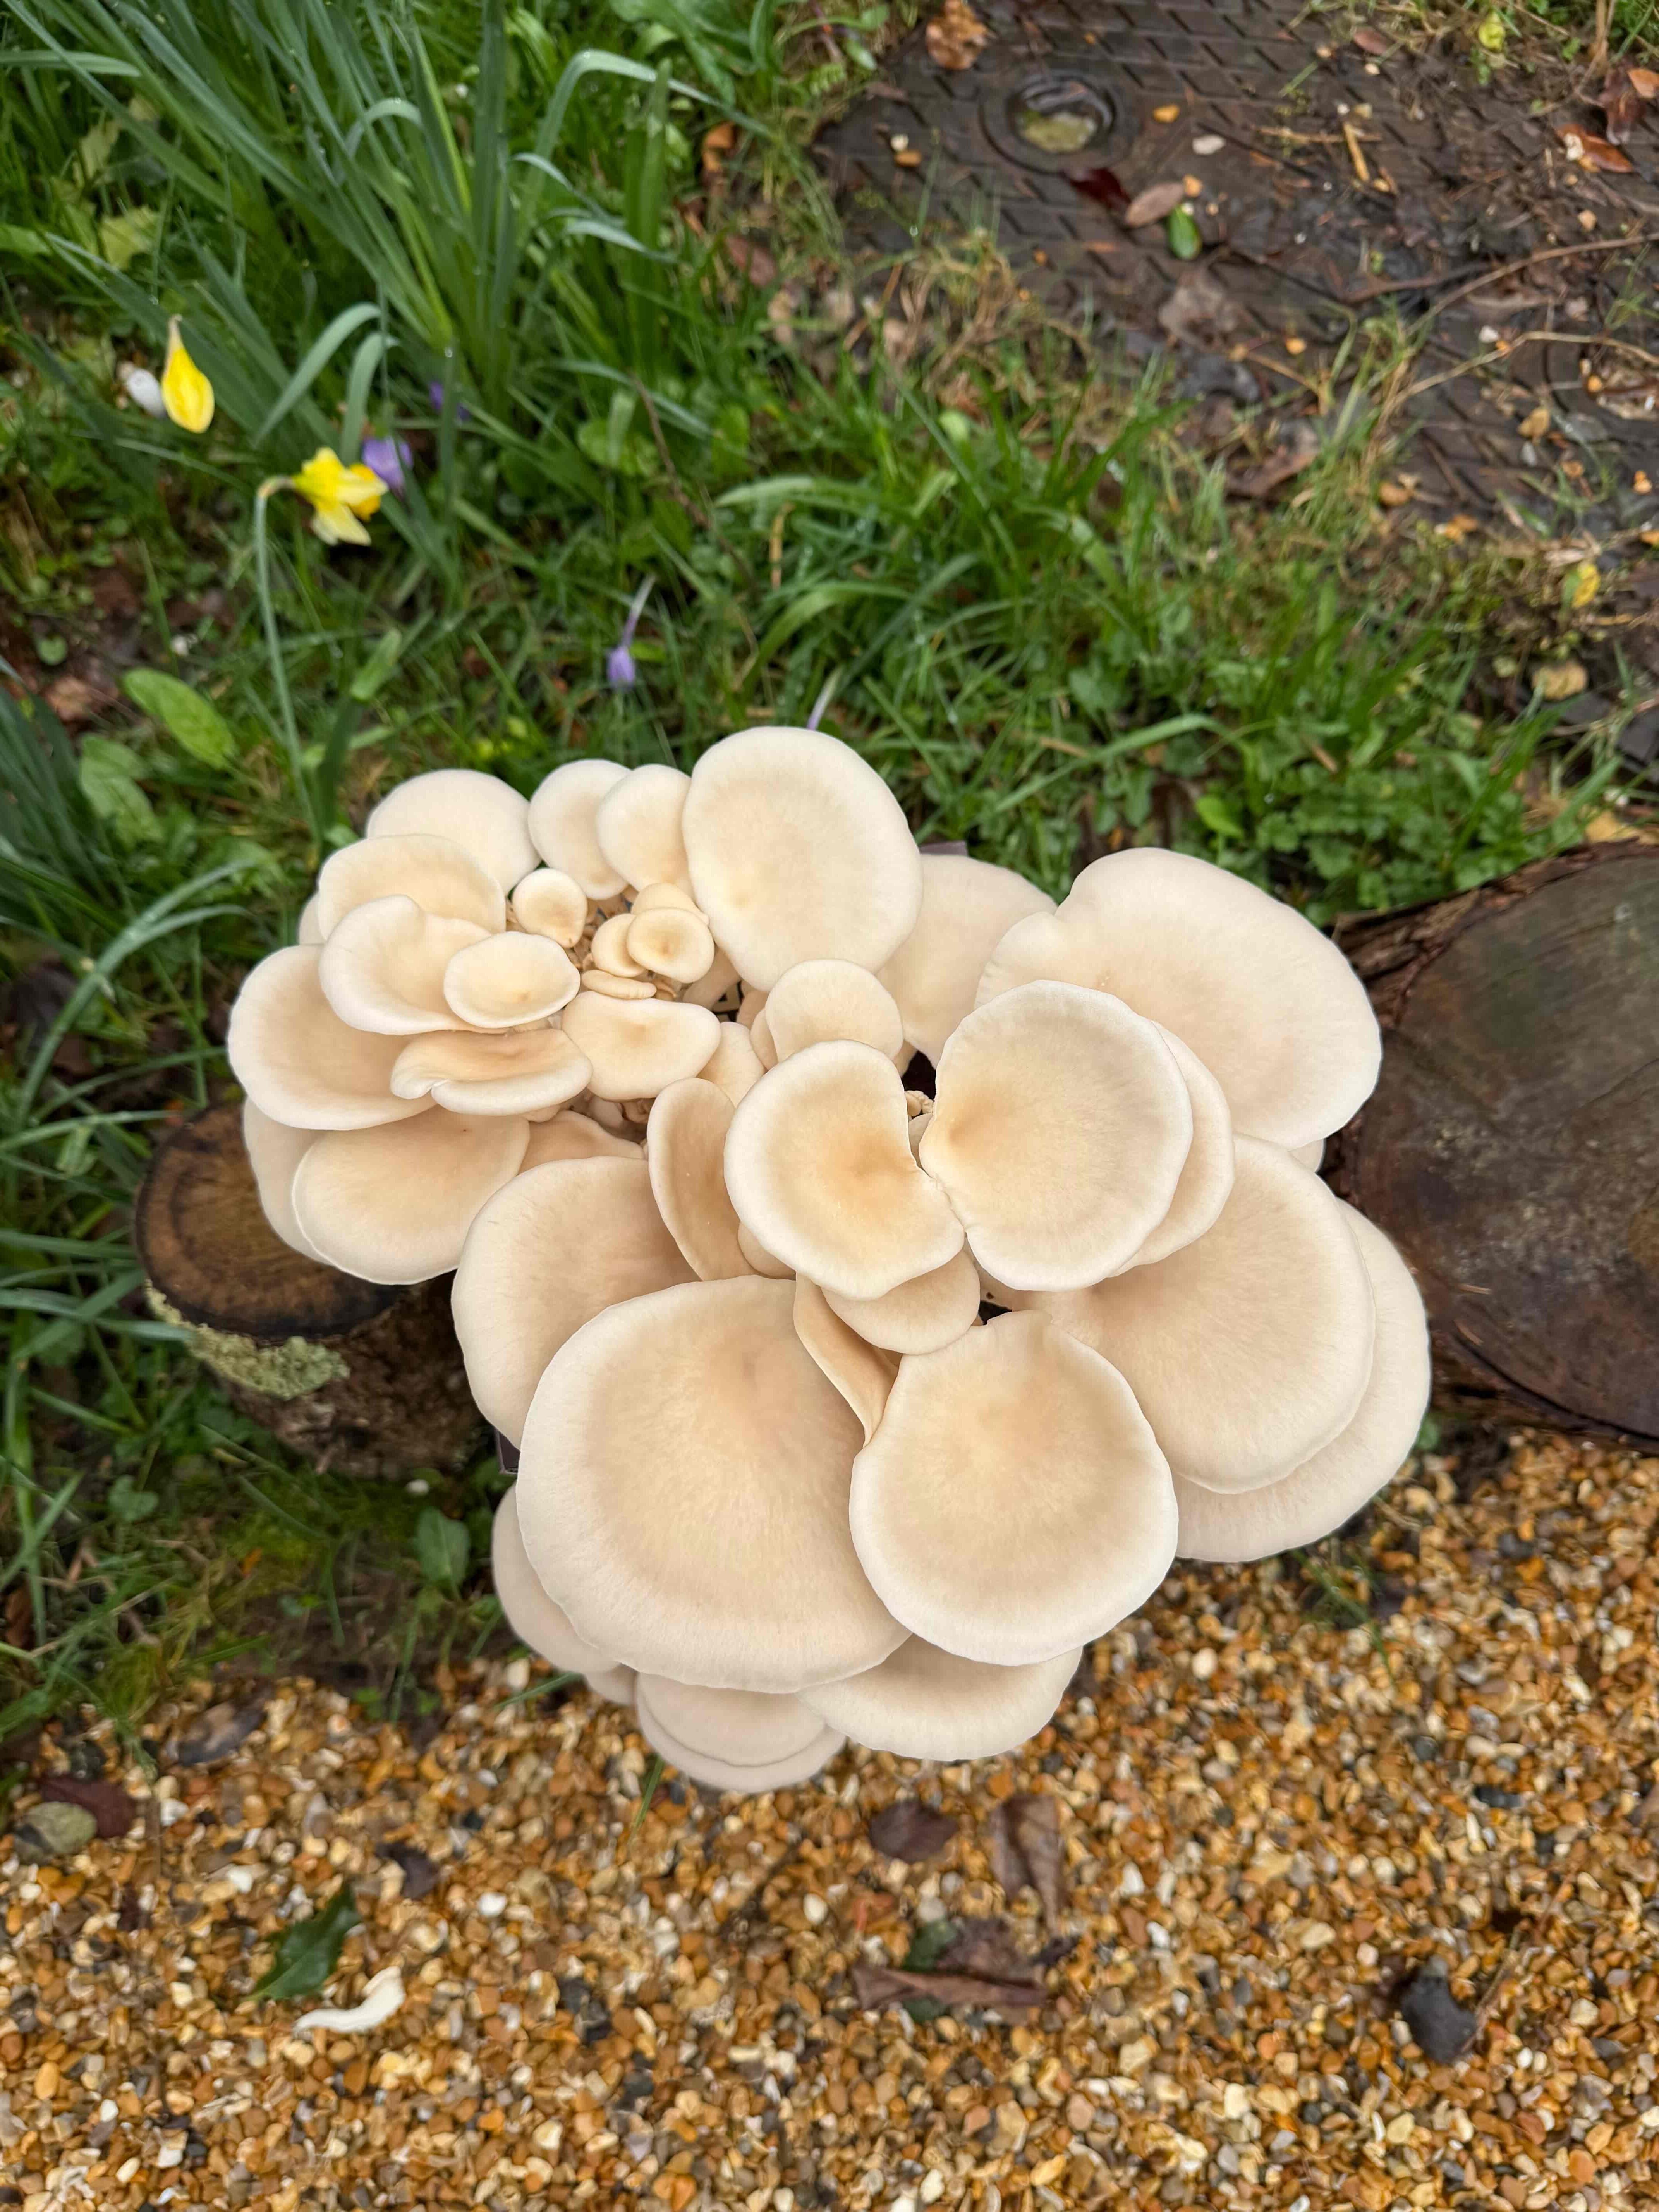
Lift the whole White Oyster cluster as one piece by twisting at the base.
When should you harvest Enoki mushrooms?
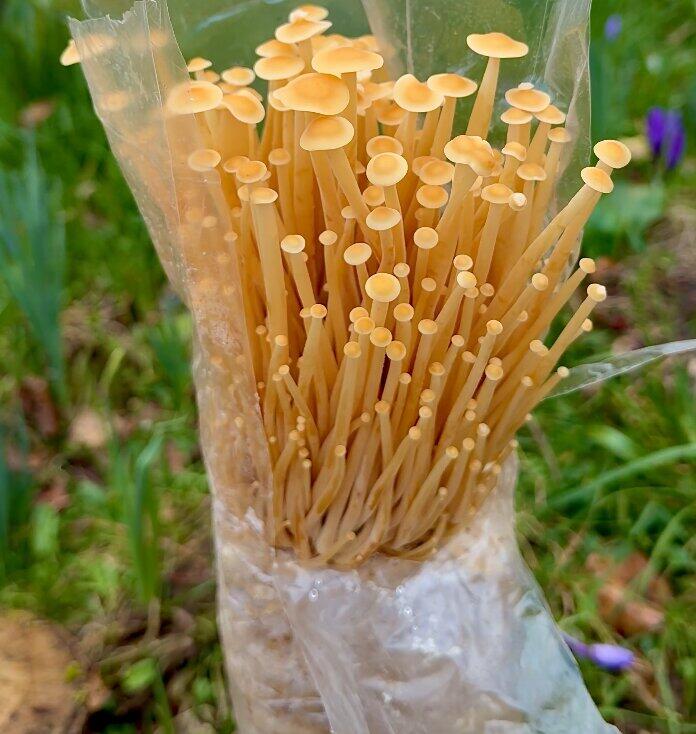
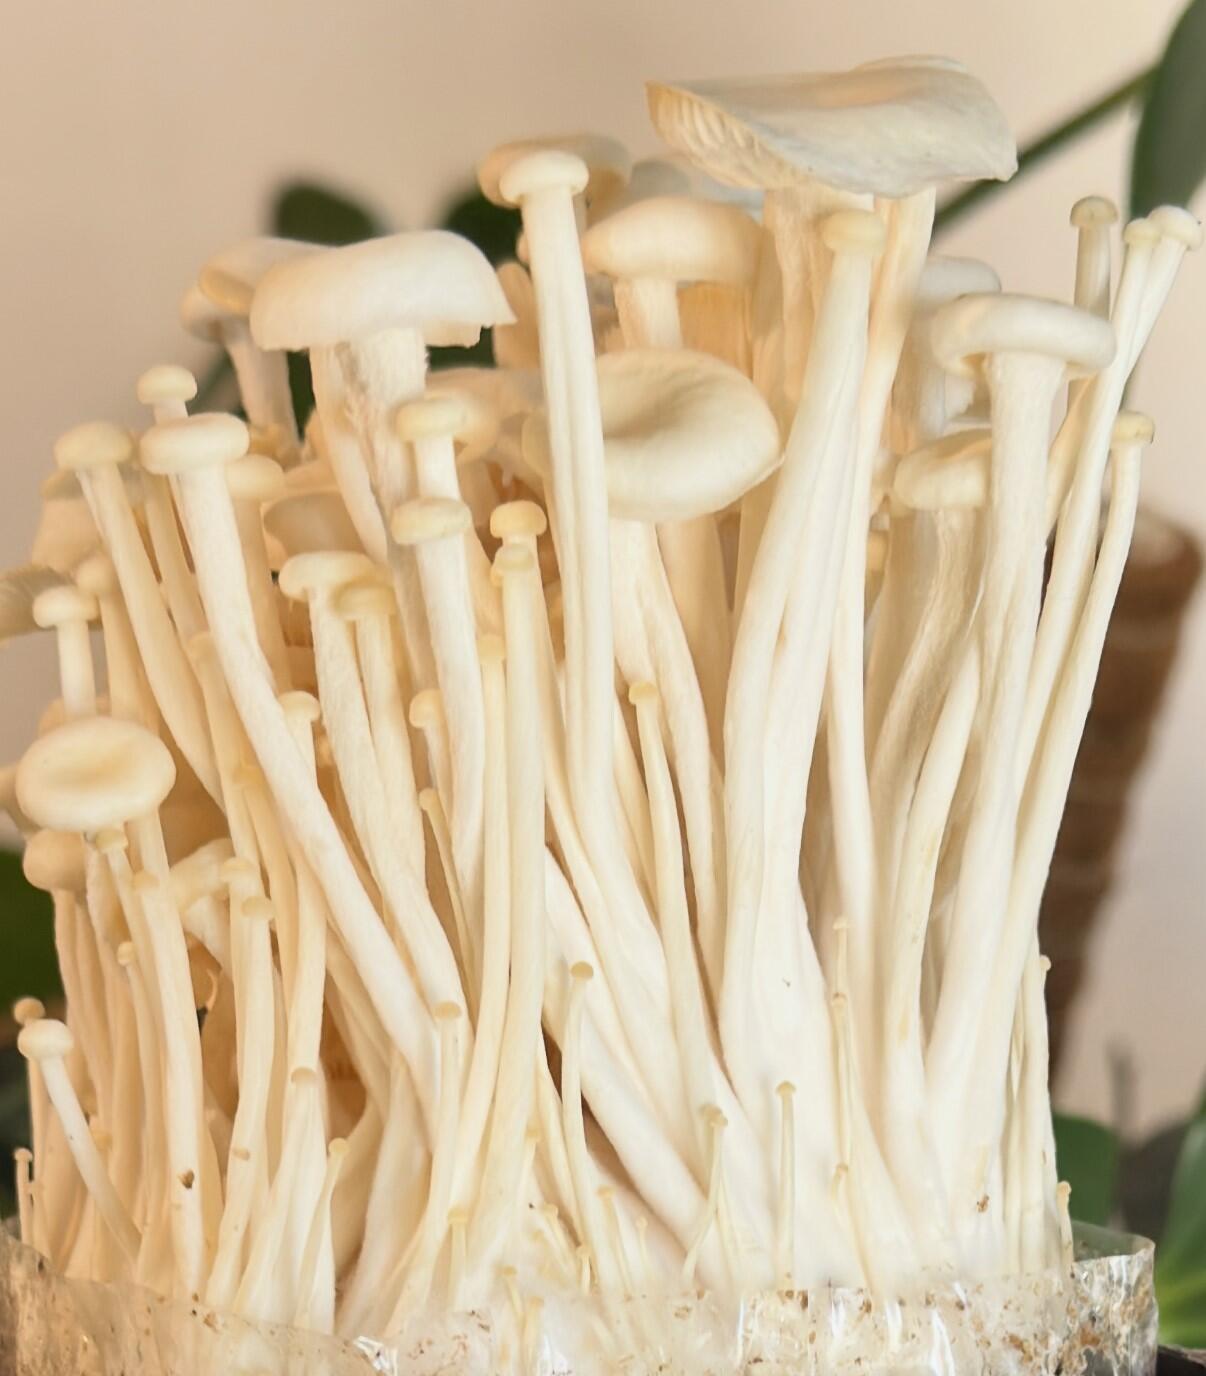
Enoki is ready when the long thin stems have reached the top of the growing space and the tiny caps on top remain small, tight, and white. The dense cluster should look like a small white forest of stems pressed together. Enoki has a shorter harvest window than most varieties because the delicate stems can start to wilt or discolour fairly quickly once they reach full size.
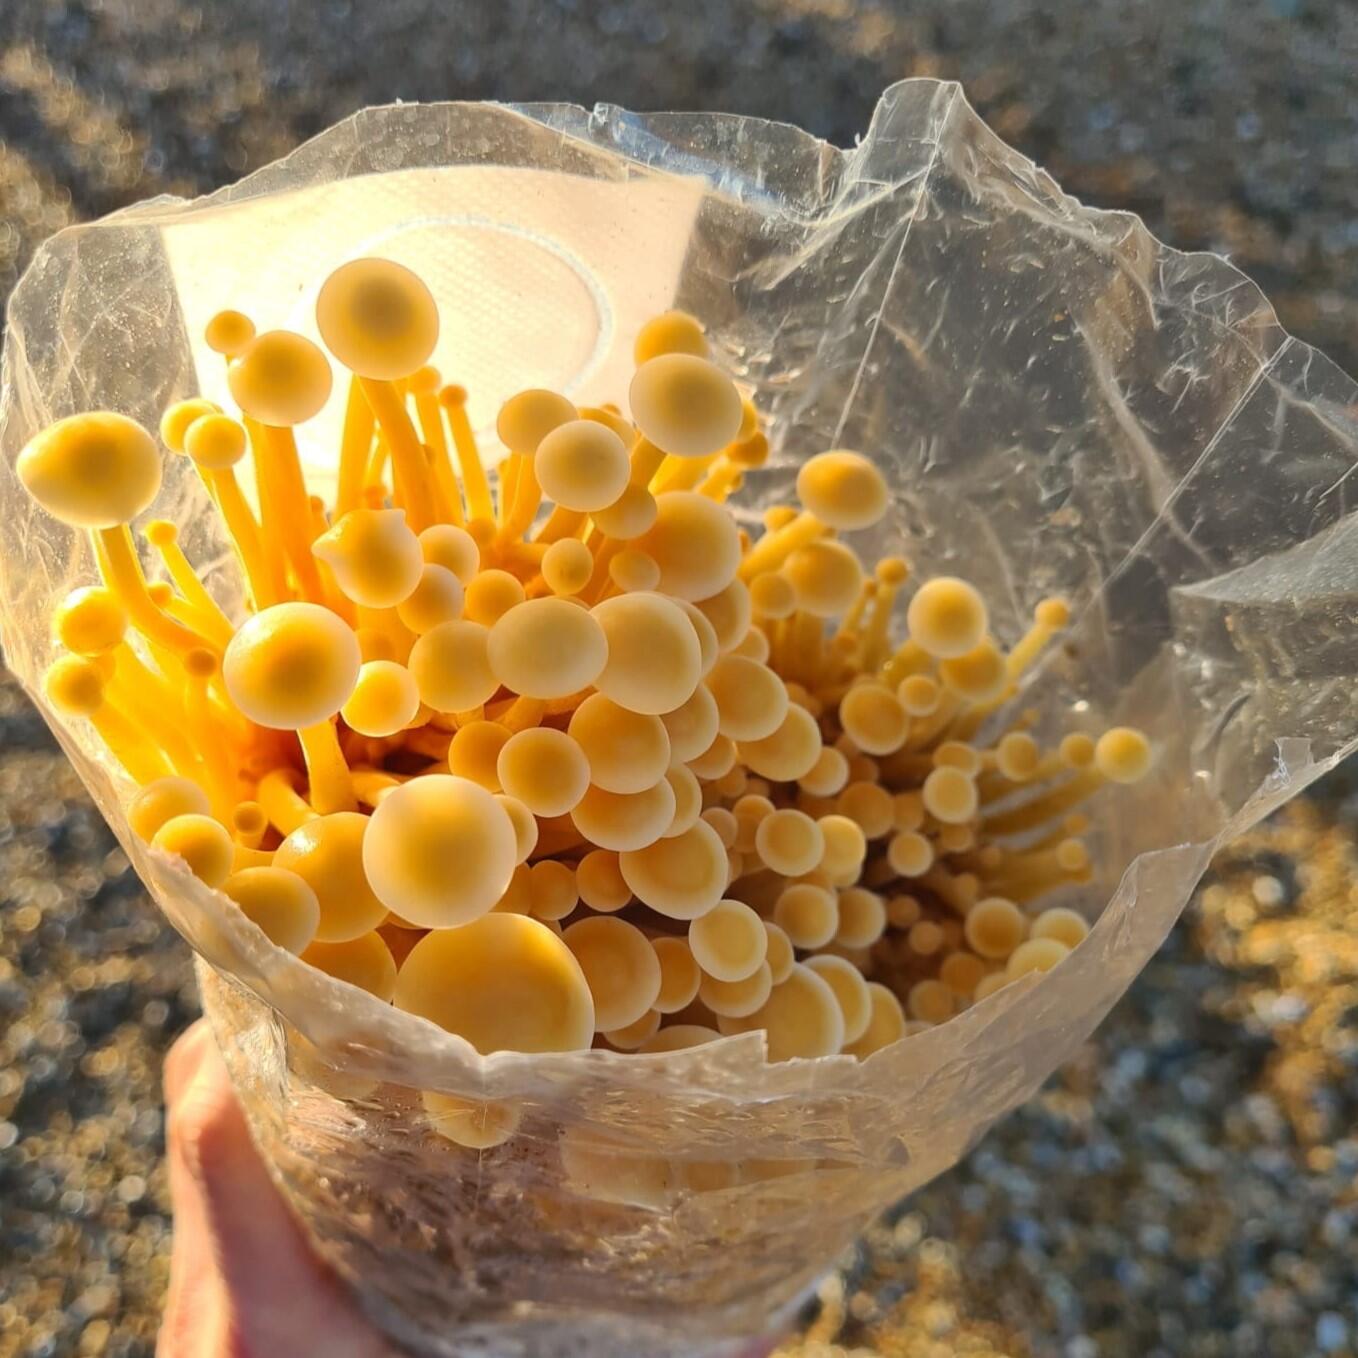
Too early
Stems are still shorter than the top of the growing space and the cluster is not fully dense. Give another day or two for the stems to reach full length.
Ready to pick
Long thin white stems with tight pinhead caps on top. The cluster feels firm and the stems stand upright rather than flopping sideways.
Left too long
Caps open and darken, stems become less firm, and the cluster starts to lean or fall sideways. Colour can shift from bright white to cream.
How to pick
Grip the whole cluster close to the base with one hand, steady the block with the other, and twist gently while pulling upward. Enoki usually comes away as a single tight bundle. A sharp knife can also be used to cut the cluster cleanly at the base if a twist feels unstable.

Lift the whole Enoki cluster as a single tight bundle with a gentle twist.
Shop Enoki Mushroom Growing Kit | Shop Golden Enoki Mushroom Growing Kit
When are Chestnut and White mushrooms ready to pick?
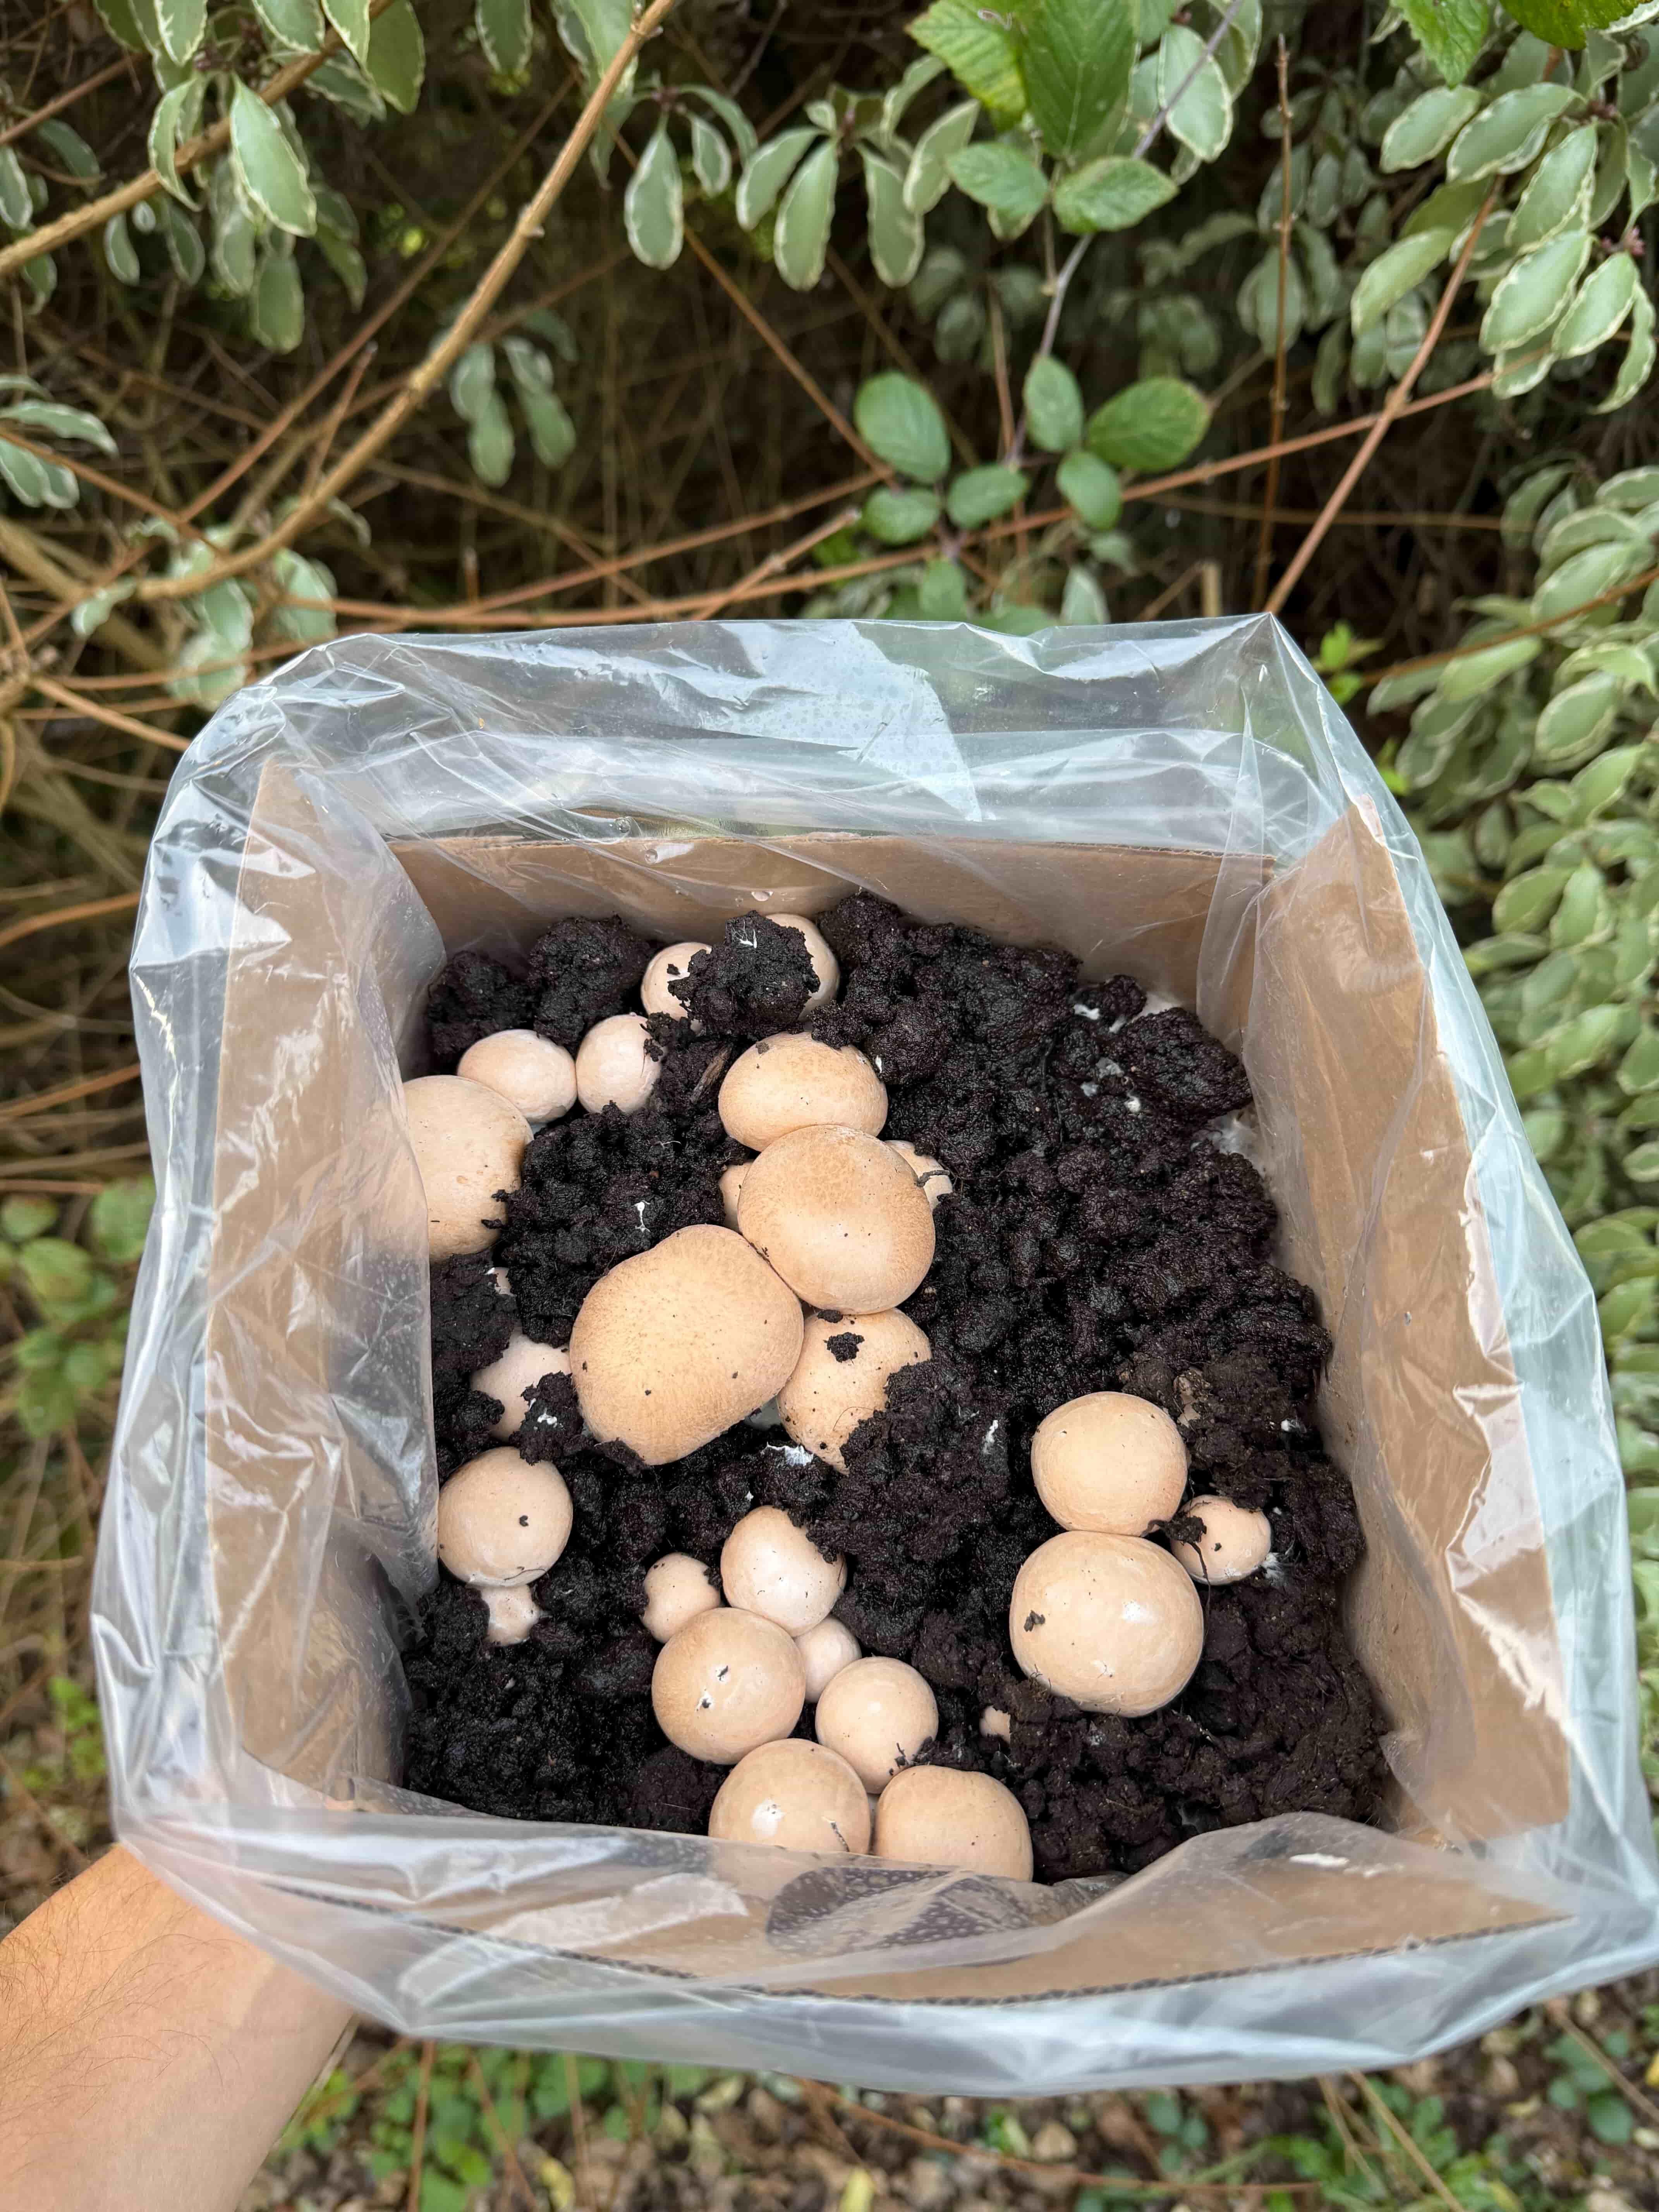
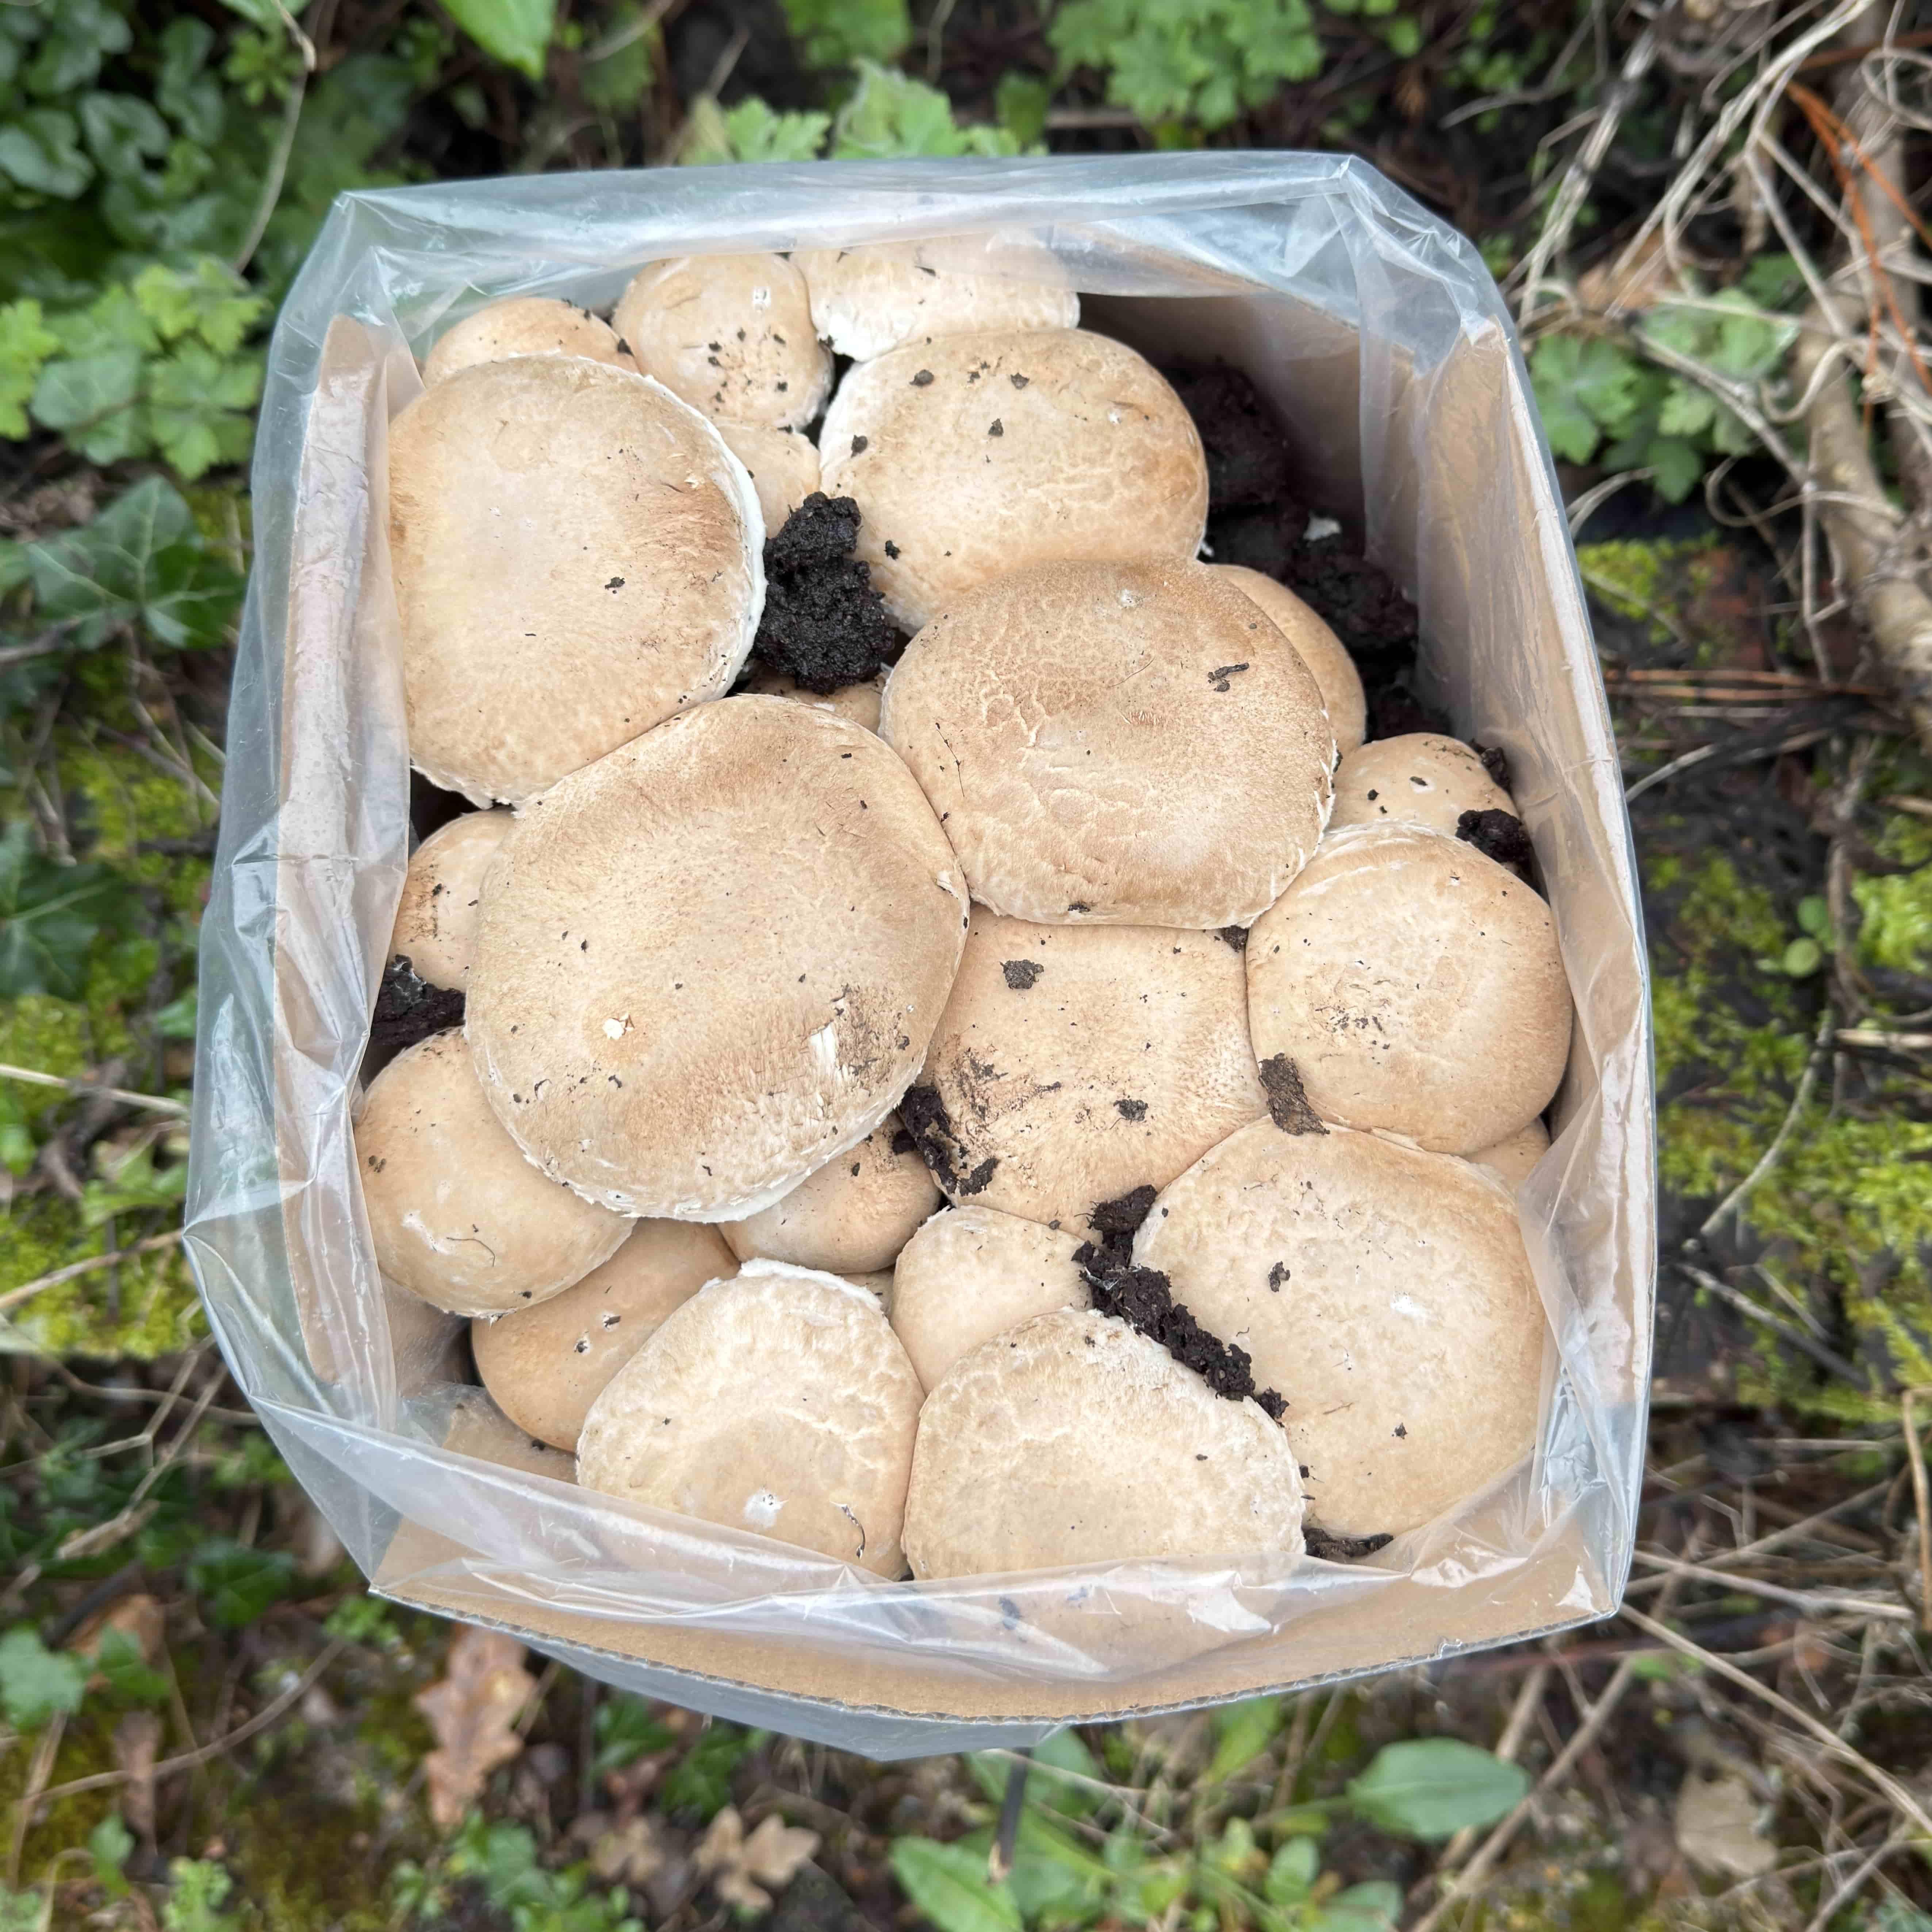
Chestnut and White mushrooms are ready when the caps are firm, rounded, and still closed underneath, with no visible pink or brown gills showing around the stem. Both varieties are the same species (Agaricus bisporus) at different maturity stages, so the picking cue is the same. Individual mushrooms ripen at different speeds across the kit, so pick each one as it reaches full size rather than waiting for the whole flush to catch up.
Too early
Mushrooms are still small button shapes and have not reached full size. Picking now gives smaller yields and less developed flavour. Leave them to swell for another day or two.
Ready to pick
Rounded firm caps with no gills visible from the side. The veil where the cap meets the stem should still be closed or only just starting to stretch.
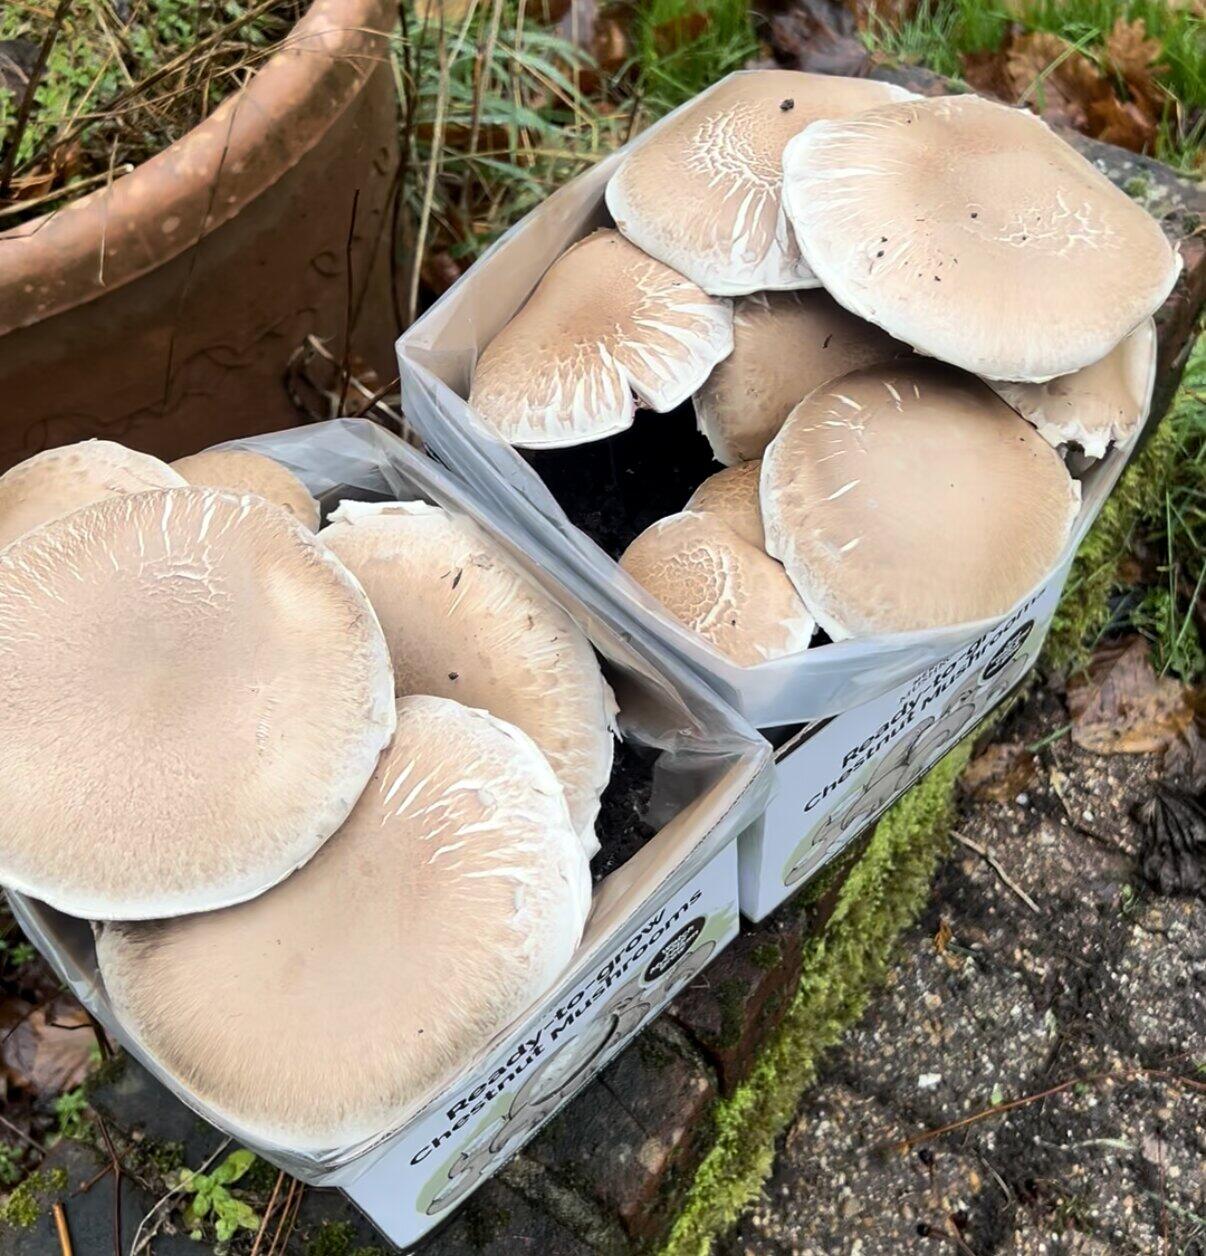
Left too long
The veil breaks and the cap flattens to show pink then brown gills. Mushrooms left longer still are edible but lose firmness and shelf life.
How to pick
Grasp each mushroom at the base of the stem, twist gently, and pull upward in one smooth movement. The mushroom should lift cleanly out of the topsoil with the stem intact. Fill any small holes left behind by patting the surrounding topsoil flat, which helps protect the mycelium underneath and supports future flushes. The full chestnut and white guide covers after-harvest care.
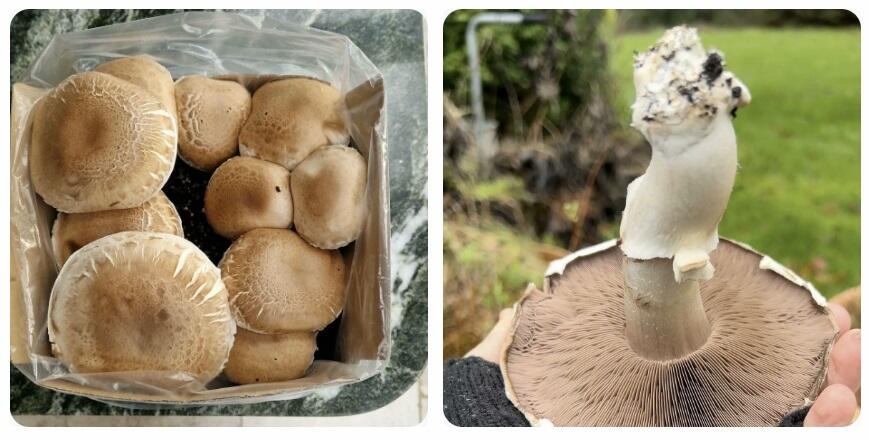
Twist each Chestnut or White mushroom out of the topsoil and pat the surface flat afterwards.
What are the most common mushroom harvest mistakes?
Harvest mistakes usually fall into a small number of familiar patterns, and each one can be fixed with a small change next time. Knowing what to watch for makes the difference between a clean first flush and a disappointing one.
Picking too late
Waiting an extra day often feels like it will give bigger mushrooms, but the growth actually slows once the cap edges start to flatten. Beyond that point the mushroom spends its energy dropping spores rather than building mass, and shelf life drops sharply.
Cutting oyster clusters instead of twisting
Pink, White, and standard oyster clusters should be twisted away as a whole group rather than cut mushroom by mushroom. Leftover stem stumps can rot on the block and make the next flush weaker or more prone to surface issues.
Twisting King Oyster, Black Pearl, or Lion's Mane
The thick dense stems on these varieties do not release cleanly with a twist and can tear out chunks of substrate. A sharp knife and a clean cut at the base gives a much tidier result and protects the block.
Washing mushrooms straight after picking
Fresh home-grown mushrooms rarely need washing because the growing environment is clean. Running them under water before storage shortens shelf life by adding moisture. A quick brush with a dry pastry brush or a paper towel is usually enough.
What should you do with the kit after your first harvest?
After the first flush, clear any leftover stem fragments from the surface with clean fingers or a soft brush, then continue the normal misting routine. Most Merryhill Mushrooms kits produce a second flush within 7 to 14 days of the first harvest, and some varieties will give a smaller third flush after that. Keep the kit in the same position, maintain humidity, and do not be tempted to turn or move the block during the rest period.
Start Growing Your Own
Every Merryhill Mushrooms growing kit arrives fully colonised and ready to fruit. Pick your first variety and you could be harvesting in as little as a week.
Shop All Growing KitsRelated reading
Published by Merryhill Mushrooms
Sussex, UK | Six generations of mushroom growing excellence